WHO'S BOTANOPIA?Botanopia was created by Lise Lefebvre, Lise is from France and came to the Netherlands to follow a master year at the Design Academy in Eindhoven. After her studies she stayed in the Netherlands, the move from the French countryside to a city context in the Netherlands was quite an adjustment. To bring nature into the house she filled her apartment with greenery, and admit it, that sounds familiar to us, right? Her love for green and design coincided and Botanopia was born. Botanopia wants to teach people how to take care of their plants and how to make them grow from a seed or tuber. By watching your plant grow from a young age, you become more involved and develop a bond with it, as you are responsible for its good care. On their site you will find numerous videos with instructions on how best to get started, you do not even have to go to the garden center, acorns from the park or an avocado seed from your kitchen are fine to get started. ECO-CONSCIOUS AND STYLISH
TINY CAMPING EN TINY BIKE RIDETo continue on jewelry for your plants, I also have to talk about the little gold decorations Botanopia offers. I got to try out the Tiny Bike Ride and Tiny Camping, it really is so cute! The nice thing about them is that they are very subtle. At first sight you don't notice it, until you put your eye on it and then you can really stare at it! There are so many fine details that every second you discover something new. I am sharing here a video of the tiny campsite; EVERYTHING FOR THE CARE OF YOUR PLANTTo complete the picture and take flawless care of your beloved plants, Botanopia offers a handy repotting tray so you can take care of your plants with a minimum of mess. And when we talk about taking care of our plants, a plant nutrition can't be missing. FOR YOURSELF OR AS A GIFTWhether you want to get started right away or prefer to give it as a gift, everything is possible. On the webshop you will find lots of nice gift sets & not only for plant lovers, you can also find a cyanotype kit. A cyano-what? A cyanotype is a print made by sunlight, a precursor to photography. If this interests you, you should google 'Anna Atkins'. I am a big fan of this technique! I could go on and on but I recommend you pay the website a visit, they have so much more fun than I can tell you here & if it's not to buy something you can learn in the tutorials or you can get creative with the free gifts you can download. DISCOUNT CODEWith the discount code 'Greenplantmom' you now get 20% off your purchase. shop here: https://www.botanopia.com/?ref=Greenplantmom More Botanopia? Website: https://botanopia.com/?lang=nl Instagram: https://www.instagram.com/botanopia_/ Facebook: https://www.facebook.com/botanopia Did you like it? Please leave a 👍 below & follow my plant adventures on Instagram!
*This article contains sponsored items*
0 Comments
EVERY SUMMER THE SAME STORYEvery summer, every summer again, I don't know what to do with the seemingly endless stream of zucchini. Every summer I promise myself to sow fewer zucchini plants and yet I always seem to end up in the same boat. Fortunately, I've collected quite a few zucchini recipes over the years. Zucchini provides an almost continuous harvest throughout the summer. As long as you keep harvesting, the plant will keep producing new veggies, until it finally gives up in the autumn. And once the zucchini is out of the country, the harvest of pumpkins and squashes can begin. Believe me, with the tips in this blog-post, you will never be short of soup again throughout the winter. Zucchinis and pumpkins require quite a bit of space in full soil. They form tendrils along which the flowers, and later the fruit, are formed. However, they do not necessarily need to use up all that space and can even be grown in pots.
FROM THE STARTAs always, you can of course start with cuttings. Starting in late spring, you can find cuttings for both zucchini and squash in just about any garden center. Be sure to look for special varieties, because the range is seemingly endless, especially within pumpkins and squashes. Fortunately, both vegetables are also very easy to grow from seed. Before you sow, it might be helpful to think about where and how you want to grow the plants. Can they go into the vegetable garden and have all the space in the world? No problem, start sowing already. If your available space is limited, or if you want to grow them in pots, then you should look for more compact varieties, such as the Black Beauty and Ambassador zucchini varieties or pumpkin varieties such as 'Baby Boo' and 'Jack be Little'. Be sure to provide a pot with a diameter of at least 30 to 40 cm. The larger, the better, even though the plant will form tendrils that you can easily let wander over your terrace or tie up. Sowing is done indoors from April. The plants can only be planted out at the earliest at the end of May, after the so-called 'IJsheiligen'. They are true summer plants that will only grow well at warmer temperatures. Pre-sow in smaller pots and push the seeds on their side about one to two centimeters into the earth, without lying flat. In this way you prevent water from standing on the large seed, causing it to rot. Make sure your pots are well watered and put your seedlings in a warm place with lots of light.
Both zucchinis and pumpkins are real gluttons and require quite a bit of nutrition. A little extra fertilization is not a luxury with these plants. You can do this by mixing good rotten farmyard manure through the soil (you can get this at the garden center, from the farmer or from your own chicken coop. Good rotten manure should not smell) or other fertilizers. If you buy ready-made fertilizers, go for slow/slow-acting ones that are rich in nitrogen and potassium (the N and K on the package). When in doubt, just go for a general purpose tomato fertilizer. 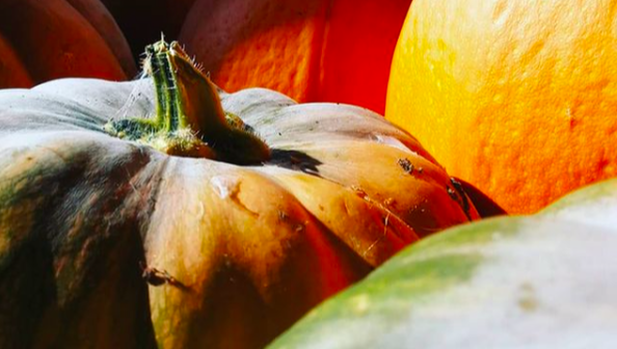 Give enough water. Especially on hot days the plants can evaporate a lot of moisture, so regular watering is the message. You can easily let your plants grow against a fence. This is an ideal solution if you want to save space. Choose a sturdy framework and anchor it sufficiently. This works especially well with smaller varieties such as butternut squash. Larger varieties form very heavy fruits that will eventually snap under the weight. Be sure to tie up the tendrils well, as both varieties grow very quickly. harvestFinally, we come to harvesting and there, of course, you get some differences between the zucchini and pumpkin. As for zucchini, resist the temptation to 'have the biggest'. The smaller fruits contain much more flavor, while the larger fruits quickly become 'glassy'. By the way, the more you harvest, the more the plant will continue to produce. So zucchini should be harvested young (300-500 grams is a good rule of thumb). Pumpkins, on the other hand, are left to mature and are harvested much later in the season. You harvest a pumpkin when the stem of the fruit has become woody in color and structure, and the skin has become hard so that you can no longer press it with your fingernail. You cut the fruit with sharp secateurs, leaving a stalk. Do not cut too close to the fruit itself. If you want to preserve the pumpkin through the winter, you can 'harden' the harvested fruits. After harvesting, let them stay in a dry, sunny place against a wall for a few more (dry) days before you bring them inside. This way they will keep longer, sometimes even through the whole winter (depending on the species).
Wist je ook dat... ...de bloemen van courgettes ook eetbaar zijn en erg lekker te vullen met ricotta? ...pompoenen doorrijpen wanneer je ze binnen op een zonnige plaats bewaart. Gooi dus zeker geen onrijpe vruchten weg. ...je ook confituur kan maken van je overvloed aan courgettes? ...je in de pompoenfamilie heel wat gekke kleuren en vormen kan terugvinden, zoals blauw of de gestreepte Turkse Tulband Did you like it? Please leave a 👍 below & follow my plant adventures on Instagram!
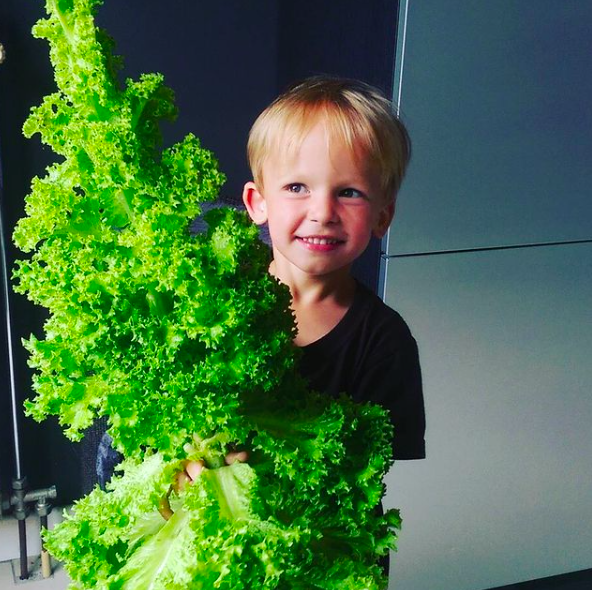
Admittedly, lettuce may not get you excited, but make no mistake: it is one of the sexiest vegetables you can grow yourself! I'm not talking about the single, wilted leaf that you sometimes get with your steak, but about young, crisp leaves that you can turn into the freshest salad you've ever eaten. Lettuce really has everything going for it: it's easy to grow, grows quickly, and when done the right way, you can enjoy fresh salads from March to October, which you can vary endlessly. If we are going to talk about lettuce, it is perhaps useful to say that you can divide the entire lettuce family into two groups of crops: the cabbage lettuce and the picking lettuce. The names speak for themselves: with cabbage lettuce the classic head is harvested once. Because such a sudden amount of lettuce is not always convenient, the other group, the picking lettuce, has seen a huge rise in recent years. The big advantage can be found in the English name: 'Cut and Come Again Lettuce'. By harvesting only the leaves you need, you allow the lettuce to continue growing. You can harvest several times during the growing season and therefore you need fewer plants and therefore less space. Today I'm going to talk mainly about the pick-your-own lettuce, but don't worry: if you want to grow cabbage lettuce, you can follow the same steps.
HOW DO YOU GET STARTED? As always, you must first imagine what your ideal salad will look like. There are many different types of pickled lettuce on the market. You can vary the color and texture, but also think about different flavors. With some rocket salad or mustard plants in it you get a peppery, sharp taste. Or sow some spinach and radishes for a bitter taste. Be sure to look around your garden center and combine to your heart's content. Lettuce is a spring and fall vegetable and does not always like high summer. That's why it's important that when you're sowing or planting soon, you pick a shady spot for your bed or pot. Too much heat and too much sun and your lettuce plants will shift their priorities from creating crisp leaves to creating flowers and seeds. And honestly, lettuce that shot up is no longer a tasty lettuce.
Sow lettuce about an inch deep. you can sprinkle a thin layer of compost on top (because otherwise the wind will blow them away, or birds will get a hold of them), but know that lettuce prefers some light to germinate. If you're going to work in rows, you should officially leave about thirty inches between rows, but honestly: I don't have that space and smaller distances have never caused me any problems. If you're going to sow on the spot, you can "thin out" the seedlings: you remove the small seedlings so that the ones that remain get plenty of room, light and nutrients. Many people find this heartbreaking, but it's necessary. You leave about ten to fifteen inches between each seedling, the same distance if you're working with cuttings. Good, our lettuce is in the ground and going to grow quickly. However, if you want lettuce from March to September, you're going to have to sow several times. Every two to three weeks you sow new plants. You can work with several pots or with several sections in your vegetable garden. Lettuce grows quickly, so when the first batch gives its last leaves, the next one is already ready. 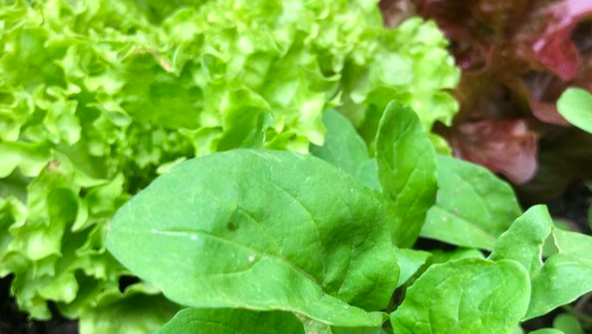 With lettuce, a lot depends on the weather: if it is hot and dry, then your lettuce will want to start growing. Therefore, it is very important to make sure that the soil stays moist at all times. You will of course have to water the soil regularly, but adding organic material such as dried grass, straw or wood chips will ensure that the water does not evaporate so quickly. If it does suddenly rain, then such a layer prevents the lettuce leaves from getting covered in mud and rotting. Even the cardboard from all the packages you ordered during the lockdown can be useful here. Just be sure to remove all the plastic and tape from it first! Also fun is to sow some radishes among your lettuce. After all, they are just as fast growers as your lettuce and they add that typical pepper touch to your salad. Radishes can be sown locally and should have a sunny spot. Remove any stones or large pieces of bark from the ground beforehand, so nothing gets in the way of the juicy and hopefully thick radishes you are about to pull out of the ground. Other than that, they pretty much follow all the rules you read about above. Easy right? Harvesting is child's play and is done with scissors. Just wash, dry (with one of your grandmother's old-fashioned but trendy lettuce machines) or dab and the lettuce is ready for your plate. The radishes you just pull carefully from the ground, or you go with your fingers into the earth to get them out. Don't forget to throw in some of your herb garden herbs and before you know it, you'll agree: lettuce is one of the sexiest vegetables to grow yourself. Be sure to try... ...of mixing different seeds together for a real "lettuce buffet ...romaine lettuce, the main ingredient of a Caesar's Salad ...Rocket salad, for a peppery, spicy flavor ...Mascara, a red oak leaf lettuce, with jagged edges ...The watermelon radish, a beautiful radish to decorate your salad with ...New Zealand spinach, which is slower to sprout and therefore stays tasty longer. Did you like it? Please leave a 👍 below & follow my plant adventures on Instagram!
Does your plant always have to be in soil or are there other possibilities? Here I would like to show you 3 of the most known substrates that both professionals and individuals can work with. WHAT IS A SUBSTRATE?A substrate is synonymous anything a plant can grow in. The primary purpose of a substrate (or growing medium) is therefore also primarily to keep the plant in place. 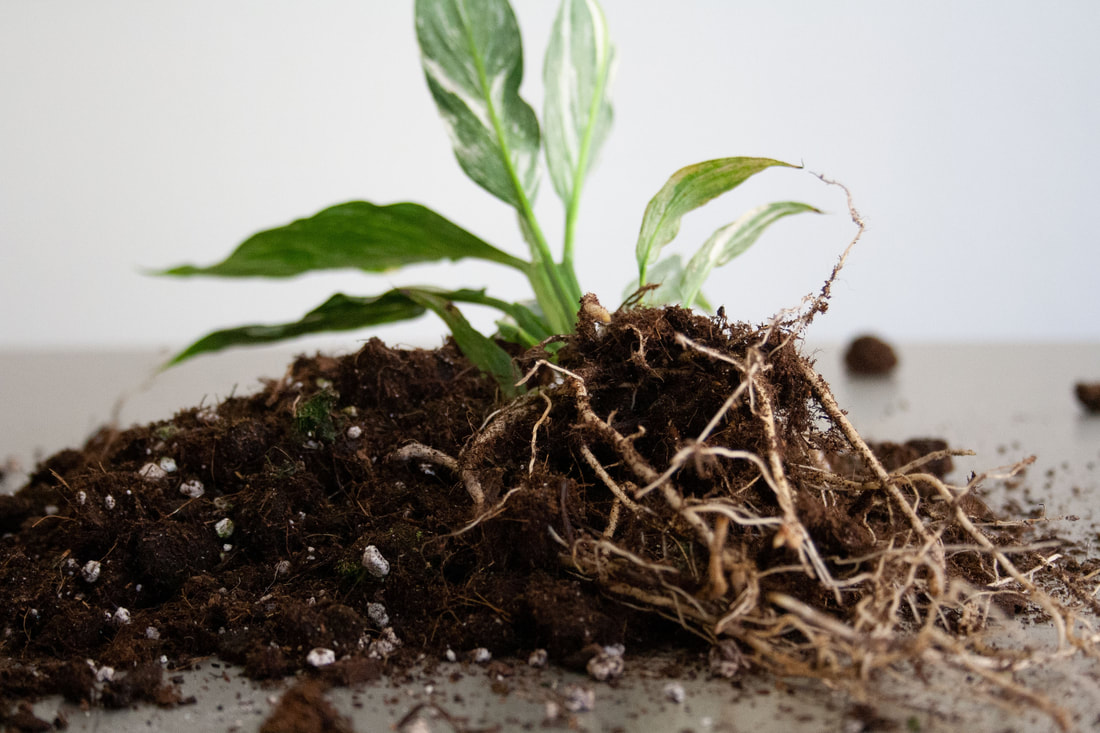 1) Potting soil - how to choose good potting soil?On the packing of qualitative potting soil you will find an RHP quality mark, this quality mark stands for the guarantee of quality, content and safety. Herewith is taken into account where the product is produced, and how environmental conscious this happens and that they are free of salmonella/ legionella/ e-coli and many other elements. By this control this label guarantees the following points. - Less weeds - Less watering - Better growth and flowering - Environmentally friendly - Safe(r) for people and animals - Better root development - Guarantee on volume - Free of diseases / harmful substances 2) VulcastratVulcastrat is an alternative for potting soil, and looks like small stones. It is a type of gravel that can be compared to cat gravel, as it absorbs moisture. Because Vulcatrat absorbs more water than ordinary soil, it gradually releases water to the roots. Vulcatrat contains the ideal water and air ratio (45% water and 55% air). Whereby the susceptibility to diseases, is reduced. This substrate can even be reused several times, it doesn't even need to be replaced after years. The nutrients, however, will disappear over time. Vulcastrat can absorb water up to 30cm high, making your plant less likely to get wet feet. It cannot clog up like soil, so oxygen can always reach the roots, the advantage to Vulcastrat is that watering becomes even easier. Especially if you use a water meter. You can choose to add a separate water meter to the pot or choose for a self-watering pot, in this case a water meter is attached to the pot. Advantages of Vulcastrat - It lasts a long time. - It ensures that there is always oxygen available for the roots. - watering becomes easier, especially if you use a water meter. How do you care for plants in Vulcastrat? The water meter does not tell you when to water, but it indicates that you should not water too much at once. Plants do not like wet feet. However, there is a difference when you put a water meter at the bottom of your pot or choose for a self-watering pot. With a self-watering pot there is a water reservoir at the bottom so your plant does not stand with its 'feet' in the water. In a self-watering pot there is an opening where you can put water in to the reservoir. If you have used a regular water meter then water slowly, it will run down slowly before the water meter starts moving. Make sure the meter never goes over MAX, within 24-48 hours your meter will drop again because the Vulcastrat has absorbed the water, do not give extra water. I also have some plants on this substrate without a meter, I water them until it runs out of the holes at the bottom (almost all my plants are in grow pots with holes, whether they are on Vulcastrat or soil) I let them drain a bit before I put them back in place. You definitely want to avoid leaving them in a layer of water. TIP: after planting on Vulcastrat flush the pot until clear water comes out, there is often dirt and sand between the substrate that you flush away as much as possible. TIP: also by the weight of your pot and the color of the Vulcastrat you can tell if you need to water or not. Feeding plants on Vulcastrat Here there is little difference with feeding plants on soil, here the preference is for liquid feeding. Always stick to the recommended amount on the packaging of your chosen nutrient. Whrite it on your calender when you have give them nutrition so that you do not give it to them again too soon, overfeeding can harm and even kill them. Slow growing plants or plants that are further from a light source (and therefore grow a little slower) need less nutrition. When in doubt, read the article about nutrition. 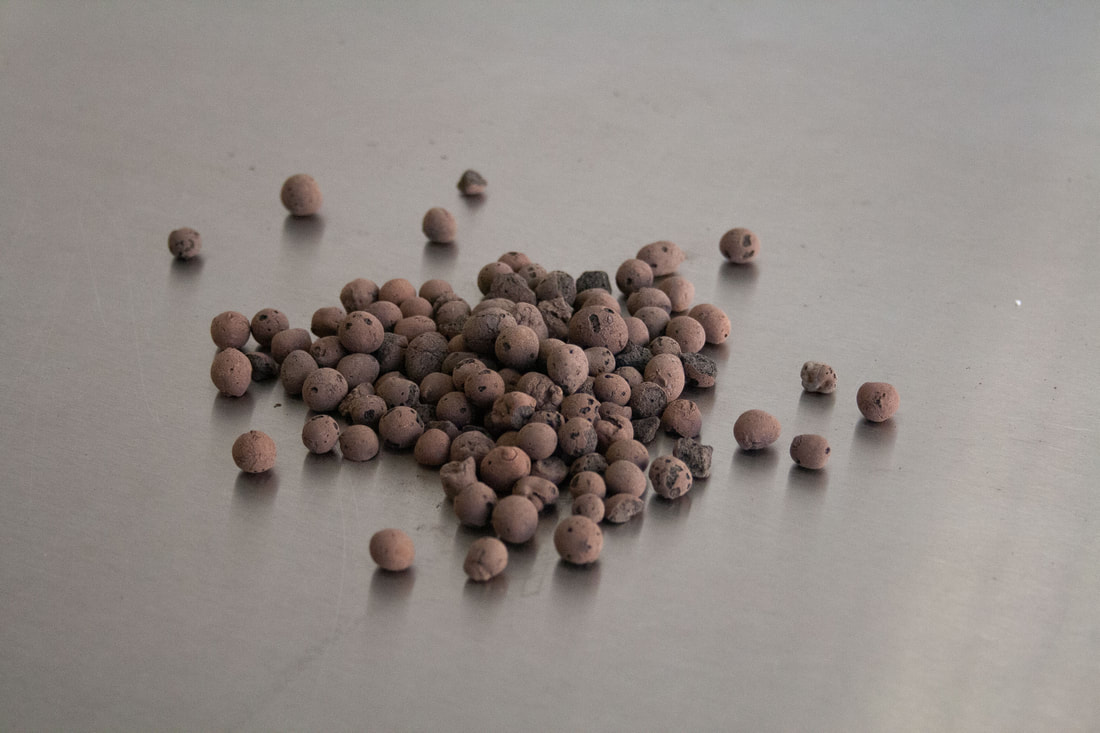 3) HydroponicsHydroponics can be compared to plants on Vulcastrat, only that plants on hydro culture often have their roots in water. They are specifically grown for this purpose. Because they are in water, it is very easy to provide them with nutrition. For plants on hydro we use hydro grains. These are so airy that the roots can still easily absorb oxygen and again you can use a water meter. Advantages of hydroponics - Less frequent watering - No acidification or choking of the soil - Longer life span - Less chance of pests - Easier to apply the right amount of water and nutrition Hydroponic care Again, watering is similar to the other two substrates, water your plant until the water meter is at 'optimal'. When your water meter is back at 'minimum' wait 4 more days before watering, this time your plant needs to air out the roots and prevent rot. Feeding is done differently with hydroponics, give them some liquid food at every watering or once every six months hydroponic food. Did you like it? Please leave a 👍 below & follow my plant adventures on Instagram!
Source: https://www.123planten.nl/verzorging/hydrocultuur
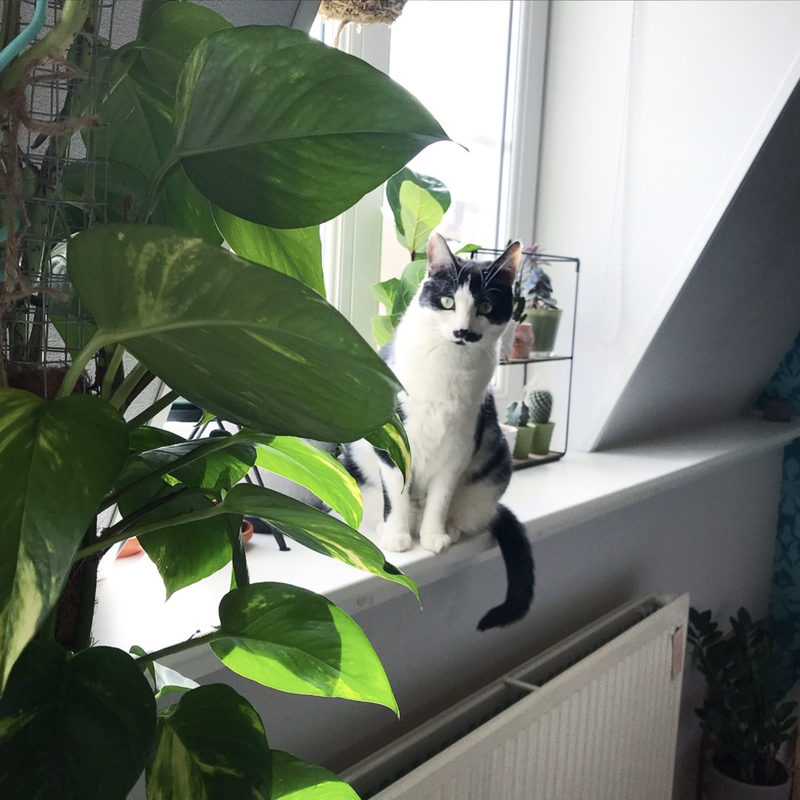
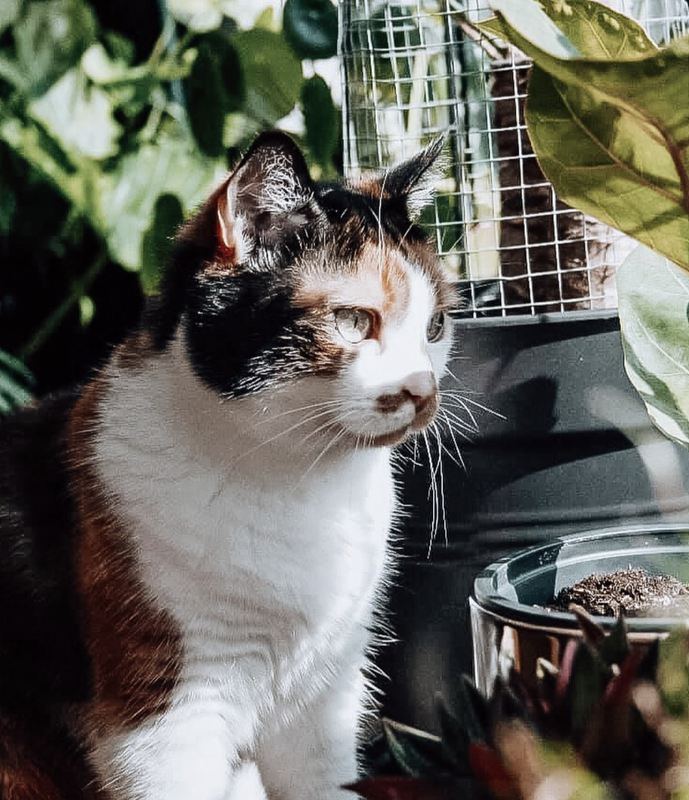
The last few months on the other hand she has been targeting the pots, she would love nothing more than to dig into the soil of the plants, the largest pots had to suffer. I try to prevent this by covering the pots with chicken wire, so Pip can't dig in them & I can still easily water the plant, etc. She also gives the plants regular cuddles and wants to be there when I take care of them (especially if there is water involved) but alright she does not eat them, but unfortunately that is not the case with every cat or dog. BOREDOM & DISTRACTIONSBoredom can be the trigger for unwanted behavior, both in children and in animals. Challenge your dog with toys or a good bone to chew, make sure it gets enough exercise (by going for a walk) or that it can go outside. If your dog gets bored it can happen that it will look for distraction at your houseplants. The same goes for cats, if they can go outside, there is less chance that they will use your plants as a playground. Is it an indoor cat? Then again make sure there is enough distraction. Give them toys that interest them (not always obvious with the picky cats), play with them and give them their own plant and place. If your windowsill is full of plants and pots, it's not surprising that your cat will clear a spot for himself to look outside. 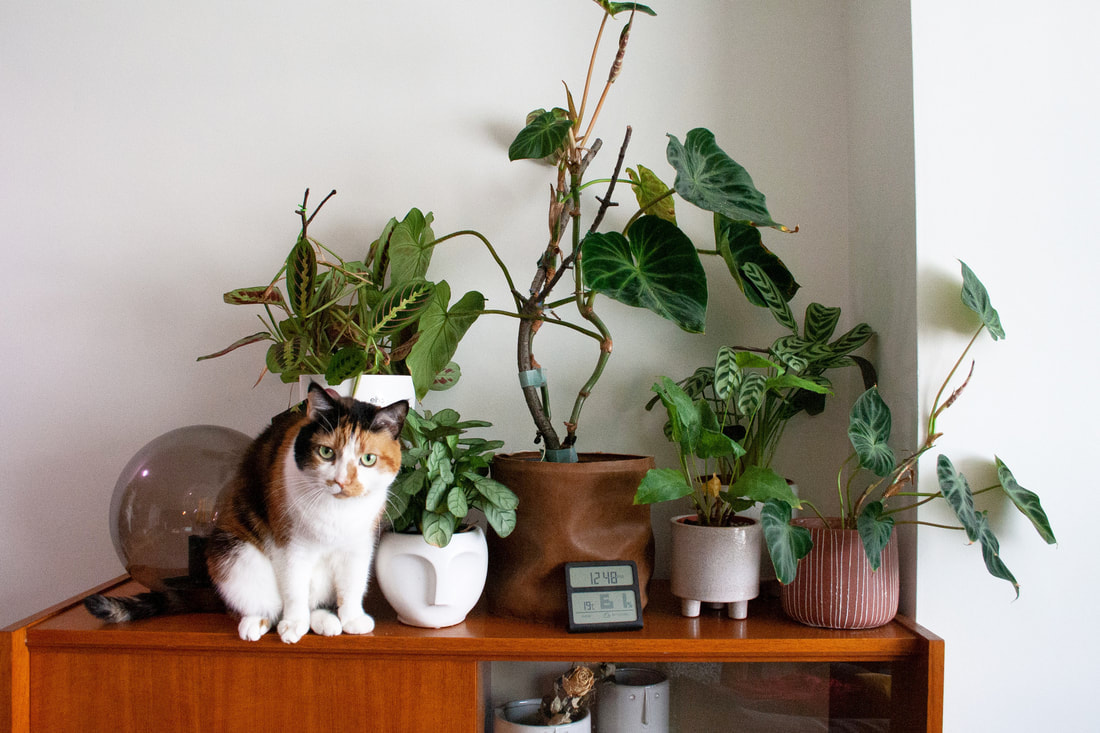 We have at least ¼ window & windowsill here for Pipa in the living room that is just for her (to give some context our window is the full width of our apartment) so she definitely has more than 1m just of herself. Where her nest is and a cat grass plant is. Also, by making a casing around our radiator - this was not specifically for this reason but nice to have - we unintentionally made the windowsill twice as deep. So the plants are on the original windowsill and Pipa still has a wide strip to parade along it, sit or lie down (nice and warm when the heating is on). In the laundry room & office, again, there is space at the window left for her, as well as another resting spot. These places belong to her & I never put plants there, to allow her her place and respect it. MOVE YOUR PLANTSPut your plants out of reach of your pets, put them up higher where your dog or cat can't reach them right away. Be careful with hanging plants, though, if they get so long after a while they can be pulled down easily. If you have the space, it might be ideal to put your beloved plants in a room separate from your pets. No spare room? Then you can also opt for plants in a terrarium or greenhouse. Putting small plants in a greenhouse can help protect them from your animals. Make sure your terrarium is safe and cannot be knocked over. GIVE YOUR CAT HIS OWN PLANT
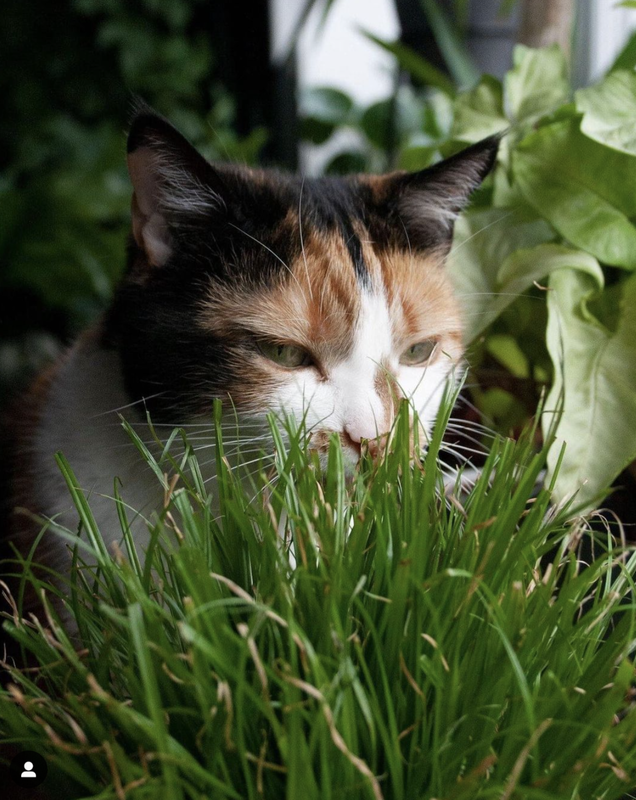
Cats have a natural need to eat grass, so when a cat lives indoors it is important that we provide them with it. You can buy it as a plant or grow it yourself from seed, every cat likes to eat grass or herbs because of the need for folic acid. This is a B6 vitamin that produces hemoglobin in the red blood cells and is therefore responsible for the transport of oxygen in the body. A second reason cats like to eat grass is; vomiting. Cat grass helps your cat to vomit, for example when they have trouble spitting out a hairball grass can help to regurgitate the indigestible parts. And a third reason: fiber. Grass also contains a lot of fiber that benefits digestion. EDUCATIONAn older cat is most likely going to show less interest in your beloved plants than a young one or a kitten/puppy. Young animals have more energy and therefore need more distraction, exercise and challenge than an older animal. Pipa came to us as an adult cat, we were able to teach her 'something' but the real thorough education is mainly done in the younger years. In order not to get too far off topic I recommend you to read this blog from Medpets; https://www.medpets.be/kitten-opvoeden/. In this blog they explain briefly and clearly how you can teach your kitten things.
For example, if the cat is scratching your seat you can make it clear that it is not okay and then distract them by playing on the scratching post. I think rewarding good behavior is much more important than punishing bad behavior. Negative attention is also attention. I reward Pipa with positive noises, attention, playtime and occasionally some treats. I am writing here mainly about cats but it works practically the same for your dog. They may not climb in your plant but they can still eat it, dig in it or run over it. Put your plants therefore well thought out, not in the passage or on a wobbly table where your dog can walk it off. TIPS AND TRICKSIf putting your plants out of reach is not possible, -I can imagine that your biggest green friends can't just go somewhere else- you can look for other solutions. For the "digging problem" that I experience with Pipa, you can cover the ground with chicken wire or put some medium sized rocks on it. Aluminum foil would also help, although I haven't tried this myself yet. I also tried it with 'toothpicks' but that didn't stop Pipa + I felt a bit uncomfortable myself because I also don't want her to get hurt. The chicken wire or stones work most efficiently here. To prevent your animal from eating your plants you can "scare" them with unpleasant smells. For example, the smell of citrus fruits, mix some water with citrus oil and spray it on the plants and soil with your plant sprayer. This is an action that you have to repeat more often because the smell fades. Cayenne pepper can also work. Sprinkle it on the potting soil and keep an eye on your pet to see if it ignores the plant. 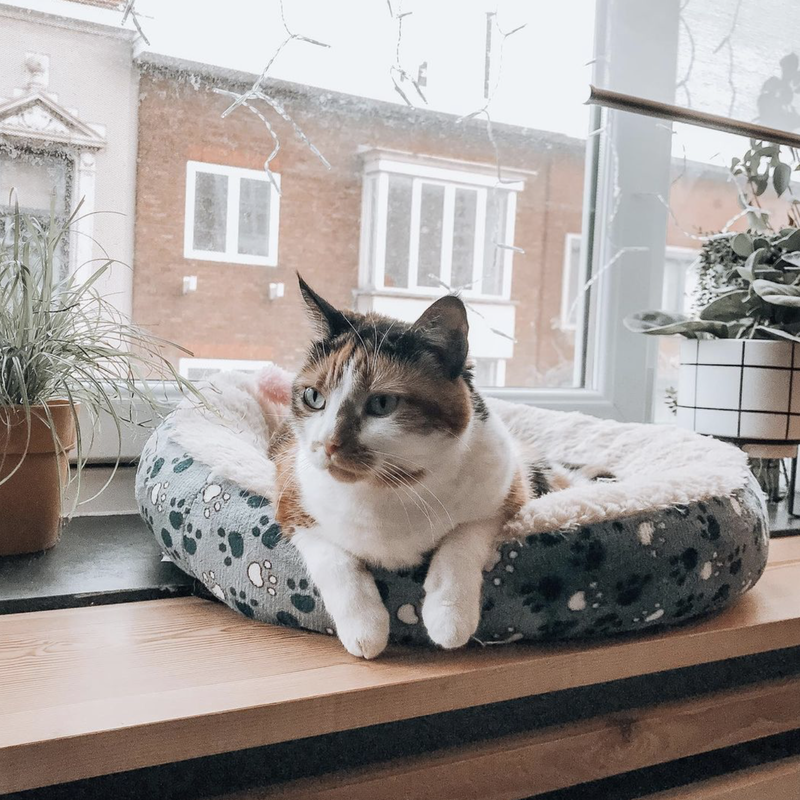 INFORM YOURSELF - TYPES OF PLANTSWhen you buy a plant you do not always know immediately whether it is poisonous or not, so inform yourself. It is useful to know the names of your plants in the house so you can react immediately if your animal eats them. It is not because your animal has taken a bite from your plant that it will die immediately, although this has already happened. The most common consequences are intestinal problems, diarrhea, lack of appetite. They may also vomit, have swelling in the throat and mouth, skin irritation or even liver failure. IS THERE ANYTHING WRONG? OBSERVE AND REACTIf you suspect that your animal has eaten a poisonous plant, react, not try to make them vomit, but go straight to the vet. It may be helpful to take a piece of the plant with you to the vet so they have a clue as to what poison it is. 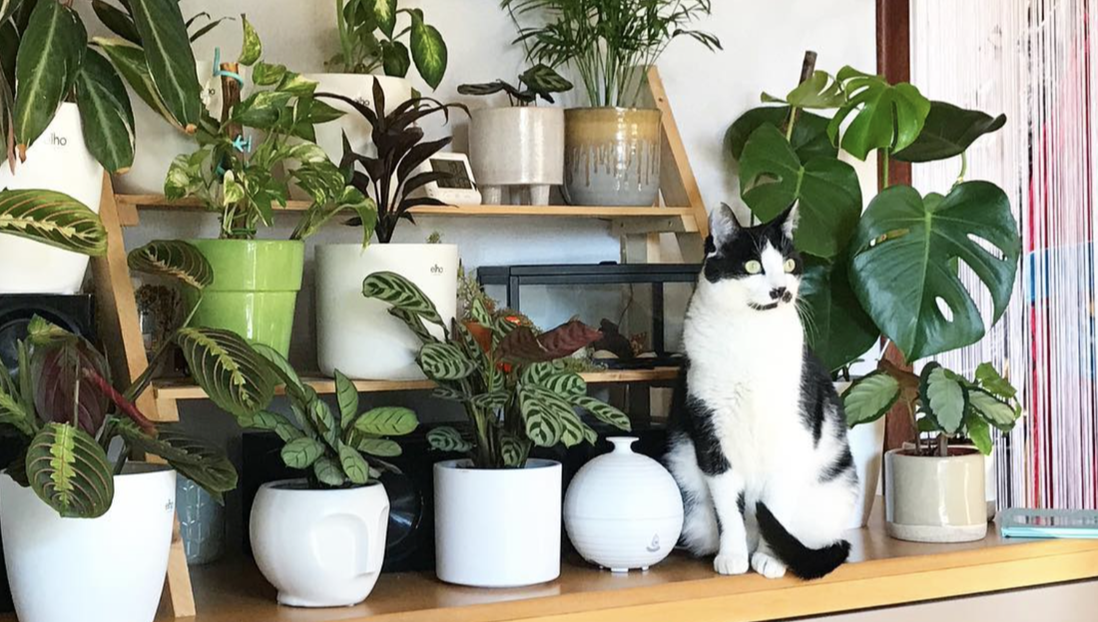 TO FINISHIt may all sound a bit much now, but there really is nothing more wonderful than a green living room with a snoozing cat or wagging dog to add life to it. Do not be discouraged, inform yourself and ask for help if necessary. They can live together perfectly, you just have to give them some attention. Did you like it? Please leave a 👍 below & follow my plant adventures on Instagram! Bronnen:
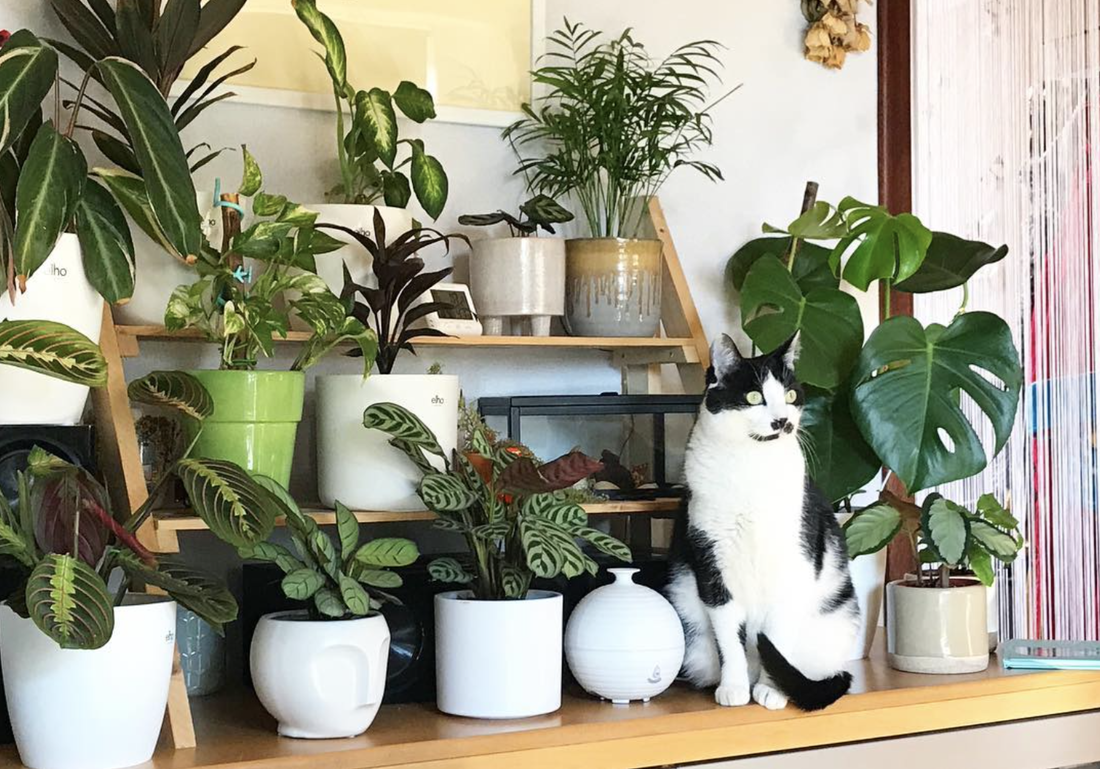 Nothing beats a snoozing cat among your jungle of houseplants, unfortunately not all of them are harmless. If you do want to play it safe you can go for cat friendly (and therefore non-toxic) houseplants. I give you here 14 examples: 1) PALM (EXCEPTION CYAS PALM)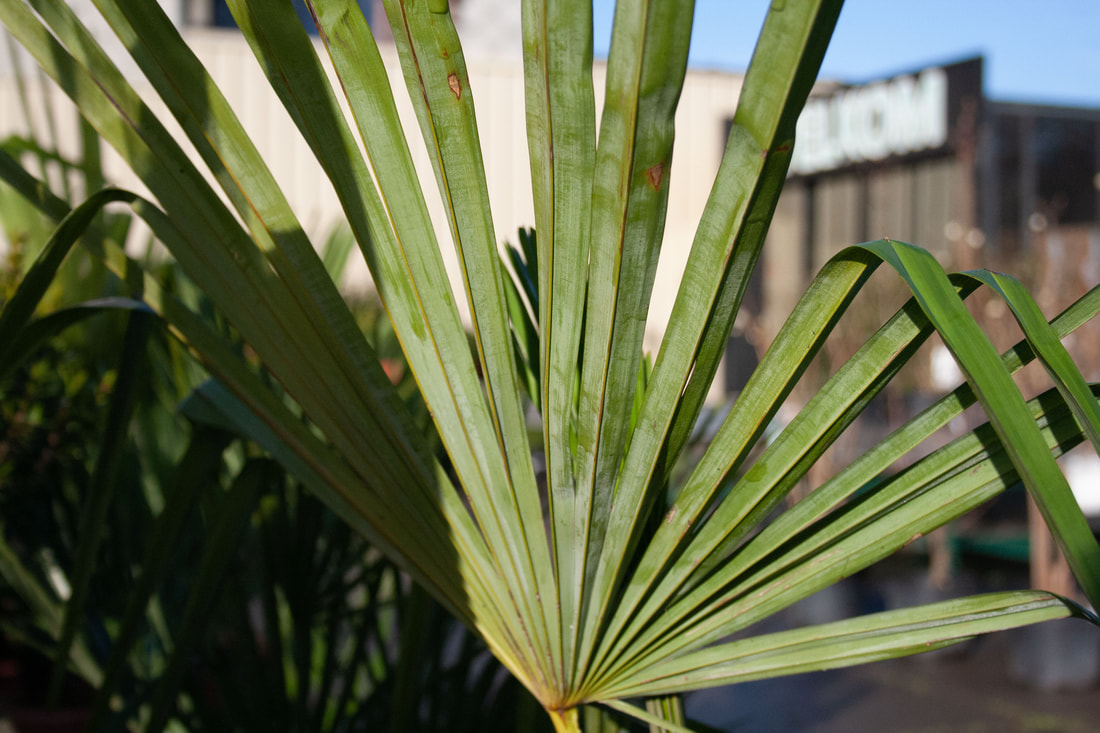 2) ORCHIDs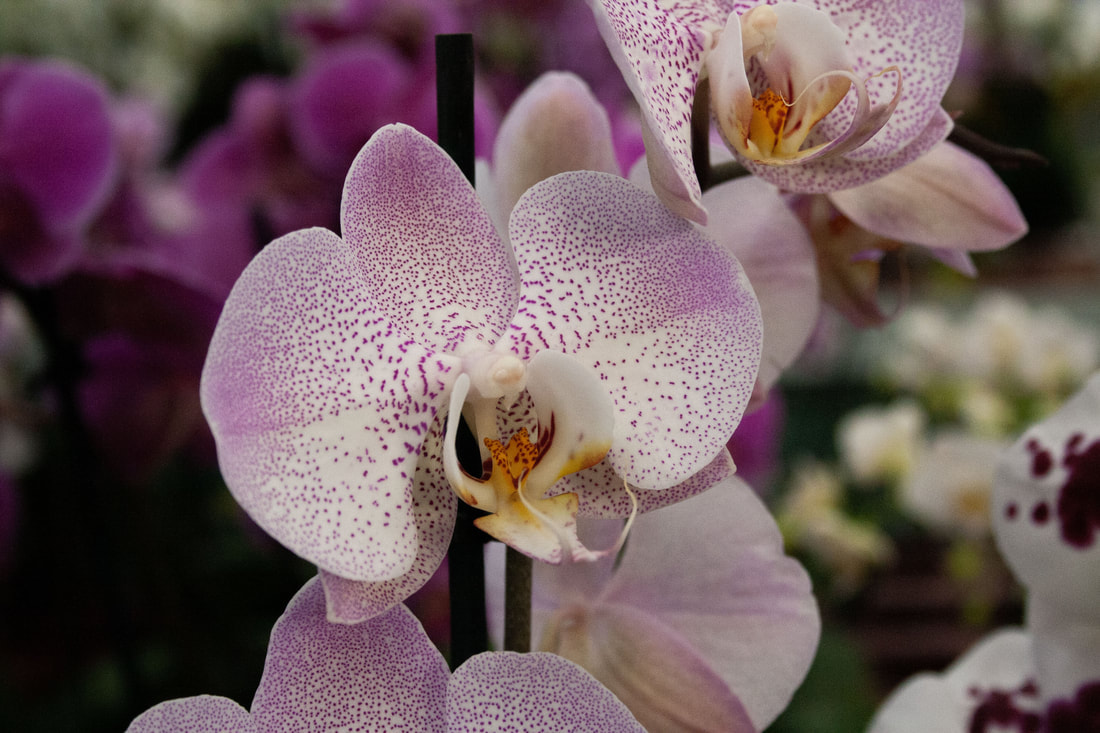 3) ZEBRA CACTUS (HAWORTHIA FASCIATA)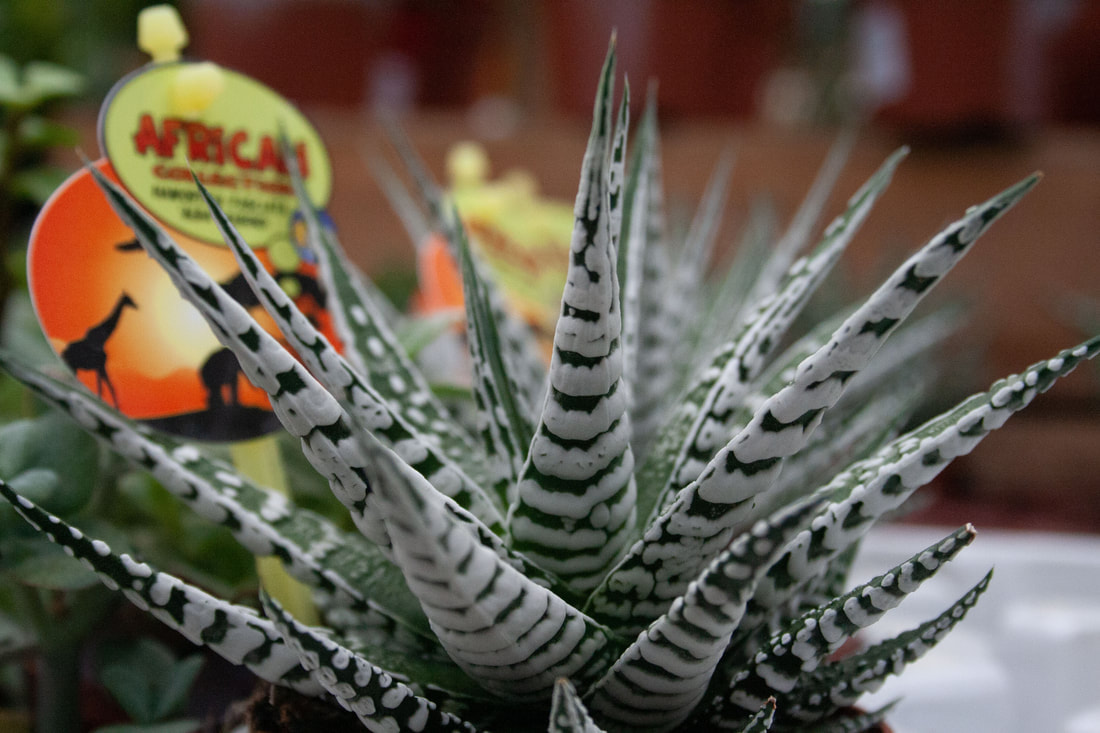 4) FARNS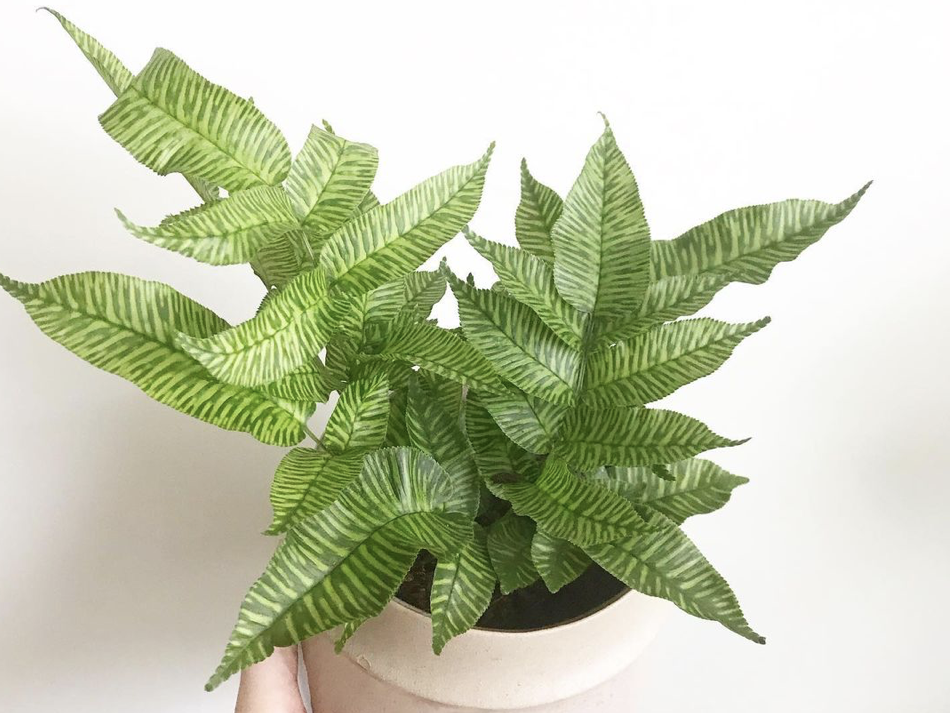 5) BAMBUSA (BAMBOO)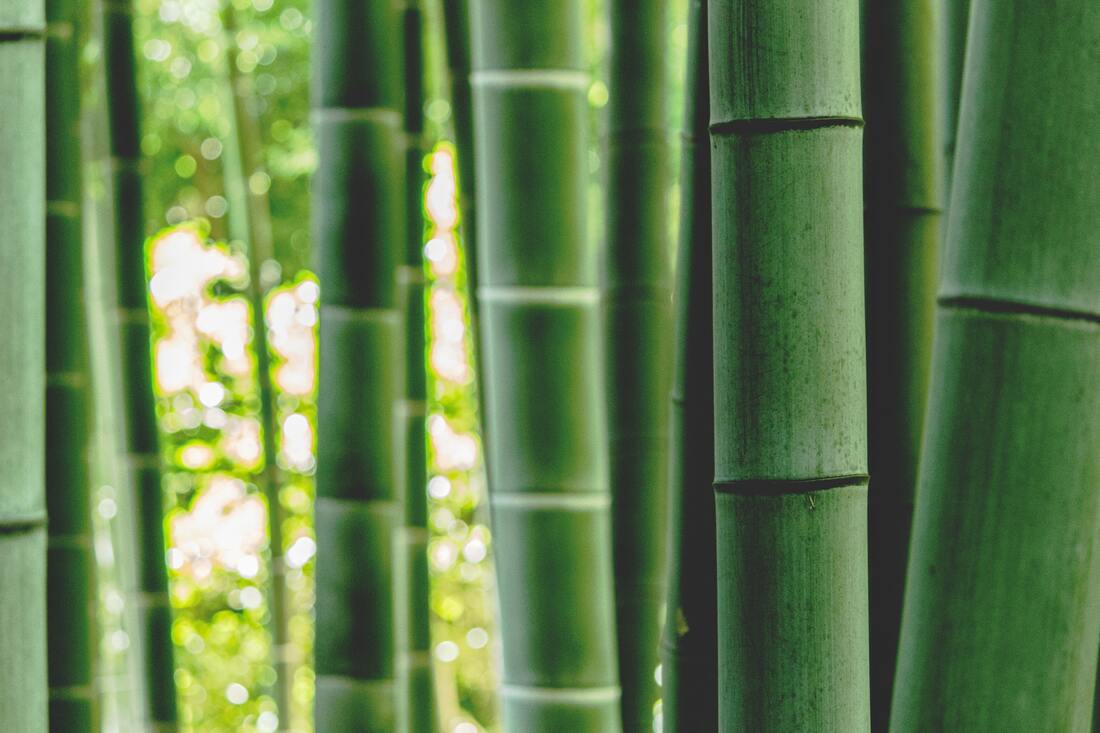 Photocredits @Unsplash 6) BEAUCARNEA (ELEPHANT'S FOOT)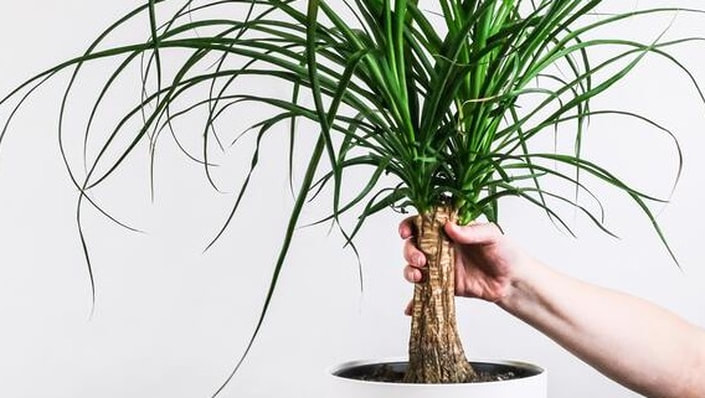 Photocredits @Unsplash 7) BROMELIAD (URN PLANT)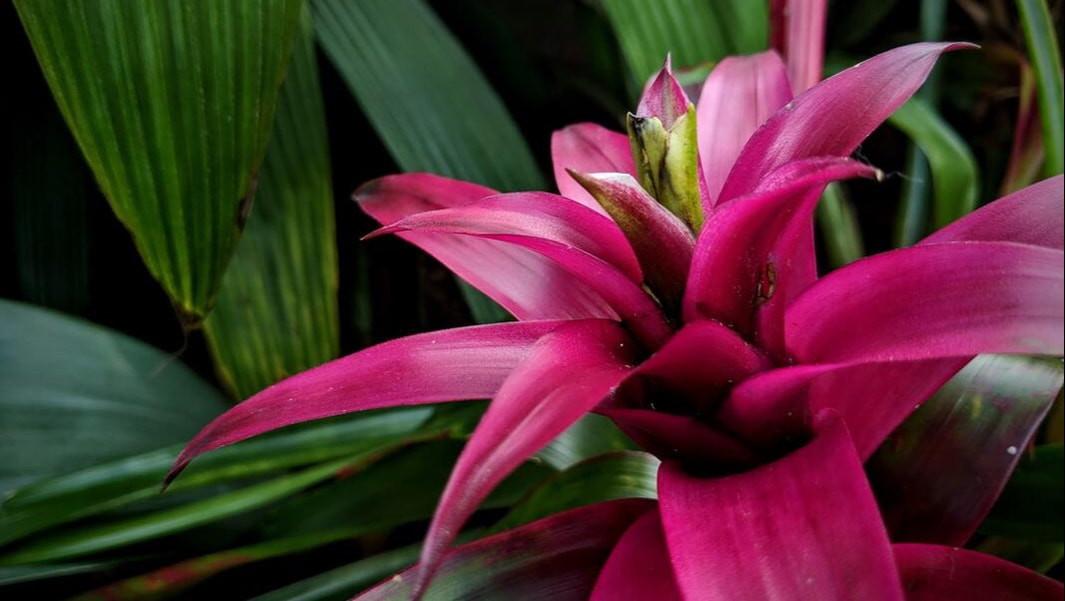 Photocredits @Unsplash 8) CALATHEA (PEACOCK PLANT)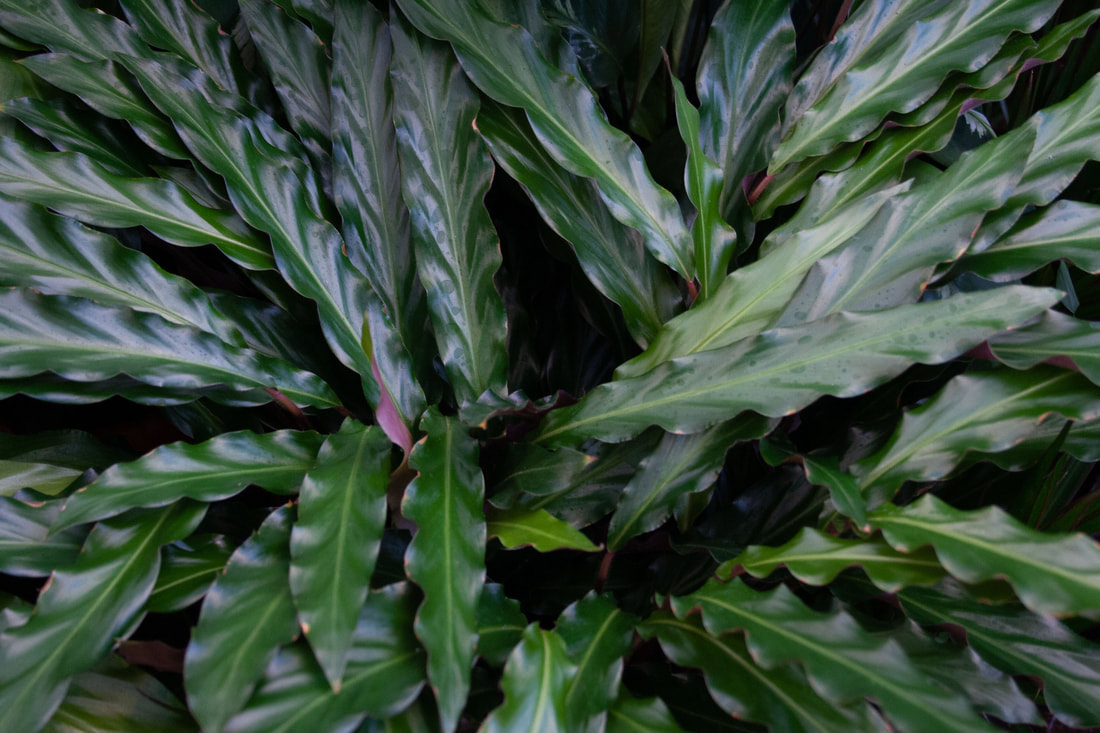 9) CHLOROPHYTUM (GRASS LILY) Photocredits @Unsplash 10) CYPERUS (UMBRELLA PLANT) 11) HORDEUM (CAT GRASS) 12) MUSA (BANANA PLANT) 13) PILEA PEPEROMIOIDES (PANNENKOEKPLANT) 14) SEDUM BURRITO (DONKEY TAIL)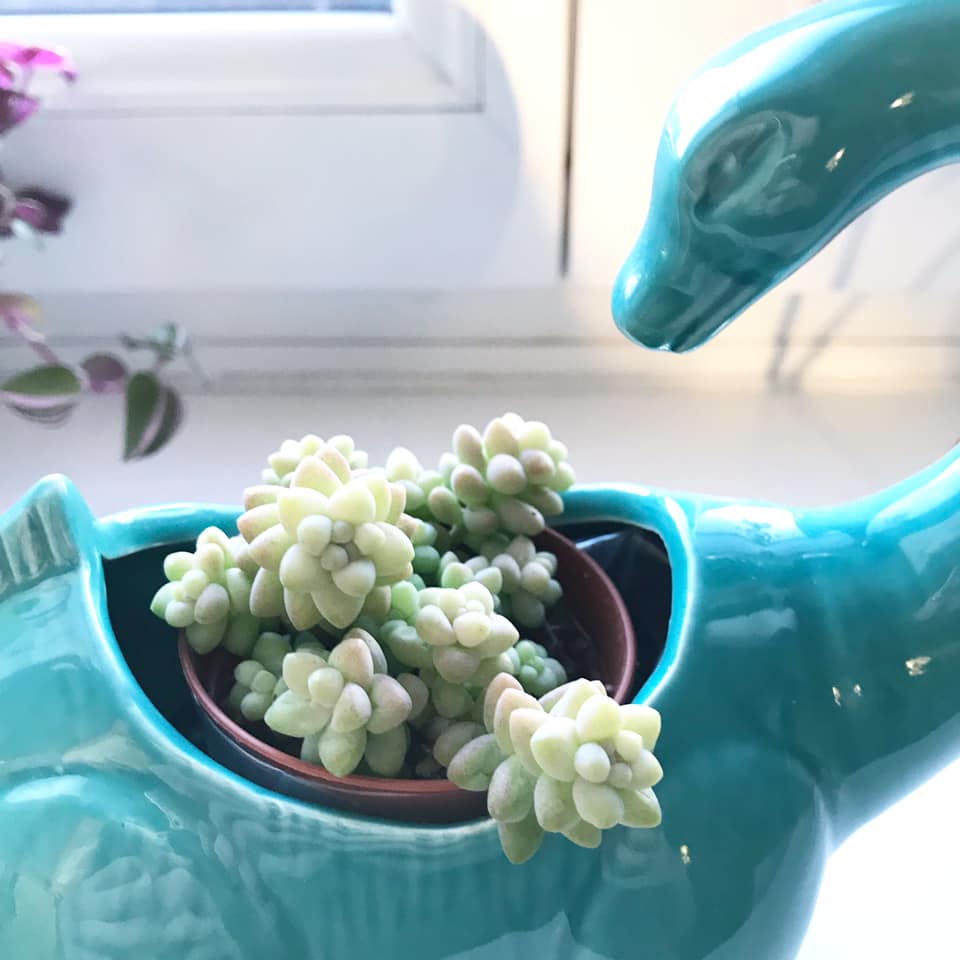 *disclaimer: there are many other safe plants, this is just a random selection of possibilities.
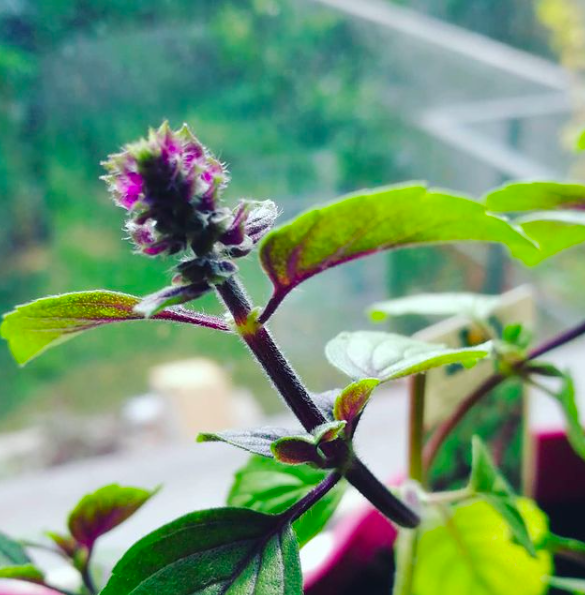
START YOUR OWN HERB GARDEN You know them: those pots of fresh herbs from the supermarket, in which a lot of hastily grown plants were crammed together. Usually you only need one sprig and the rest ends up languishing in your kitchen. Recognizable? Fortunately, there is nothing to stop you growing your own kitchen herbs, just in a pot or somewhere in the garden. That way, all you have to do is step outside with a pair of scissors the next time you fancy a mojito or fresh pesto.
HOW DO YOU GET STARTED? As always, ask yourself what spices you use often. Fan of mojito, tagines or tea? Then mint should definitely be on the list. Are you more into fresh pasta and Mediterranean cuisine? Then herbs like basil and oregano are your ideal kitchen partners. If you go for pots, give the herbs a slightly larger pot than the one in which you bought the plant. Make sure there are holes at the bottom and sprinkle some pebbles or shards as a carpet pad, so that the water can drain away. There are lots of "specialized" types of potting soil, but any regular potting soil will work just fine. Most herbs are sun-hungry, so be sure to give them a sunny spot. Chives and mint, on the other hand, prefer more shade. Watering is done when the top layer of soil is completely dry and always make sure that the excess water can drain away. Most of our typical kitchen herbs are used to a much warmer and drier climate and do not like wet feet.  Most of your herb plants will last until late fall, especially if you planted them indoors. Some species, such as rosemary and thyme will harden off and become small shrubs that you can even let overwinter in the garden. Other herbs like basil, which are normally annuals, you're going to have to reseed or plant now and then. Still others, such as mint and chives, seem to disappear outside during the winter, but reappear the following spring. Starting a herb garden is easiest when you choose cuttings. This way you start with larger plants and you can immediately start harvesting. The choice in cuttings is usually limited, which is a pity, because there are many nice, special and tasty varieties in the herb world. SO MAYBE YOU WANT TO SOW YOURSELF? You can sow on the spot in the garden, but then everything has to have warmed up considerably already. It is easier and safer to pre-sow indoors. You can then sow immediately in the pot in which you want to grow the herbs, or in temporary pots to later transplant the seedlings to the garden or pot. I use an old, plastic container myself. I can't remember for a long time what it once contained, but the plastic box seals and is the ideal mini-greenhouse. This way the seeds get the moisture and warmth they need to germinate. Don't have a mini-greenhouse yourself? You can easily imitate one by covering your pots with cling film.
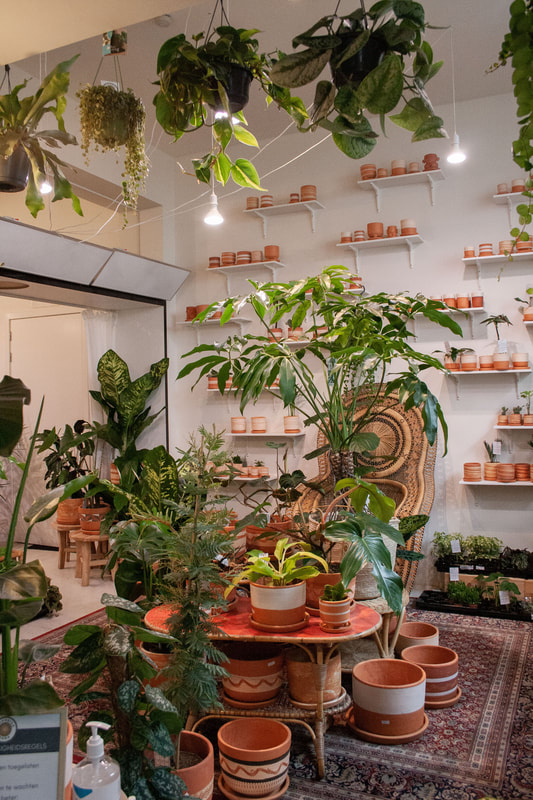
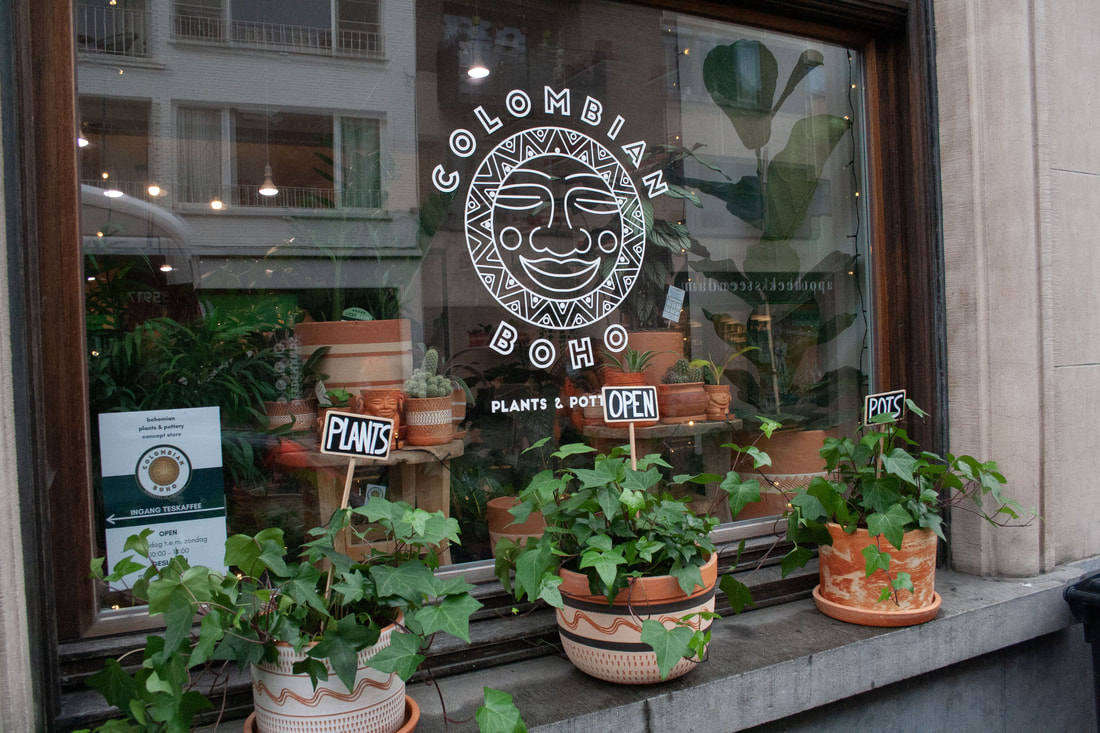
Now it's just a matter of waiting until your seedlings have their first 'real' leaves. After all, the first two leaves don't count; they are the 'seed leaves' that are meant to start the plant and will still disappear. Now you can carefully transplant them (I often use a teaspoon) to their new pot. If you want to plant them in the garden later, you can let the seedlings get used to the temperature difference by putting them outside on sunny days and taking them inside at night. This is called hardening off. Once your plants are strong enough and large enough, you can start harvesting them. This can be done simply with scissors and is not at all difficult. If you notice that the plant grows faster than you can use it in the kitchen, you can always harvest and dry a stock of herbs. You can do this by hanging them in a bundle in a dry, dark place or in the oven at a low temperature if you want a faster result. This is especially useful with herbs that disappear again in the winter, such as mint or basil. Other herbs such as rosemary or bay leaf can even grow into sizeable bushes, so strategic pruning might not be a bad thing anyway.  So, now you're all set to start your own herb garden. If you have any questions, ask them below in the comment box and they will surely be answered. Maybe one last tip: mint is a real bully. You can quietly plant a lot of herbs together, but mint always gets its own pot. If you want to plant mint in the garden, put it in the ground with pot and all. This prevents it from taking over the entire border. Also be sure to grow... ...lemon thyme. Delicious with chicken or in lemonade and tea. ...the oregano variety 'Hot & Spicy', with its distinctive peppery taste. ...Chervil, a surprisingly delicious alternative to parsley. ...Red basil, because pesto doesn't necessarily have to be green. ...Chocolate mint, which is a little reminiscent of After Eight chocolates. ...Special flavorings, such as lavender, borage (also called borage) or aniseed.  We are already halfway through the month of March, so time for me to introduce a new Belgian shop to you. This time it is really literally a new store! Namely Colombian Boho. In early January, I made a day trip to Ghent where I visited a few fine plant stores. The pandemic and the accompanying lockdown(s) have woken us up to the importance of shopping local. That's why I came up with the idea of introducing you to a nice shop every month and to challenge myself to visit some new shops (apart from my regular addresses).
Because of corona I lost my job and started a store here, I knew the building was free. One thing led to another and the store opened in July. The large pots were sold out almost immediately. Where does your passion for green come from? I had a lot of plants at home to start with, I have no professional training in plants or anything, I mainly taught myself. I was doing it as a hobby and now that I have a plant store I know a lot more. I know the care for all the plants I sell. I'm not a botanist, so sometimes people come and ask; do you have that or that and I think; eeeuhmmm. But that's how we learn, I also write all those name cards with the plants themselves so I do learn a lot. 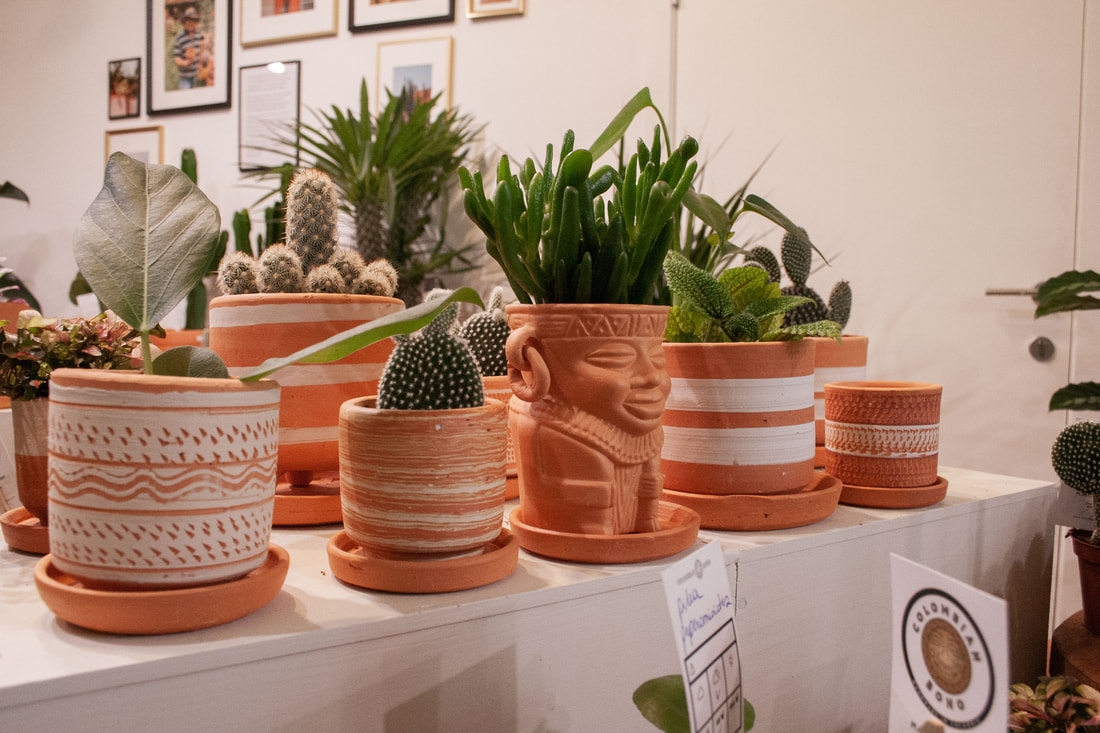 Why is Colombian Boho just such a fun store? The pots make it unique, and make the store stand out. The whole store is the Colombian terracotta pot. The large pots where sold out quickly, so I then have to find something else. I then had serax pots for a while, they are nice, but you can also buy them a street away at the competition, so it was then. And they're not so special anymore within our concept of terracotta pots, the soul of the store was kind of gone. These pots, our pots, you really don't find anywhere else. I import them myself and that is what makes them unique. Which is also necessary.
very relatableThank you very much Louis for the nice conversation and I can only recommend you to walk into the store if you are in the neighborhood. Super nice to have seen it, a very pleasant appearance and you can even have a coffee there. I bet you won't walk out empty handed! As I get to know more and more shops and their stories I notice that quite a few share the same starting story, starting from their own hobby and/or plant collection at home. But also the learning process sounds very familiar to me. I may not have a shop but Instagram does the same for me. I started the account on the advice of my boyfriend, to get to know people with the same hobby and as the proud plant mother that I am, to be able to share pictures of my plants. Hihi :) More and more I get questions about how to care for a certain plant, and not always do I know the answer. But I do go looking for an answer, online, in books, I ask advice from others.... Which leads me not only to answer the question but also to learn continuously, and nothing better than that. So don't hesitate to ask your question. More Colombian boho? To read more about the origin of the pots and their way to Belgium, you should definitely read on here: https://www.colombianboho.com/our-story You can shop for pots here: https://www.colombianboho.com/MINI-POTS Or physically in the store: Steendam 76, 9000 Ghent, Belgium When is the store open? Wednesday to Sunday 10:00 - 18:00 Monday and Tuesday closed We are completely cashless. We accept all payment cards and electronic ecocheques. We only accept electronic ecocheques, no paper. We accept Sodexo, Edenred and Monizze cards. And I believe I heard recently that the pots are now also available at Robberechts in Wolvertem, so if Ghent is a bit too far away you can also go there to have a look. Did you like it? Please leave a 👍 below & follow my plant adventures on Instagram!
After a while, the nutrition in your plant's soil becomes depleted. In nature or full soil, plants usually find enough nutrition, in a pot this is not possible. That is why we can add nutrition ourselves. 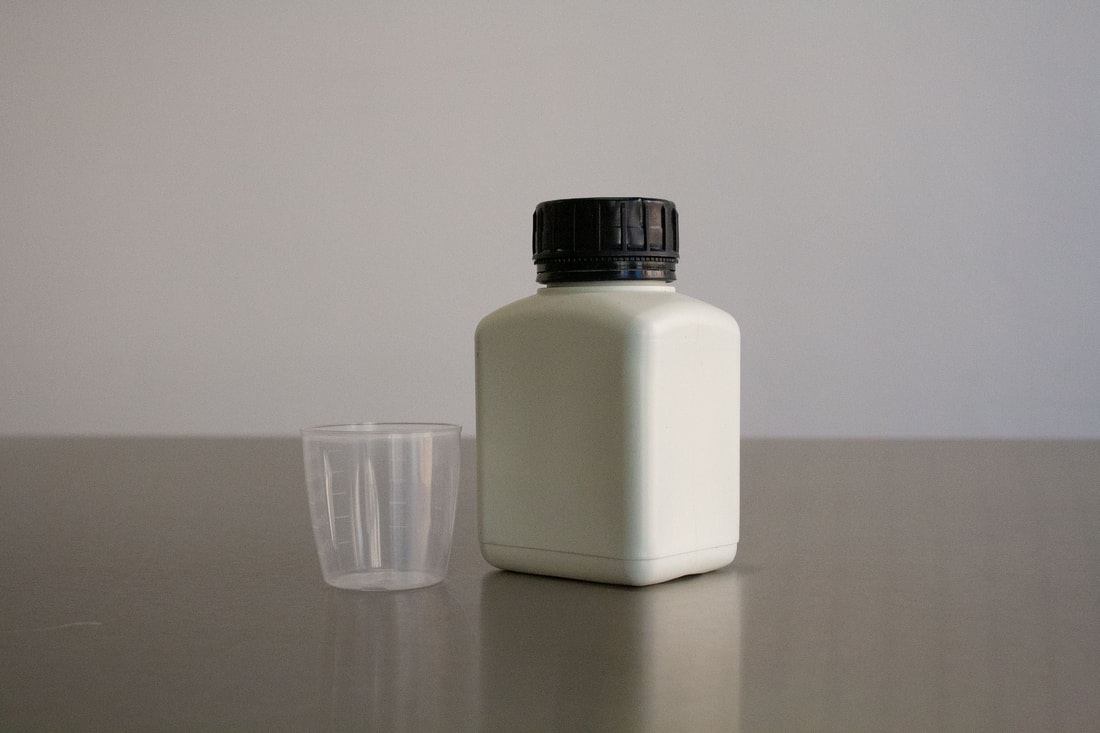 Why does a plant need nutrition? To promote the growth of your plant there are 3 important elements: Potassium, Phosphorus and Nitrogen. Potassium is indicated with a K and ensures the formation of fruits and flowers but also as a residence against diseases. Phosphorus is indicated with a P and ensures that the roots develop well. Finally, nitrogen is indicated with an N, which is important for the growth of the leaves and stems and therefore for photosynthesis. Not every plant needs the same amount of everything, a flowering plant needs more potassium while a green plant needs more nitrogen. There are different types of nutrition, think for example of orchids, they have their own nutrition adapted to their needs. When to add nutrition? Your plant gets most of its nutrition from the soil. Have you recently repotted your plant? Then do not give it any extra nutrition. On the packaging of your potting soil you can read for how long it is provided with nutrition, for most species this will be about 3 months. After that you can give your plant nutrition during the growing period, which for most plants is from March to October. During the winter you should give your plants a rest period so they can recharge for the spring. Most plants can use some nutrition every 3-4 weeks, don't worry if you skip it. However, be careful not to overfeed, too much nutrition can burn the roots. If this happens the plant can no longer absorb nutrition or water and dies. Inform yourself per plant species, slow growers such as succulents and cacti often need much less nutrition. There are adapted products for this in a low dosage. Do not feed a plant that is thirsty, water it first and then feed it. What types of nutrition are there? There are different forms and types of nutrition on the market, such as liquid nutrition, nutrition in granules, sticks or powder form. The advantage of sticks is that they give your plant nutrition for a longer period, a disadvantage is that there is a greater chance that you damage the roots. Sticks are therefore recommended for larger plant pots. The most user-friendly is the liquid nutrition. Often the cap is used as a measuring cup to need to know how much to add to your water. 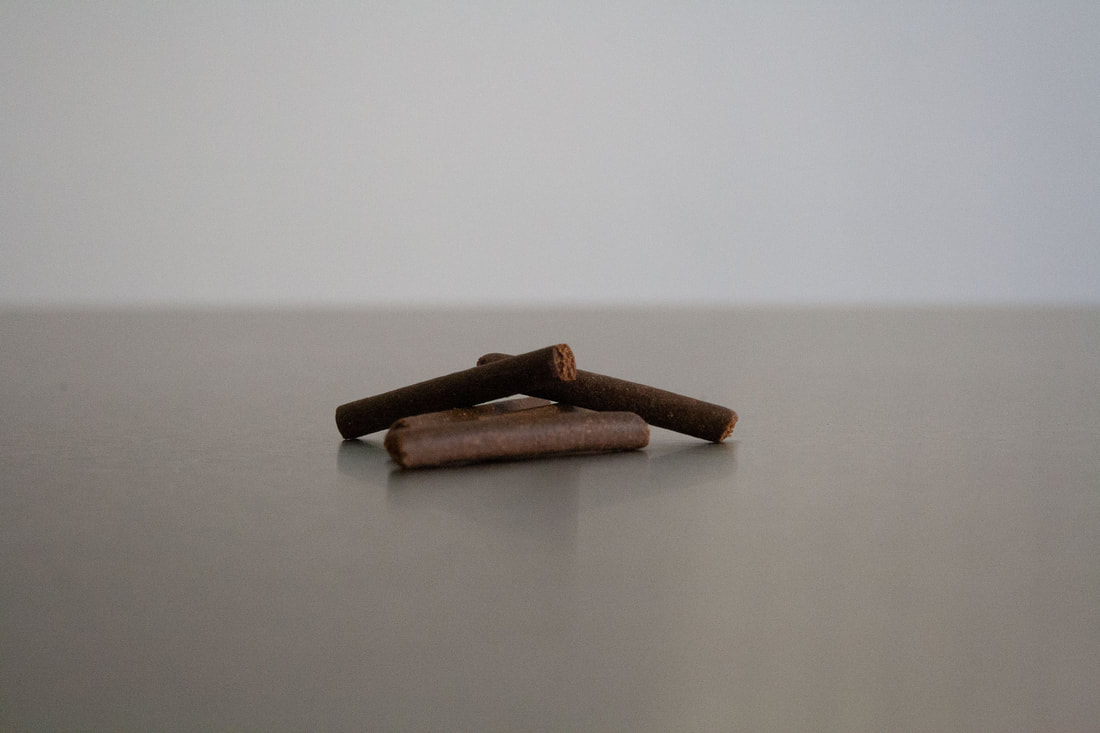 Important: Always follow the recommended amount, dilute the dose if necessary. It is better to give a little too little than too much. If you give too much nutrient you will damage the roots, causing the plant to turn (yellow) and lose its shape, just as if it had too little water. Did you like it? Please leave a 👍 below & follow my plant adventures on Instagram!
Bart tells: I was such an eternal student and have far too many diplomas in my pocket; from advertising and international communication to a regent and even that of ambulance driver. Normally I would have added that of florist last year, but corona caused some delay. We live in Mechelen, a house filled with far too many houseplants, a dog and a cat, a partner and a child. Contrary to what many people think, we only have an ordinary, average city garden, which is living proof that you can also grow a lot in relatively small areas. Even chickens!
The sun is shining, the birds are chirping and the weather is itchy: you want to go outside! You don't just want to go outside for a walk or a bike ride. No, you want to grow your own vegetables, fruits or herbs, just like you saw on that one Instagram account. But how do you start doing that? Don't you need a big garden? Or a veritable arsenal of gardening gear? Everyone can get started with flowers, herbs, vegetables and fruit. Prior knowledge is not really necessary. A balcony or a sunny windowsill is space enough and you need almost no equipment. And the nice thing is: if it ever goes wrong (and it will), then you just try again, right?
Also ask yourself what is feasible: you can certainly grow a lot on a windowsill or small balcony, but maybe in those cases you should not start a giant pumpkin. Also keep in mind that some plants are very easy, while others are a joy to grow. If it is your first time, start with something easy.
You don't have to grow everything from seed either; feel free to go to your garden center and get some cuttings for a quick start. If you do want to grow from seed, learn more about the different varieties. Purple potatoes, red and white striped beets or rainbow colored corn cobs? You can't think of anything else that exists. Before you know it, you'll have something on your plate that you can't find in the supermarket! In this series you will learn the absolute basics of vegetable gardening. Whether you're working on an allotment or with some pots on your balcony, you will learn how to grow, raise and harvest some easy vegetables. Without the need for handfuls of materials or bookshelves full of previous knowledge. And do you still have a question? Then just post them on this blog and you'll get a tailor-made answer. Because everyone can grow, including you! |
AuthorCrazy plant lady who likes to inspire others! Everything I write here comes from my own experience, knowledge that I gained by reading books and on the internet. If I would literally copy someone's info, I would do my best to link it of course! Do you spot typos or do you have other concerns, let me know! Have fun reading! I've only just started writing English blogs since January 2021, that's why there are many Dutch blogs and not so many English ones.
I use DeepL to help me translate. ARCHIVES
Maart 2022
|


 RSS-feed
