|
This post was originally posted on 15/07/2020 & can be read here. Translated with DeepL on 30/01/2021.  Hi, welcome! I would like to talk about some different (grow) lights, their plus and minus points. Price quality, what I like / dislike about it, ... Meanwhile, there are already many lamps on the market from different brands. Everything I write down here is from my own experience or research, do you have a lamp in your home and your experience is completely different? Do not hesitate to share your experience with me. The more experiences we collect the clearer our view on a particular product. In a previous blog I already talked to you about Elho's 'leaf light care', where I briefly explained the use of a grow light and why you should have one in your home. In some places in your home you just don't have enough light to keep that one plant happy, or throughout the winter -when the days get shorter and darker- some plants can be short on light. Would you like to read the previous blog? You can do so HERE! Which bulbs do I want to review with you?
(click on the name to go to the official websites) Here we go! LEAF LIGHT CARE & LIGHT GARDEN.The first two lamps I'm talking to you about are two from the brand Elho. If you know me a bit you know I'm a fan of this brand, Elho puts a huge focus on sustainable and environmentally friendly products and I can only applaud that! From them I have the "Leaf light care" and the "Light garden" in the house.
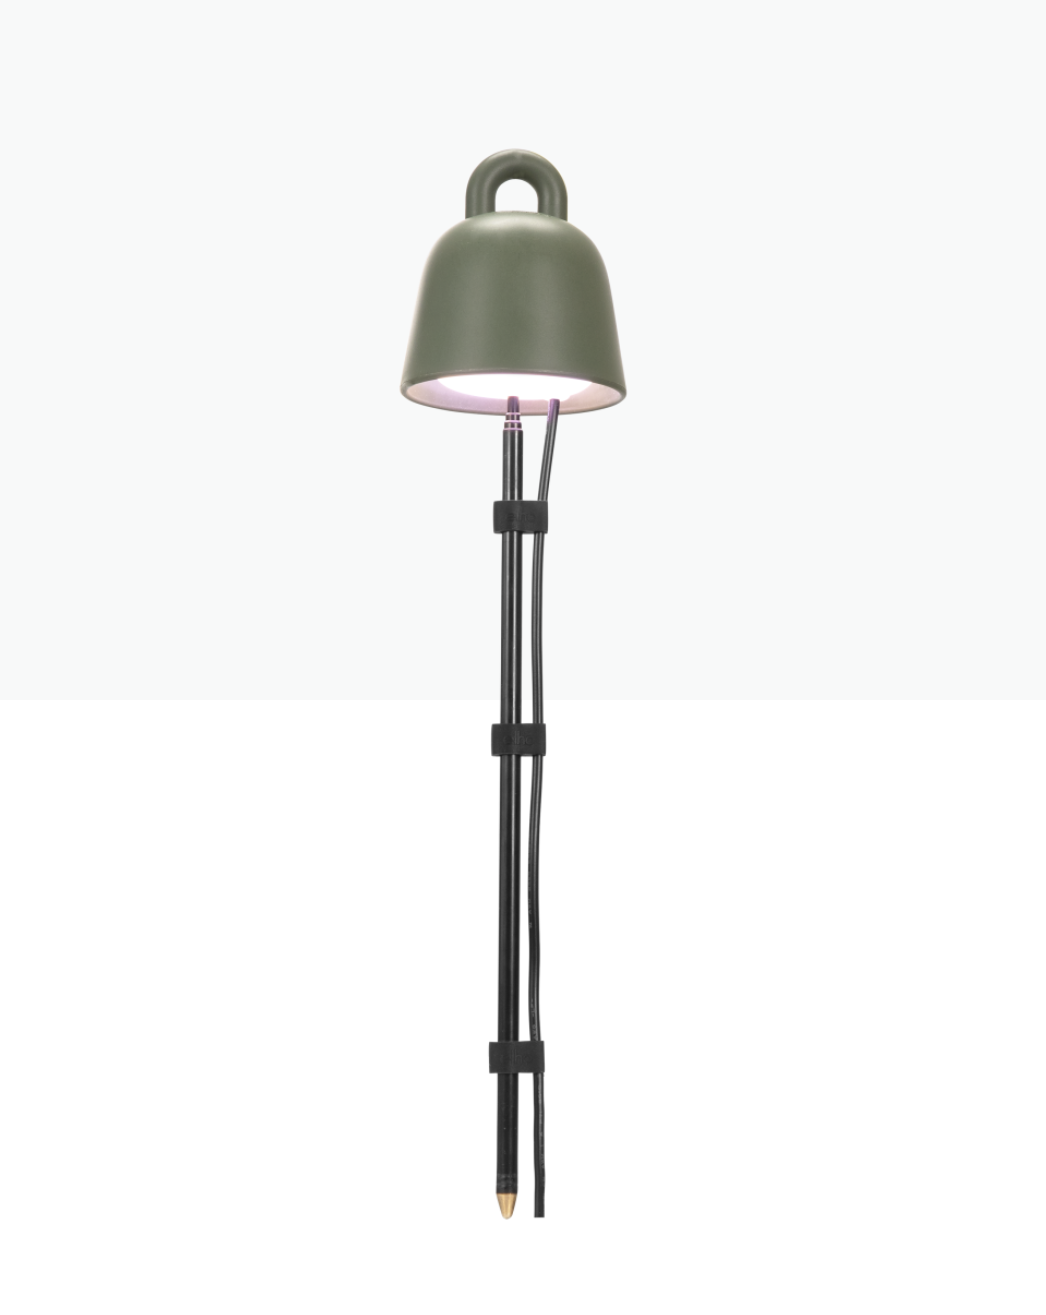
The lamp is available in 2 colors (on the outside) and I personally think it is quite beautiful. It is very subtle so it doesn't draw all the attention when you walk into the room. The light it gives off is not completely white, there is a slight purple glow but not strong enough to be experienced as disturbing. Furthermore, the lamp has a very long cord so it can perfectly stand on top of the cupboard here and the cord can be plugged in at the very bottom. It doesn't have a switch because you don't need this at all, the built-in timer does that job for you. If I really have to nitpick I think it's a shame that the lamp doesn't have a mega long range, it's a bit double. I love the lamp just because it is compact and subtle, on the other hand you can 'only' put in 1 larger plant or 2-3 little ones under it. The lamp has an adjustable stick so it can grow with the height of your plant. Recommended retail price: €44.99 - 3-year warranty.
I inquired a little more with Elho themselves to ask what the situation was now when the lamp comes to the end of its life, do you replace the circuit board or does the whole lamp have to go in the trash? As usual, I got a very reasoned answer pretty quickly from the always friendly Patty. She told me that the inside consists of a circuit board because the frequency is not obtainable with a regular lamp, the board is set to give the right frequency and duration of light. So unfortunately when the bulb stops working it cannot be fixed by replacing a bulb. The lamp has been thoroughly tested and has an extremely long life that lasts much longer than the light hours of a bulb.
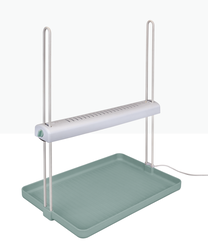
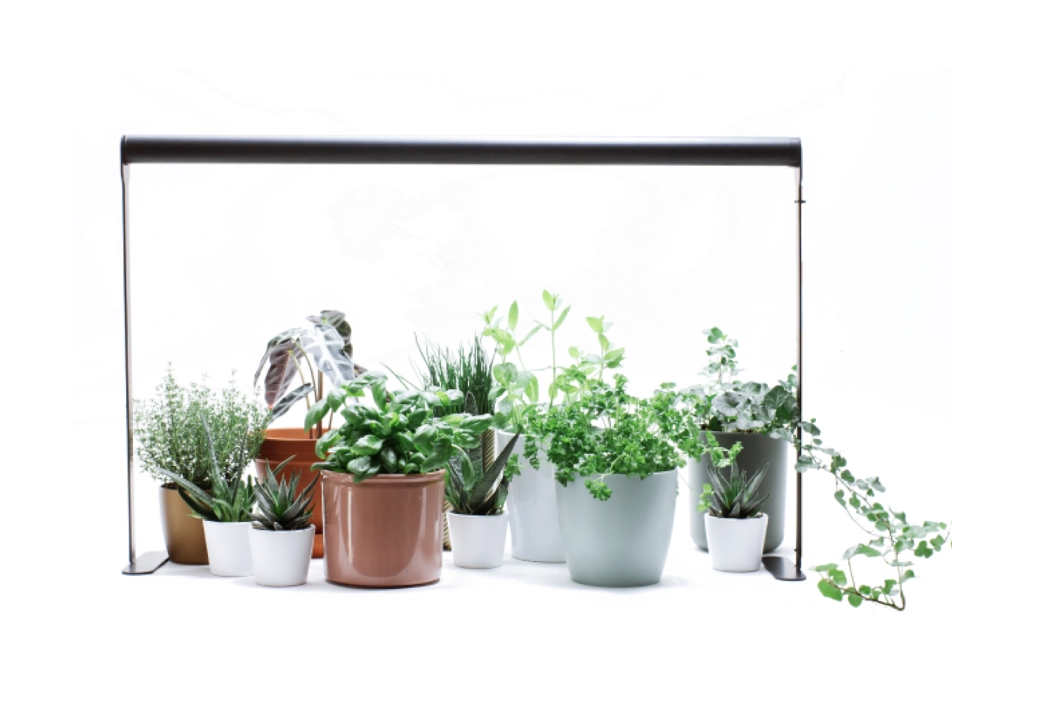
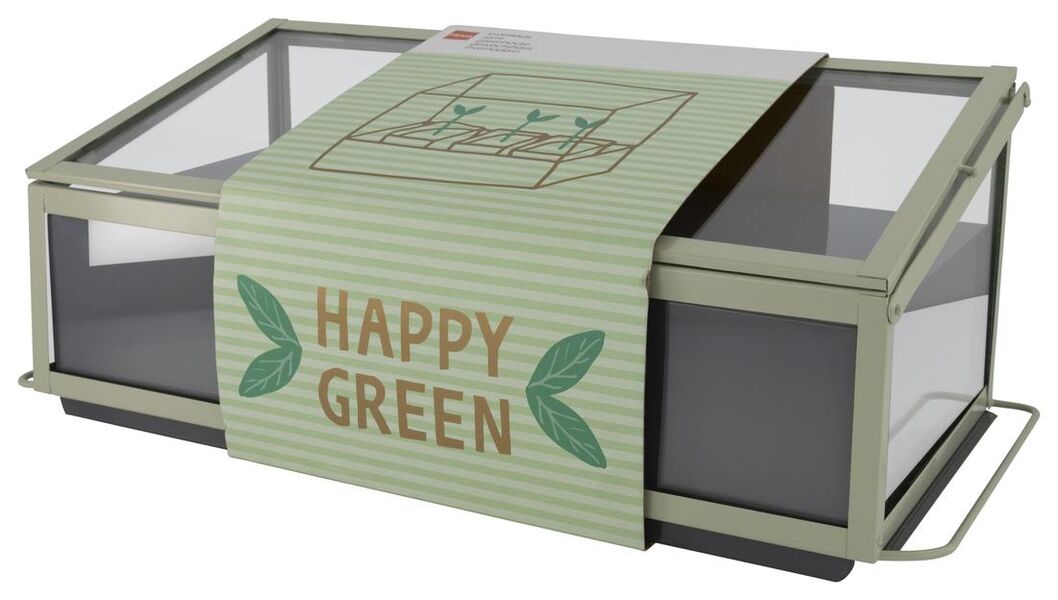
This lamp does have an on and off switch on top of the lamp, there are 2 touch buttons to turn the lamp on/off & one to set the duration of the lamp. The lamp burns for 15h here with me just like the other lamp and then 9h rest. You can also adjust it in height so it grows with your plants or seedlings. It has a kind of 'scale' at the bottom, which I personally find handy when watering the plants under it. The lamp doesn't get extremely hot and I can leave them on with confidence even when we are away from home. Tip: Elho also sells grow houses that fit perfectly under this lamp. Recommended retail price: € 99,00 - 3 years warranty.
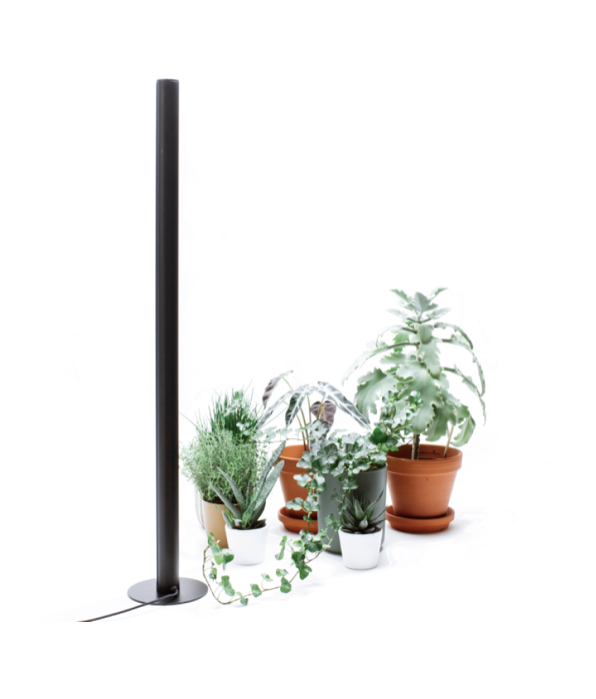
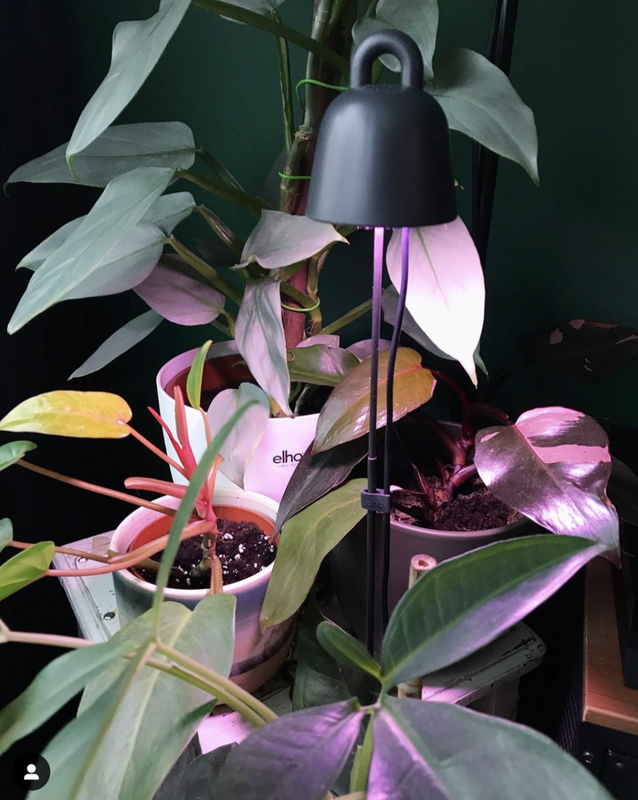
To conclude; I am very much a fan of both lamps, personally I think they both have more + points than - points. The price is reasonable, especially compared to their expected lifespan. They are subtle in the interior and grow with your plant. Built-in timers ensure that your plant gets enough light and you don't have to think about it. Unfortunately, the lamps cannot be replaced, but Elho would not be Elho if they could not recycle their own products. Is your lamp broken? Then be sure to bring them to a collection point so we can keep the waste mountain as small as possible. In the video below I would like to introduce you to the lamps. (video is in dutch for now - sorry!)  PLANTSPECTRUM.Next lamp up... The PlantSpectrum of the Mother brand. This is the most recent lamp that I got in my house and therefore I have the least experience with it so far. The lamp had been on my wishlist for ages after I saw it at The Plant Corner in Berchem, where I attended an embroidery workshop and where the PlantSpectrum lamps were used as lighting for working! I thought they were ideal! Now that I finally have one, I have to admit that I sometimes steal them from the plants, when I have a job to do in the evening where I really need some bright light without hurting my eyes. Or sometimes even to take a picture. The lighting on this lamp just feels so natural that I quickly tend to turn it on. It's a bit more expensive to buy than the other lamps I've mentioned here but it's the one with the longest expected life span.
While using the lamp I noticed that it can get quite warm after a while, because I was naturally curious why this happens I started reading about the design of this lamp. It is designed in such a way that the aluminum casing takes the heat away from the circuit board, thus extending the life of your LED bulb. The lamp is made from recycled aluminum & has a very clean look, clearly a lot of thought has gone into its functionality & longevity as well as its design. 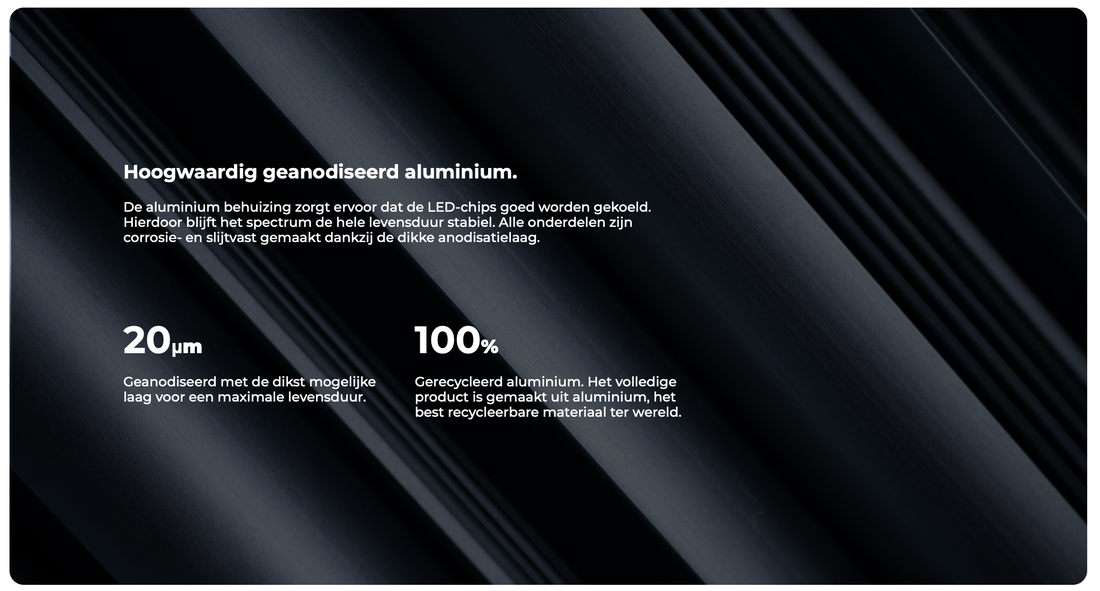 The bulb is really designed with the idea of lasting a lifetime, the LED strip has a 4 year warranty and after 8 years of intensive use, the LED board can be replaced without having to throw away the light module. Once you are registered as a customer, you can update PlantSpectrum for life for a fraction of the cost. It sounds a bit advertising, but I'm super happy that you can just replace the LED strip, so you don't have to throw away the bulb. You invest in something to enjoy for the rest of your life. Price: € 199.00 - 4 years warranty on the LED strip. Choice of holder (vertical/horizontal to be purchased separately)
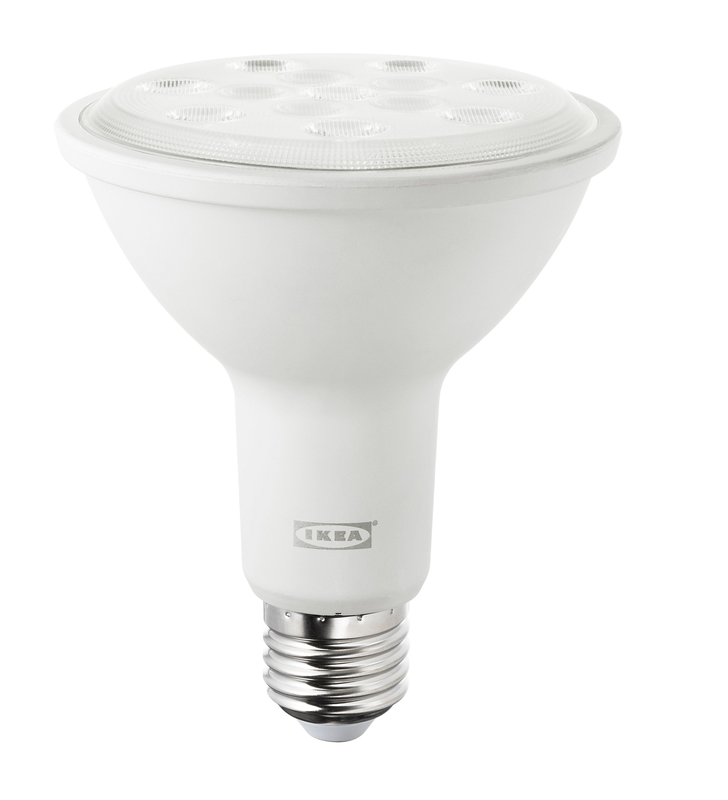
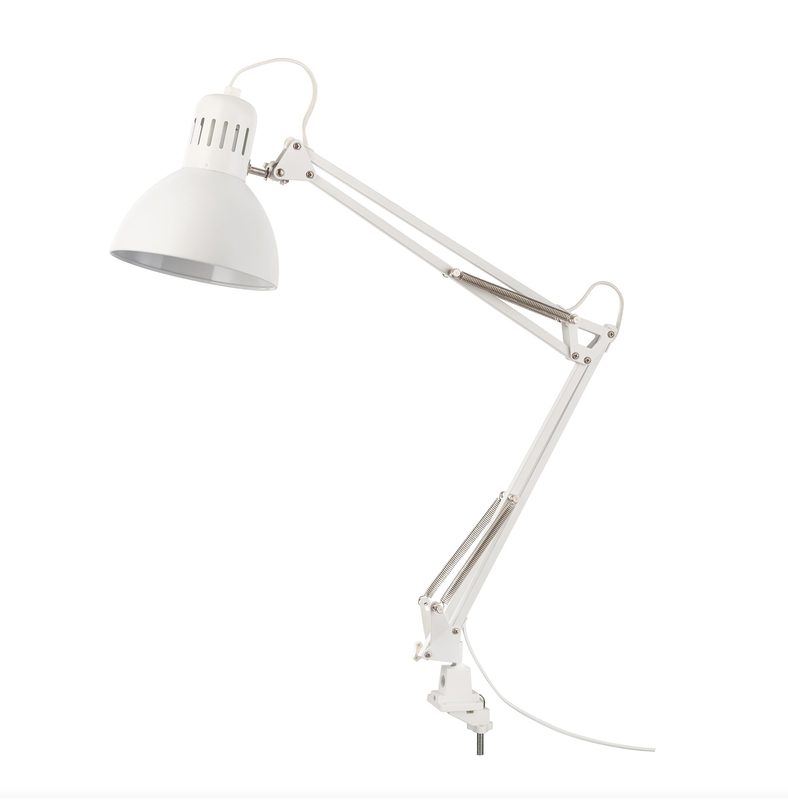
As I said I have only been using the lamp for a few weeks, Mother has much more than just the PlantSpectrum. They also grow microgreens that they cook with and share the recipes with. You can find more info on their website or visit their Instagram. I also gathered as much confidence as I could and made my first video. I was so excited about this! In this video I briefly present you the lamp. I'm sure there will be more to come, I'm planning to make some about the other lamps and put them in the blog before it goes online. (video is in dutch for now - sorry!)  Växer.The Växer lamps are, in my opinion, the most well known when it comes to greenhouses. Most of us know about the #ikeagreenhousecabinet, there are two different lamps on the market, both with the same name. One is ready to use, the other you still need to provide a fixture or socket with cord. I have both in the house, and will introduce them to you separately for a moment.
Recommended retail price: € 35
Recommended retail price: € 14,99
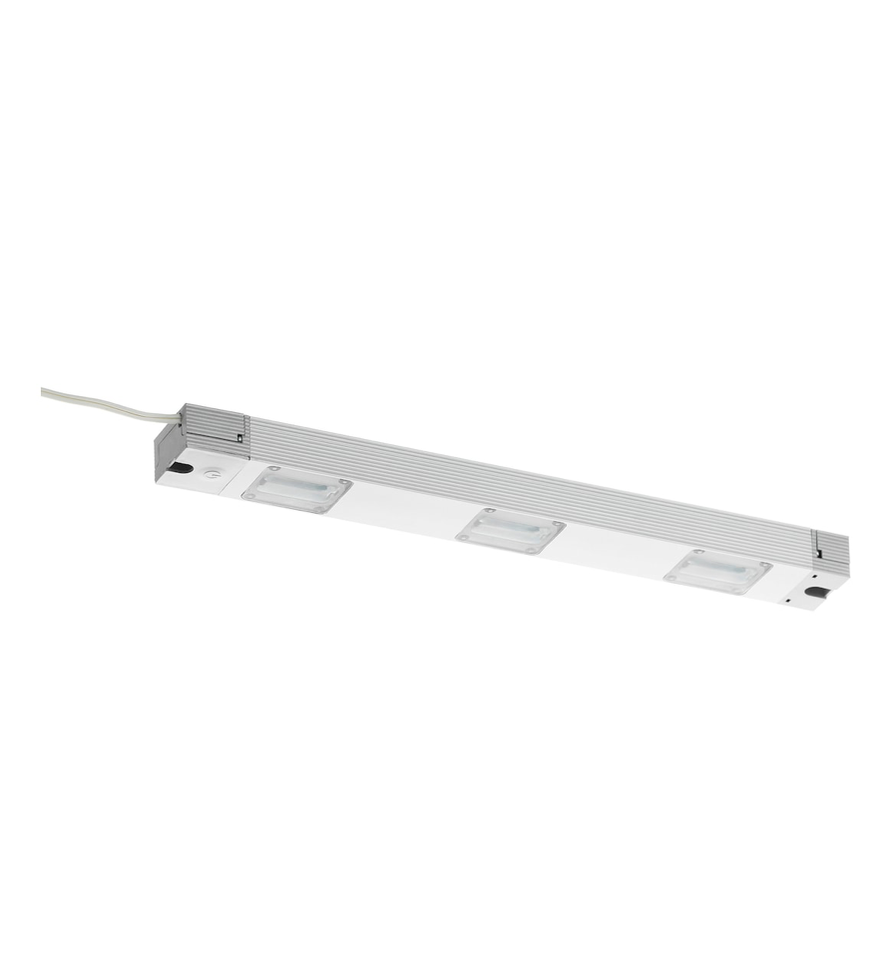
 hema's LED lamp.Hema's LED lamp was originally made to be attached in their greenhouse (see photo), as you can see from the attachments at both ends of the lamp. With some creativity you can also manage to attach them in a different way. For example, I have 2 of them hanging in my homemade 'greenhouse' using 2 magnets per lamp. These lamps are much more purple in color, especially compared to the previously mentioned lamps. The LED strip sits on a metal plate, which I think is to direct the heat away from the strip (as I learned at PlantSpectrum) and of course to brace the strip for attachment.
Recommended retail price: € 11.00 (BE price)
Below I placed a short movie in which I introduce you to the Hema grow light. This is to give you a better idea of the product & so you can also see a bit of what I mean with my homemade greenhouse. (For those who want to know, I used the HYLLIS shelf with cover from Ikea). (video is in dutch for now - sorry!)  growlight.
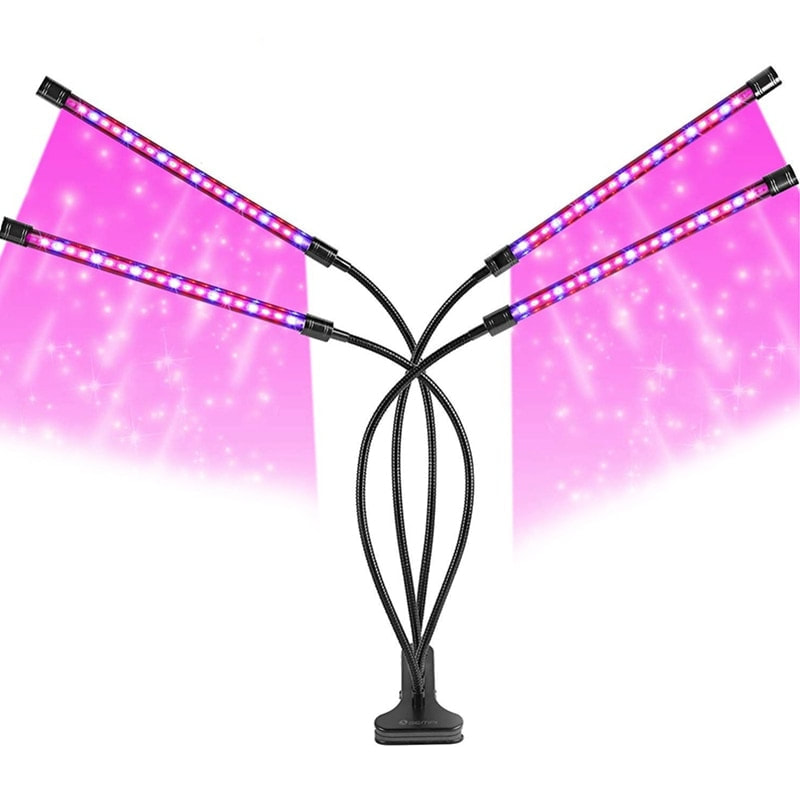
The one I have in my house is yellow in light. It is much more yellow than a regular lamp, an advantage of the 3 part lamps is that you can make them shine in different directions. You can therefore put one lamp closer to a certain plant than the other. Personally I find the timer not always reliable, sometimes it works for a few days as set & then suddenly it goes off for a day. I don't have a light meter in the house, so this is something I judge by feeling; but I have the impression that sometimes the lamp is not strong enough to be the only source. By this I mean that the lamp is good for lighting a less bright spot, but I question whether the lamp as the sole source could keep a plant alive. Recommended retail price: € 20-25
To finish also about this lamp a little video to show them to you better. (I made the video after a long day of work, my apologies for the tired head ;) ) (video is in dutch for now - sorry!) CONCLUSIONAll suggested lamps are LED, which gives them a longer (expected) life & makes them more energy friendly. The prices are very different so there is a lamp for every budget. Of course there are many other lamps besides the 7 that I have presented to you here. If I had to choose a lamp again I think I would go for the PlantSpectrum from Mother & the lamps from Elho. In the cheaper class, I would choose the single light bulb from Ikea. I think your choice also depends a bit on where you want to put the bulb, how many plants it has to illuminate? Is it the only light source or will there also be natural light to the plant? Is it a larger plant or cuttings / seedlings? All important things to consider when choosing the perfect lamp. As a personal recommendation, if your budget allows you, I would choose a slightly more expensive bulb where a longer life is expected & one that I know is made from recycled materials. I notice in practically all the plants that get the 'help' of a grow light, that they benefit from it. Many of them are stimulated in growth, and often they start to grow straighter (toward the light). Except for the doubtful case of the ALiExpress lamp, I dare say that a grow light is a great added value for your plant that is not able to get enough daylight (just). I hope I have been able to inform you a bit and that most of your questions regarding these products have been answered. If not? Feel free to ask them! I am happy to help where possible. Disclaimer: The images in this blog were used from the internet and/or named websites. The videos are the property of ©️Greenplantmom. I am speaking from my own experience, if you have a different experience with any of these products please feel free to leave a comment. Did you like it? Please leave a 👍 below & follow my plant adventures on Instagram!
0 Kommentare
The original blog post was released on 21/03/ 2020 and can be read here in Dutch. The translation was made with the help of DeepL on 25/01/2021
The lamp has a colored led light, this to obtain the best care for your plant. I also find it very handy that this lamp has a built-in timer, you just plug it in and the lamp turns on. It is a cycle of 15 hours of light and 9 hours of rest, the lamp goes on and off gradually to mimic a sunrise/sunset. The light is slightly more 'purple' in color than our daytime lighting but personally I don't find it 'purple enough' to be perceived as disturbing. So you can say that I am a fan. I have been able to compare the lamp to other brands I have purchased before and if I had to choose again I would go for this one. My other lamps don't have a timer so I put in a socket timer so I don't have to switch them on and off daily. I also find the Leaf Light Care quite attractive in design. It is a subtle lamp that does not immediately attract your attention when you walk into the room. The lamp is available in two colors, so you can decide what best suits your interior.
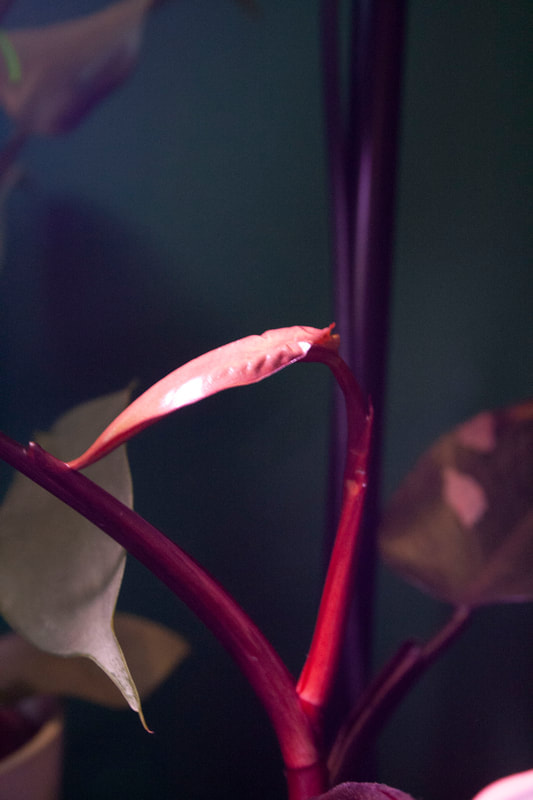
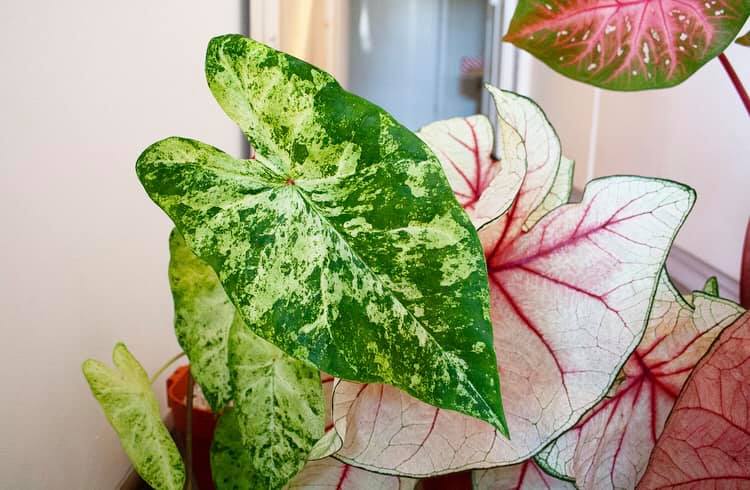
Woohhoooo spring is coming, and that makes me so happy! Both the plants and myself could use some sunlight. I want to talk about the 'caladium' today, last year I wrote a post about these plants (you can read it here: Plant Care: caladium )
Anyway, now (January-February) is really the time to pre-order your tubers. So you have a large choice to choose from, last year I was a bit too late. You can also wait until complete plants are for sale in the (web) shops and garden centers. Therefore I am already sharing the shops I bought from: (click on the logo to go to the webshop)
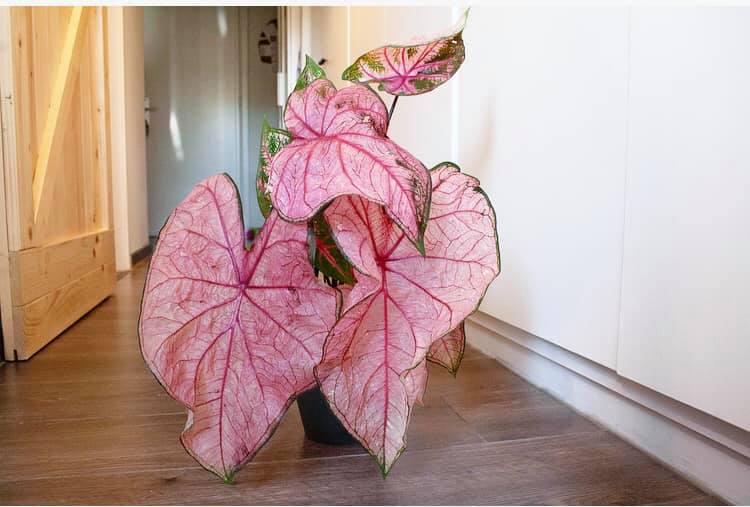
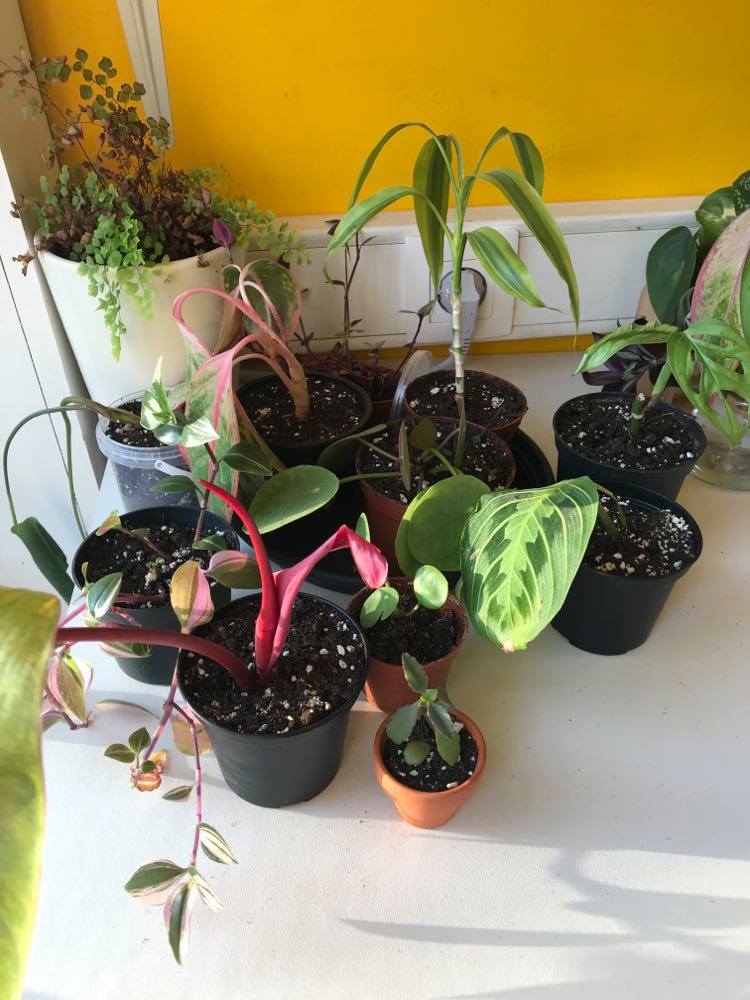
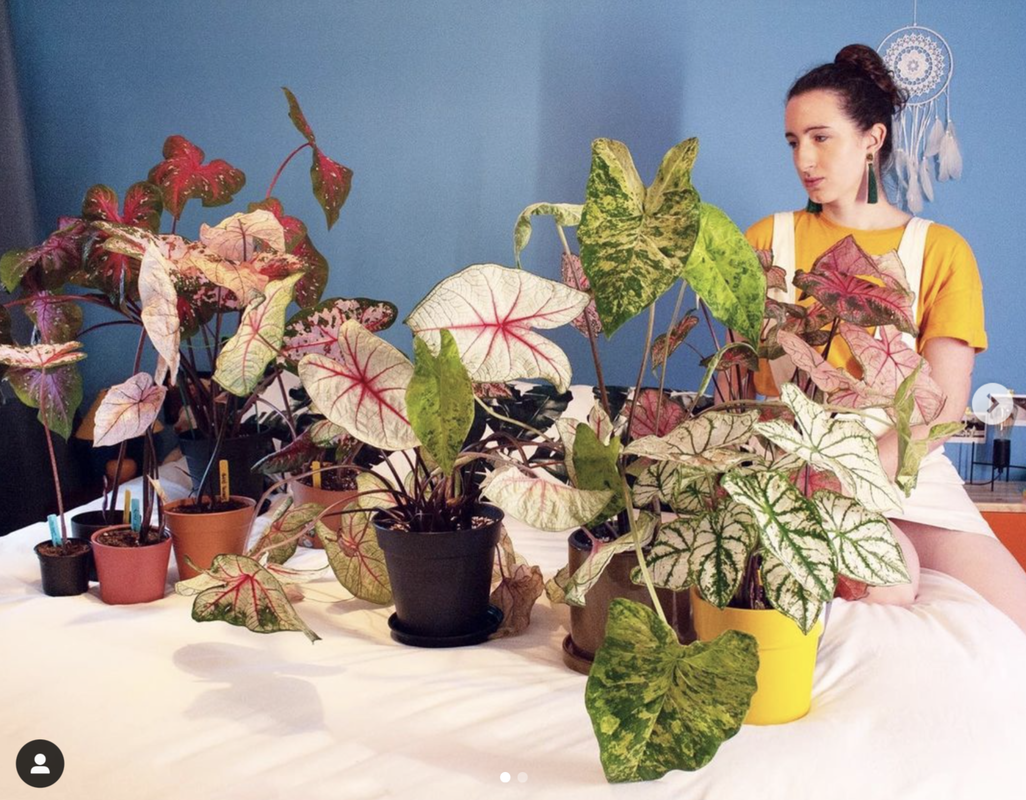 And so I ended the summer with quite a collection after all.
I dare admit the collection is getting out of hand, but there are SO MANY varieties. Really this is just a kernel of all the options out there! I can really recommend trying one out. You have to be patient in the beginning but once they start growing they go like a rocket! Furthermore, they are not difficult to care for, I'm going to clear my head and empty the window sill so I'll be ready in March! Greetings! & I love to see your photos on Instagram with the #greenplantmom. Did you like it? Please leave a 👍 below & follow my plant adventures on Instagram! Did you buy your tubers/plants elsewhere? Satisfied with your purchase, let me know :)
This post was not sponsored in any way and was written out of my own experience and interest. The original blog post was released on 29/05/ 2020 and can be read here in Dutch. The translation was made with the help of DeepL on 25/01/2021 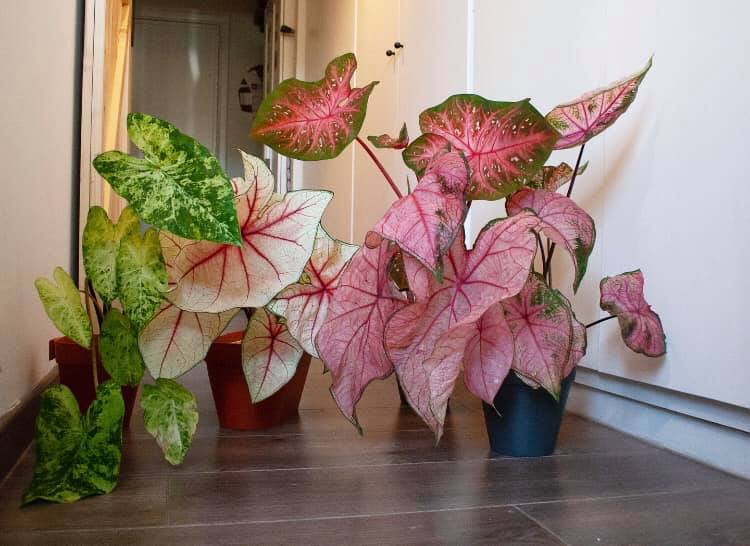 The caladium, a beautiful plant that is becoming more and more popular. You can find it in some garden centers or plant stores as a plant or as a tuber. This tuberous plant is native to the tropical regions of America and they are loved for their fantastically beautiful leaves. In the fall, the leaves dry up and fall off. You can save the tuber for the following year. Keep the soil slightly moist during the growth period and ensure good humidity. From the end of the summer give a little less water to let the leaves die. The caladium likes a light place, be careful with direct sunlight this can burn the leaves. In summer you may give 1x / 2-3 weeks a diluted portion of nutrition. Let the root tubers sprout again in March in a pot with soil and peat (or perlite). Stick the rhizomes 2 cm deep in a mixture of equal parts soil and peat. Water more as the leaves grow. Store the root tubers in dry peat in winter at a temperature of 13-16 degrees.
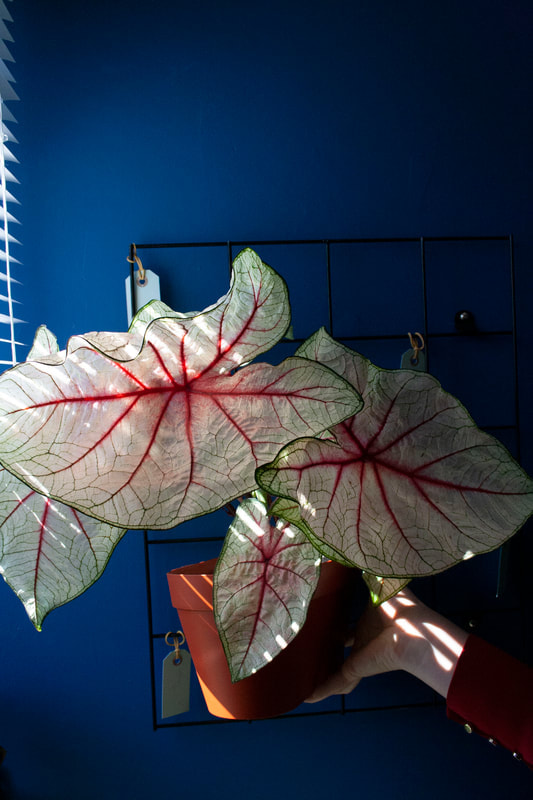
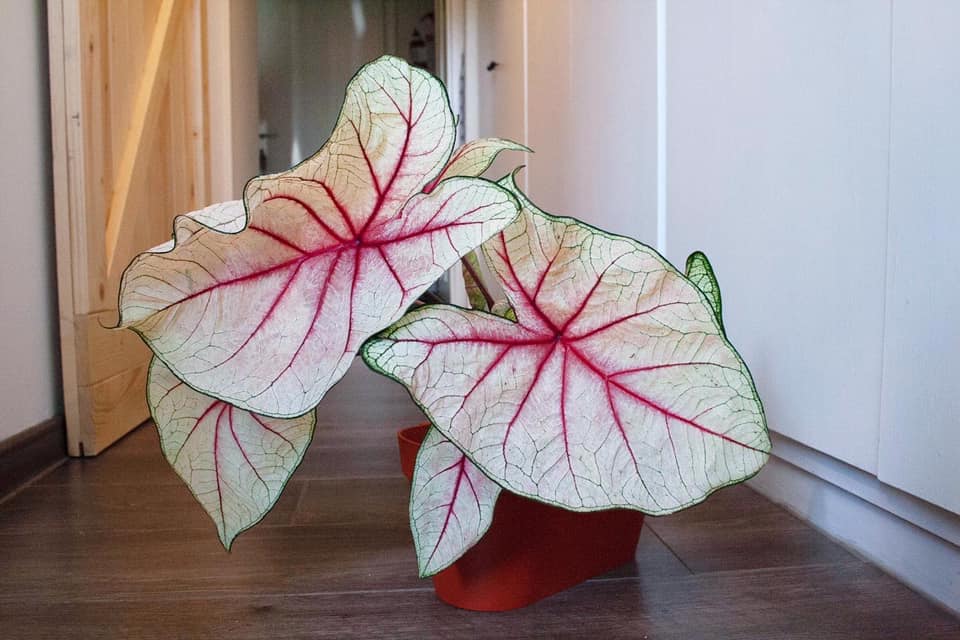
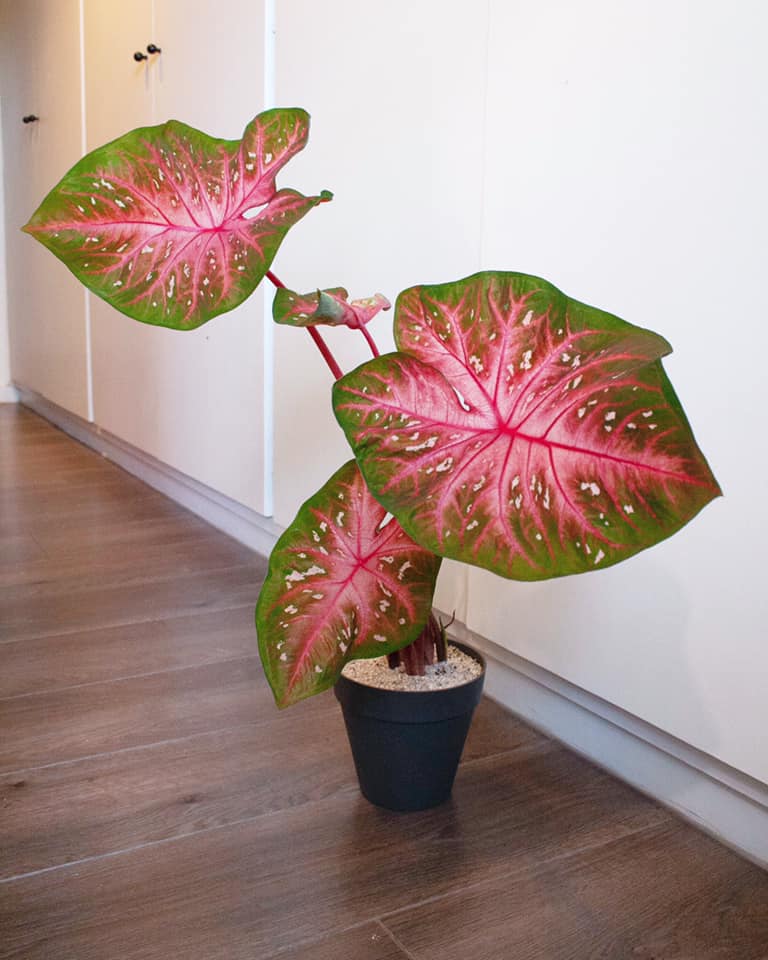
I find the plant easier to keep than I thought beforehand. They grow fast towards the light so turning the plant a quarter turn daily can prevent them from growing all slanted like mine are doing now. It's the first year I've had them myself & so this fall will be the first time I've had to store them to last the winter. The caldiums also make flowers, it is recommended to cut these away and save the energy for making the beautiful leaves. If you want to see more caladiums, be sure to check out #Caladium #Caladiumlovers A lot of info I found in this book: 1001 Houseplants. There rest of info on the site where I ordered 3 bulbs from: Bulbs&leafs. And highly recommended is also the video of mama botanica.
Did you like it? Please leave a 👍 below & follow my plant adventures on Instagram!
This blog was written 25/03/2020 and published translated on 23/01/2021 Translated with the help of Deeply, read the original blog here: Hup je schaar er in! Stek je kamerplant. Houseplant cuttings, a much discussed topic. In almost every book that has something to do with plants there is a chapter about propagating your plants, also online you are flooded with tips & tricks. So what I'm going to write below is probably not new, but it is my experience! I would like to talk about what ways there are to take cuttings and how to do this as successfully as possible. So here I go!
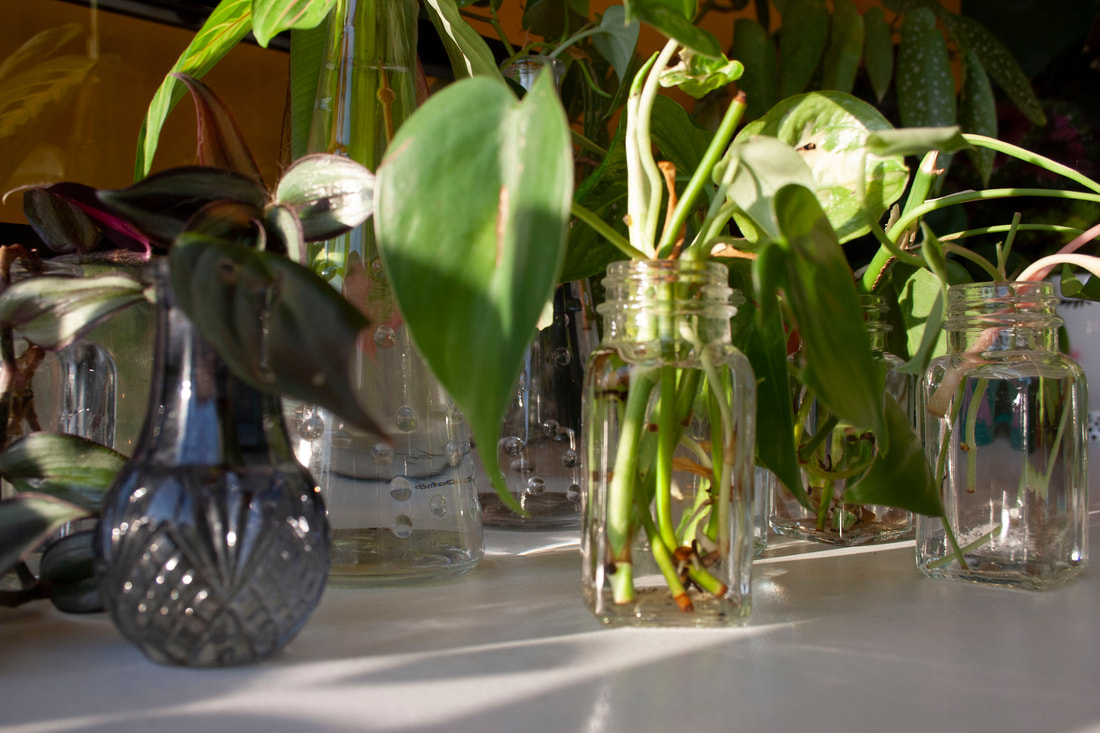
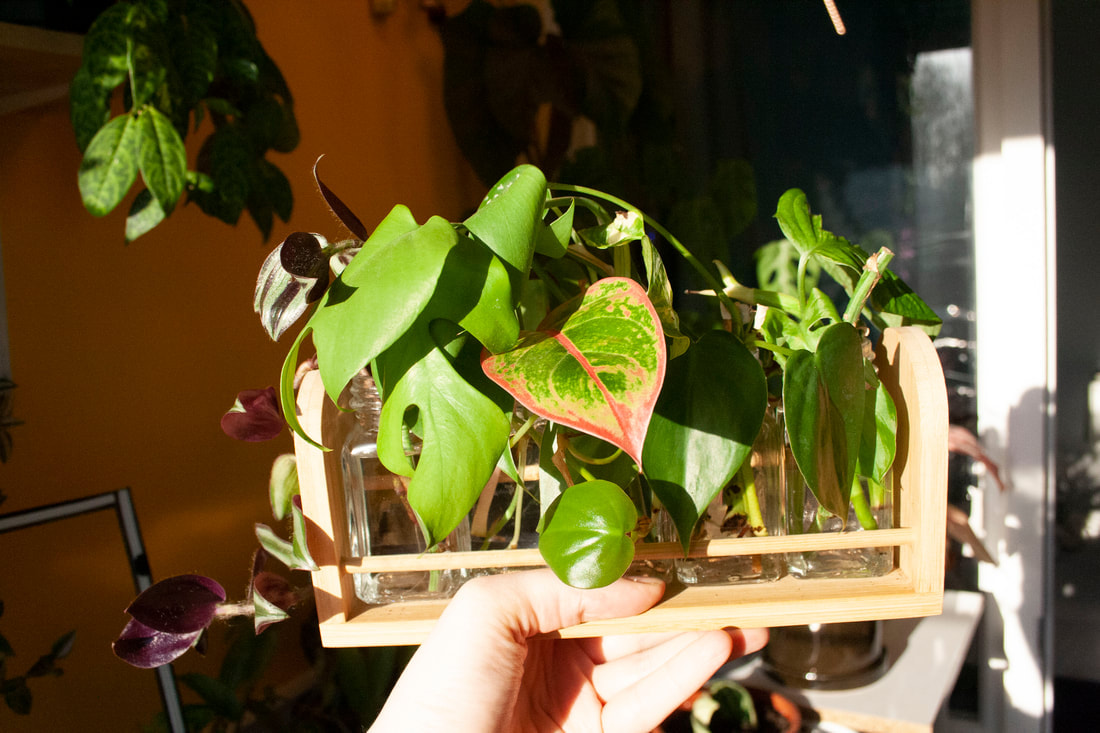
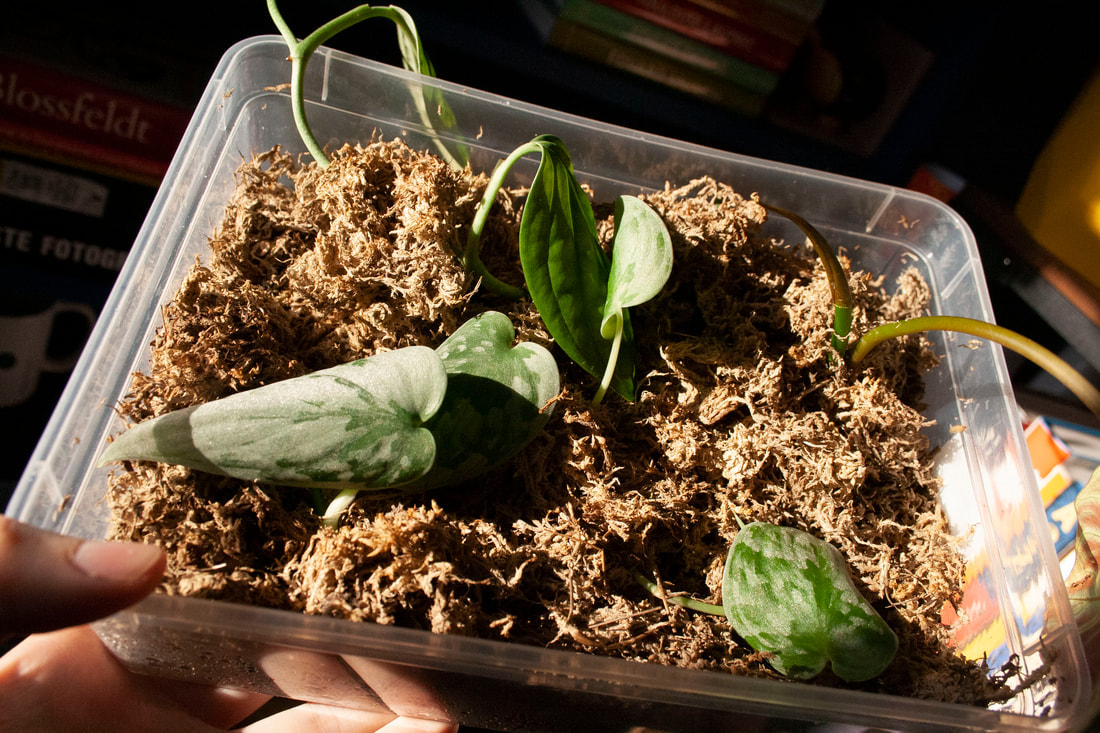
Cut or trim your cutting with a clean and sharp knife (or pruning shears) just above an node, where a leaf or bud begins. Remove the bottom leaves from your stem, that is where the roots will form. Clean material is important to leave a clean wound. ROOTING You can root your cutting in water, soil or (sphagnum) Moss. Many cuttings can easily be rooted in a glass of water. Put your cutting in a glass or vase of water and check regularly to see if there is enough water left. Smaller vases are useful to put your cuttings in, no vases in the house? A glass, bowl or empty jar will also work perfectly! To help, you can pull a piece of plastic foil over your glass and make small holes in it through which you put your cutting.
I am all for reusing stuff, so also for cuttings everything that qualifies is put to use! At the moment I have a spice rack in use as a cutting rack, handy with this is that the bottles are a little firmer when our jungle tiger (our cat) comes to meddle again. A piece of charcoal at the bottom of your glass would help keep your water clean, a tip I'm definitely going to try out!
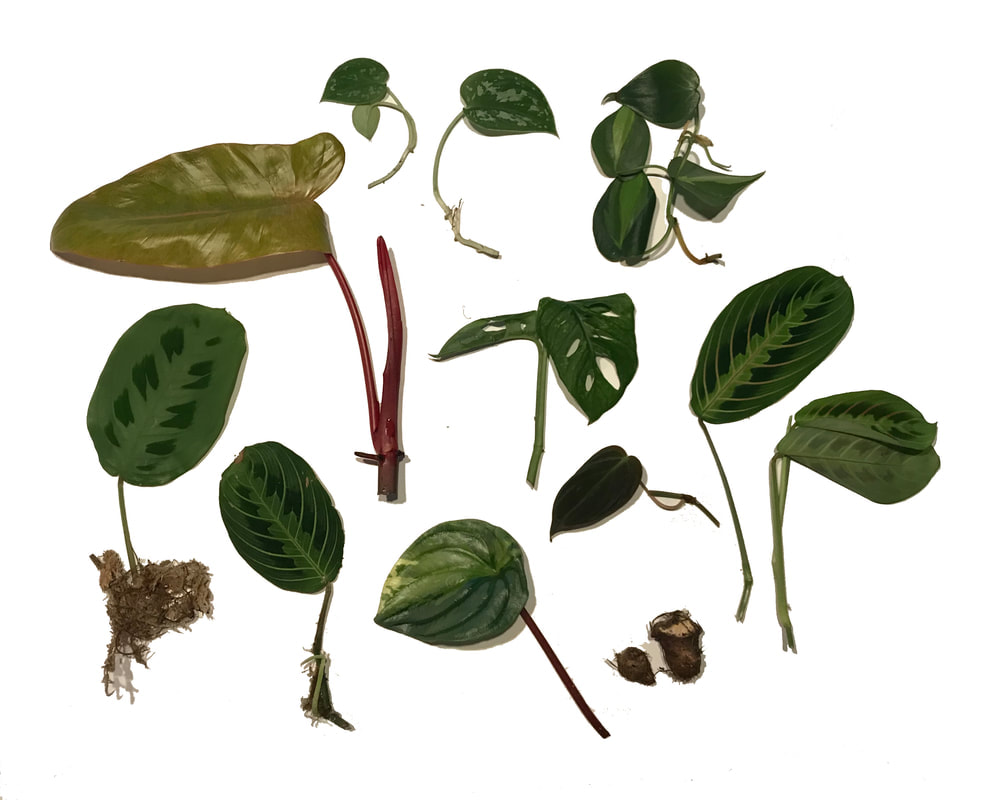
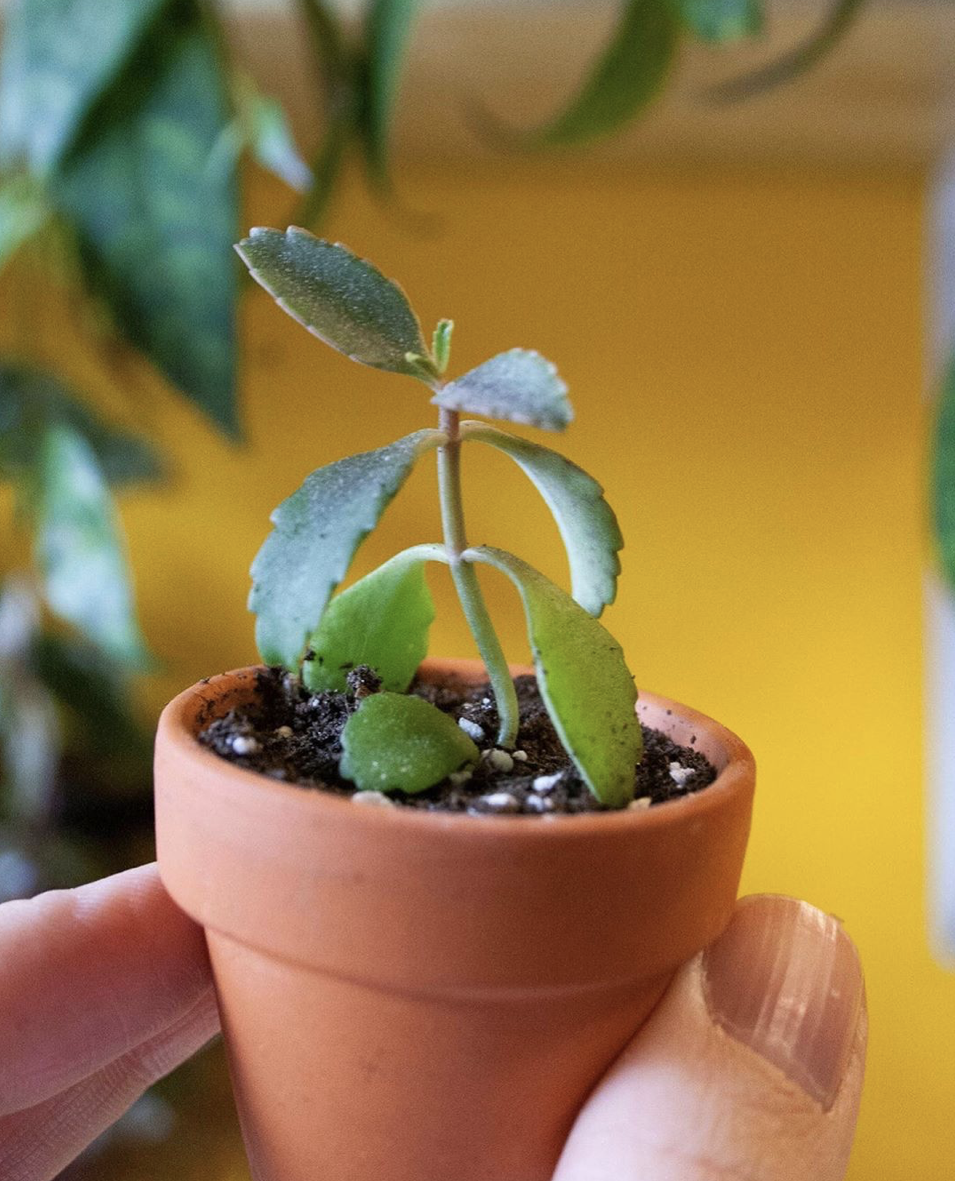
Cuttings with large leaves often evaporate water faster, to slow down this process you can (partially) roll up the large leaves. With many tropical plants it happens that they evaporate a lot of water even before they have been able to form roots. To prevent dehydration you can put them in a greenhouse or cover them, but make sure that the plastic is not touching the cutting. Put your cuttings in a warm light place and do not forget to ventilate them in time to prevent mold. 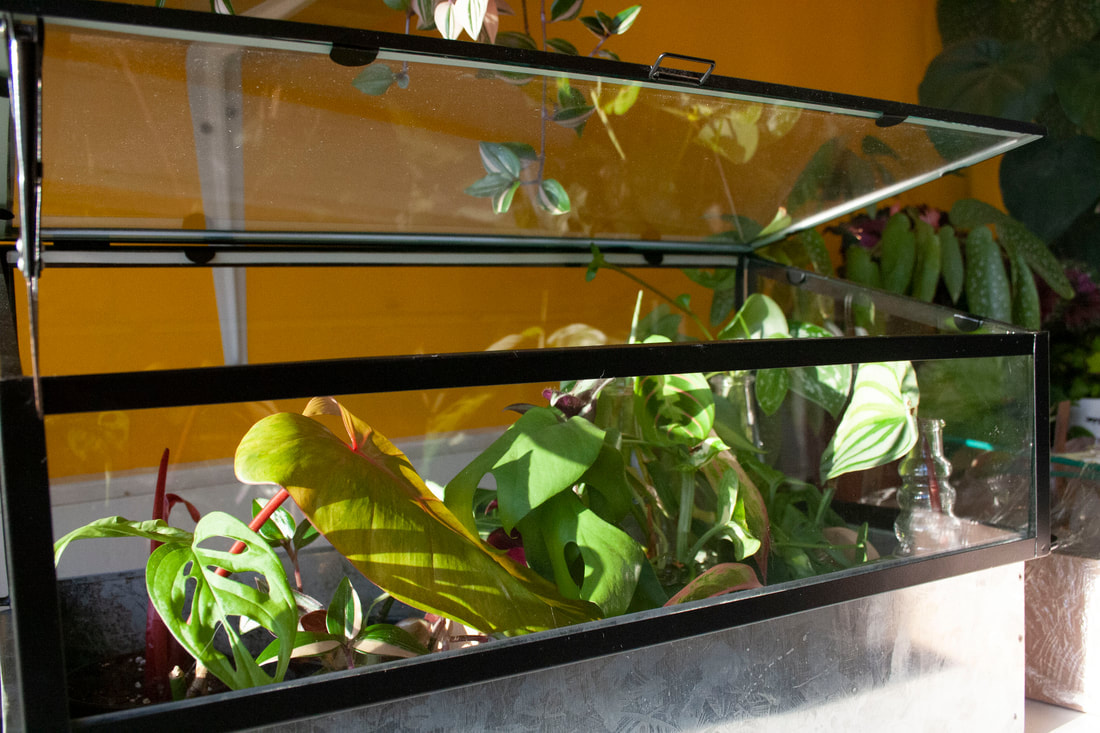 Some plants can be propagated by leaf cuttings, for example some begonias or the peperomia. Currently I am trying out both watercuts and leaf cuttings from the peperomia watermelon, very nice experiment! You can take cuttings with pieces of a leaf or with a complete leaf. Cuttings with a piece of leaf work well with fleshy plants like succulents or the sanseveria. Take a healthy, fully grown leaf from your plant with petiole. Cut your leaf into strips across the width and insert them into the soil with the side of the leaf vein. To make a leaf cutting from a whole leaf take a healthy leaf with part of the stem attached. You can also make small incisions across the width of your leaf, place the leaf with the incisions down on your soil. 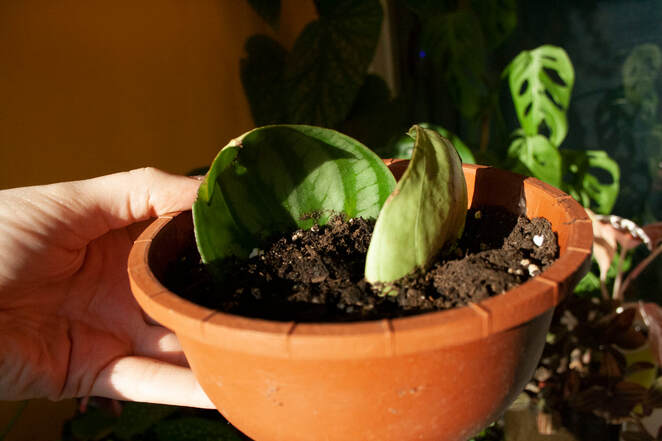 TEARING Not all plants can be propagated in the above ways. I think for example of the calathea, to propagate plants like this one take them out of their pot and tear the root ball into 2 or more parts & give the parts their own pot afterwards. The tearing can be done by gently pulling the roots apart or cutting them with a clean knife, trying to damage the roots as little as possible. Make sure that each part has enough roots when you repot it. PARTS Some plants also make their own 'babies', they grow little plants next to themselves. You can split these from each other by cutting them off and letting them root or tearing them from the root ball. The most common example is the Pilea (Pancake plant) these are known to multiply themselves many times.
Of course you can also grow your plant from seeds and pits, you can buy these but also just get them from your own kitchen! I'd like to talk to you about this later, at the moment I'm germinating some seeds and pits for the vegetable garden & some flowers!
Further propagation can also be done by means of a piece of stem, a piece of rhizome, by marcetting or laying off. I won't go into that now, I don't have any experience with it myself. Would you have questions about this I will certainly help you on your way with the info I have acquired about it. I hope I have been able to inspire/inform you! Feel free to share your cutting experiments with the #greenplantmom! I'm curious! The original post was published on 24/11/2020 and can be read here. It was translated with help from DeepL on 30/02/2021 Yesterday there was a very nice package at the door! Mother.life released a smaller copy of the Plantspectrum. In a previous blog post last summer I talked to you about different grow lights, including the Plantspectrum32. This plant spectrum can be seen as the little brother of the previous model. Super handy for the smaller plant corners or on top of your shelves or furniture. I leave my lamps on for 15 hours a day so that the plants have enough time to rest, of course it also depends on which plants you put under/next to them. Be careful not to put the lamp too close, too much light can burn the leaves. These lamps can both handle a bit of humidity, which is a good thing between the plants ;) In the video you can see that the lamp is ready to use in 2min and that you can start using it right away! Green greetings 🌲 Did you like it? Please leave a 👍 below & follow my plant adventures on Instagram! *This post contains sponsored products.  Every plant is more beautiful in the right pot
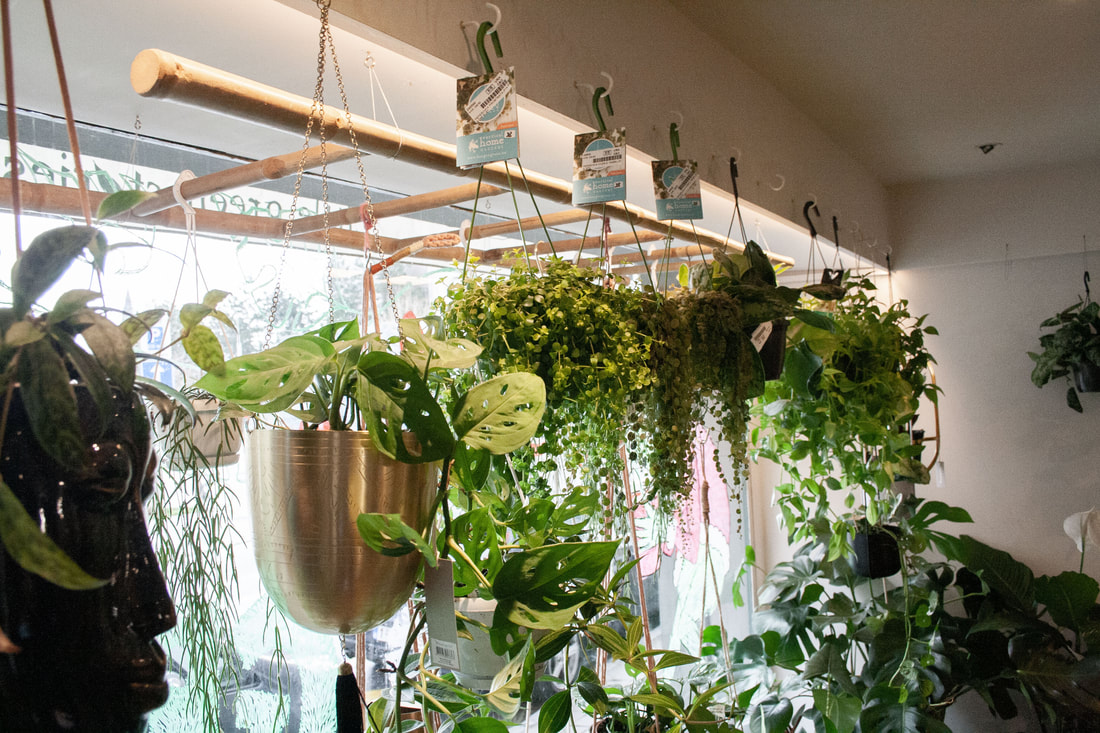 But where did Nele's passion for green come from? It started long before it became such a hype! Every plant becomes (even) more beautiful in the right pot. Nele started with her own houseplants and was constantly looking for the best pots, the range in shops and garden centers did not really meet what she was looking for. Or you finally find that one pot and then you come home and it turns out that your plant doesn't fit in it, Nele was looking for 1 place where everything could be found together. Beautiful pots and plants! In the meantime, Nele also guides a course at syntra in which she teaches people to take care of their plants.
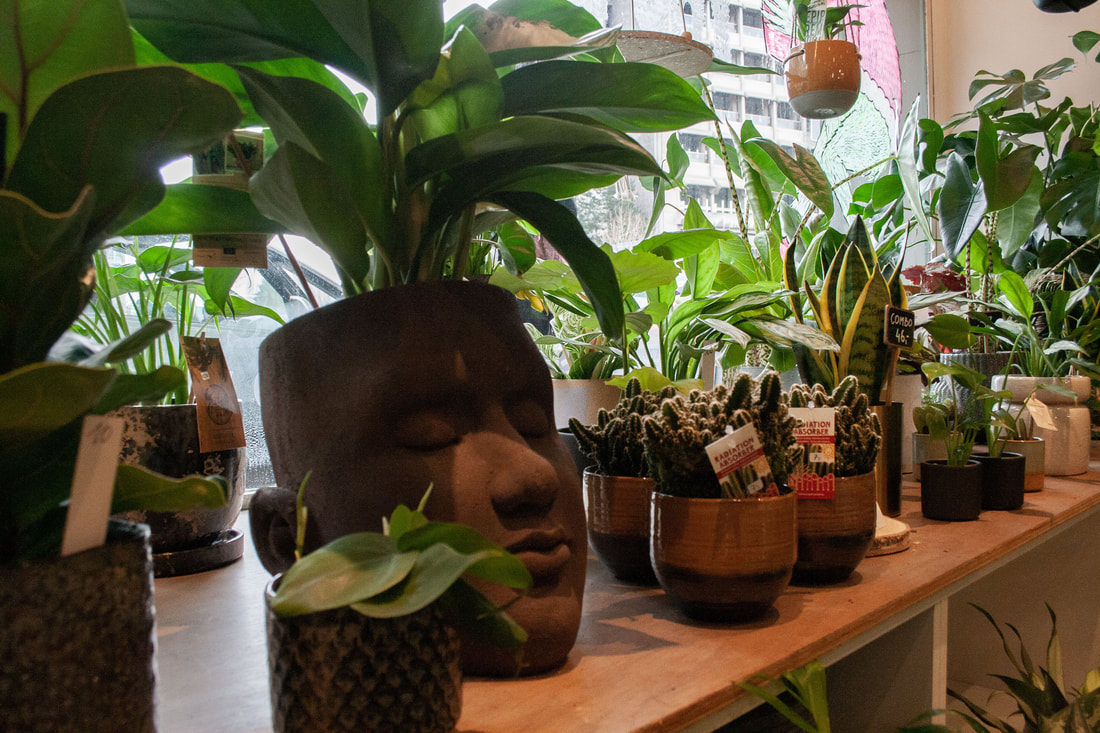 Throughout the 4 years as owner of this shop, she has seen a significant shift in interest and especially in the prices of plants. Despite the fact that prices (from the growers) are going up, Nele thinks it is very important to keep it accessible. She has a wide audience of both working people and students & she wants to keep prices accessible to everyone. Now and then there is sometimes a more special one, with a corresponding price tag. For example, last September she gave away no less than 10 monster variegata! So that even the people who couldn't buy this plant had a chance to win it (how cool is that ?!) The challenge is to find a great plant that is affordable! Nele is satisfied that people can come and buy a cute & affordable plant. The best thing about the whole job is that you have to enjoy it, she has done a number of other jobs for this & the golden key is having fun being there every day. People are happy when they go outside with a plant. Plants make people happy. More Little green stories? Website: https://littlegreenstories.be Instagram: https://www.instagram.com/littlegreenstories/ Or visit them: Little green stories Sint-Jacobsnieuwstraat 82, 9000 Gent I would like to thank Nele for the friendly conversation and for allowing me to take some pictures in the super cozy shop! So this was officially the very first “shop of the month”. I hope you liked it and stick around for a new shop next month! Please leave a "LIKE" if you liked reading this :) Greetings Kelly - greenplantmom Shop visited & photos taken on January 7, 2021.
Published January 13  When your plant needs it!
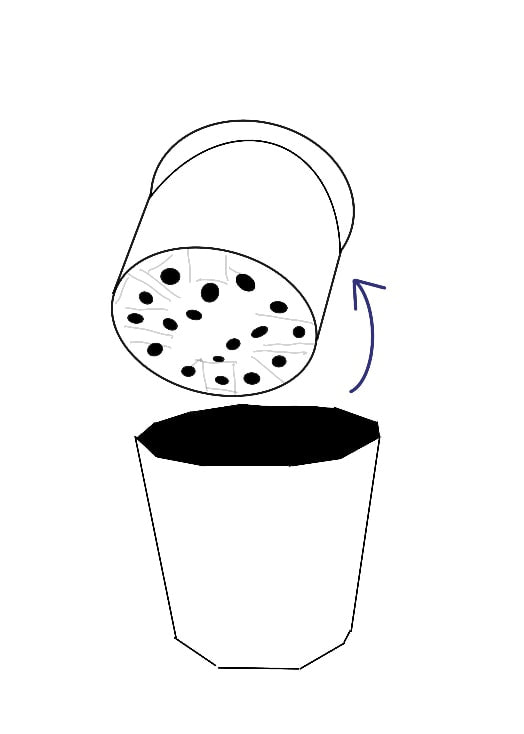
It is indeed recommended that you wait until spring to repot your plants & if your plant can wait then I prefer to do so myself. Why is spring better? Plants will produce more energy in the spring to grow by the time summer arrives, if you damage your plant while repotting it will recover more easily in the spring + new soil (which also means new nutrition*) is always useful if you want to make a growth spurt. I repot a plant shortly after purchase to make sure no bugs get into the soil and to get a good idea of the plant's roots. Beware! I do not do this with every plant, some sellers advised you to wait a certain period with repotting and I have learned that sometimes you just have to listen ;) I do try to separate the new plant from my collection for a while to make sure there are no unwanted visitors on it. No place you say? I know that! When it comes to relatively small plants, a greenhouse or freezer bag can often be the solution (don't forget to air it out ;) ). When to repot?
Personally I think it's okay to repot in the other seasons, if your plant meets the above symptoms it probably needs it. Do it with all the care and love and you will be fine. Most plants should be repotted every 1.5 to 2 years. With the exception of slow growing plants such as cacti or succulents. *Read the packaging of your soil to find out how long this nutrition will last. This is different from brand to brand. Just repotted your plant? Do not add extra nutrition, too much can damage your plant. Translated with www.DeepL.com/Translator (free version)
Pot without drainage holes
TerracottaI'm not a big fan of it myself but I do find it very beautiful. Before you plant your plant directly in a terracotta pot, it's best to put it under water (the pot of course, not the plant). The terracotta will fill up with water and will not steal the moisture from your soil. Plants in terracotta can often need watering again more quickly because the pot itself absorbs water.
|
AuthorCrazy plant lady who likes to inspire others! Everything I write here comes from my own experience, knowledge that I gained by reading books and on the internet. If I would literally copy someone's info, I would do my best to link it of course! Do you spot typos or do you have other concerns, let me know! Have fun reading! I've only just started writing English blogs since January 2021, that's why there are many Dutch blogs and not so many English ones.
I use DeepL to help me translate. ARCHIVES
Maart 2022
|


 RSS-feed
