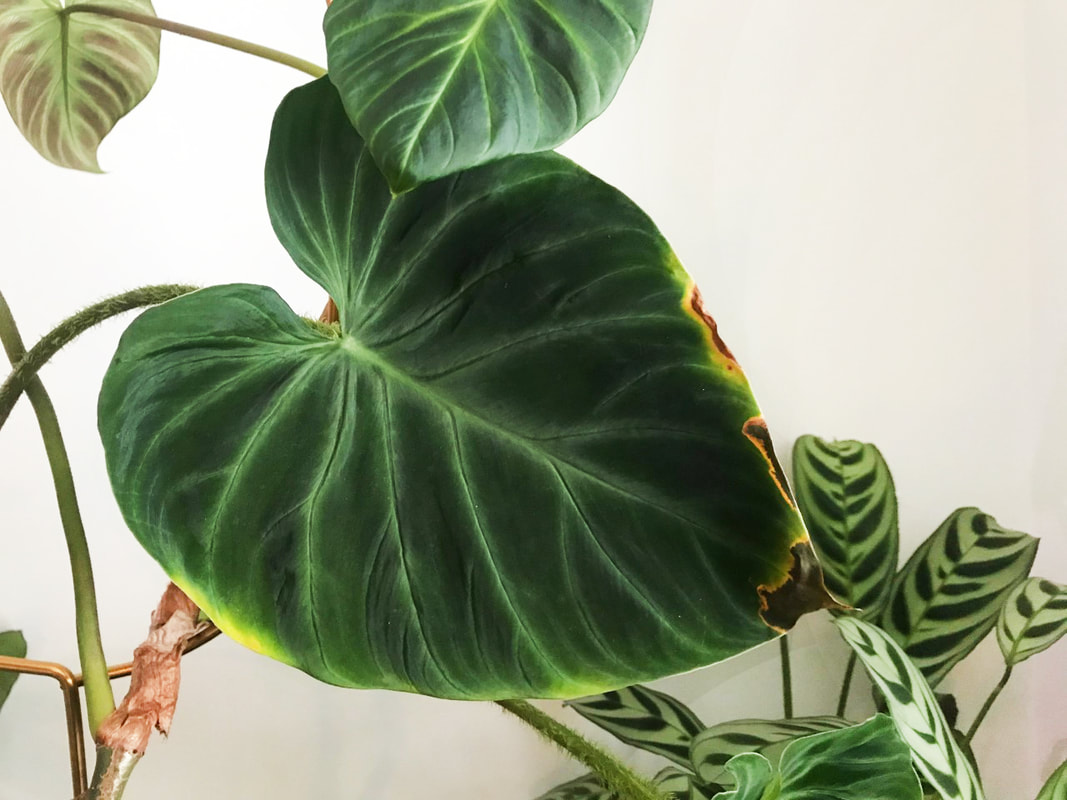
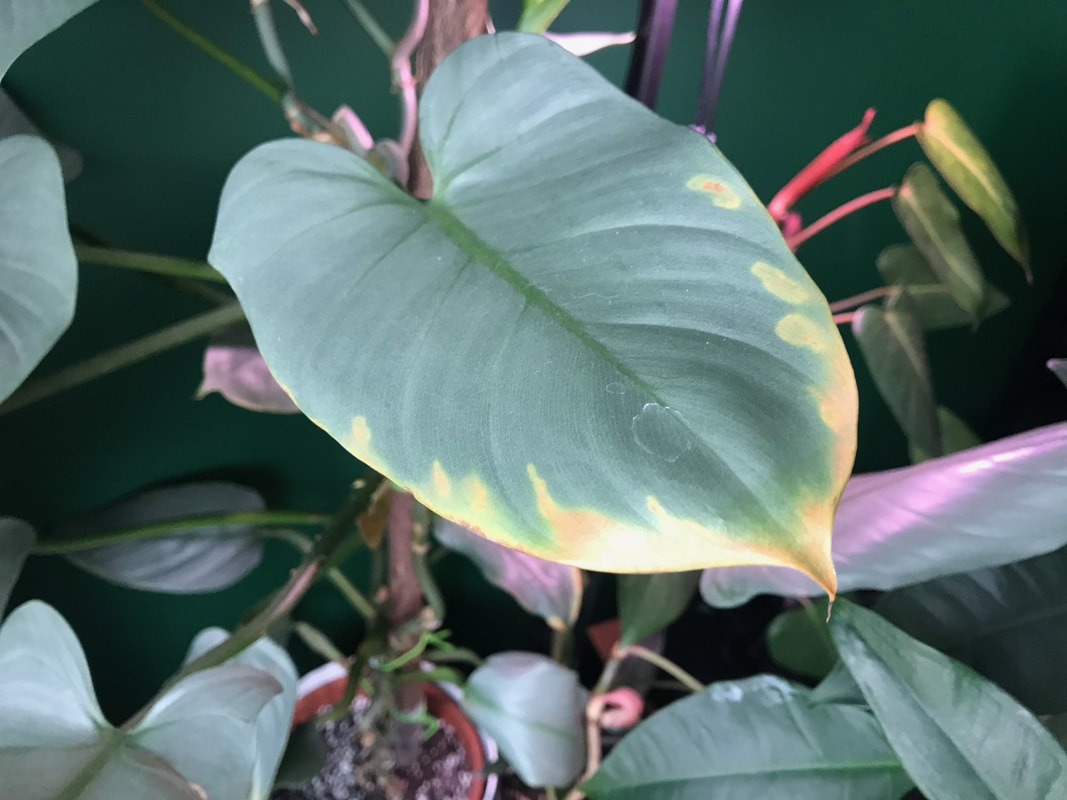
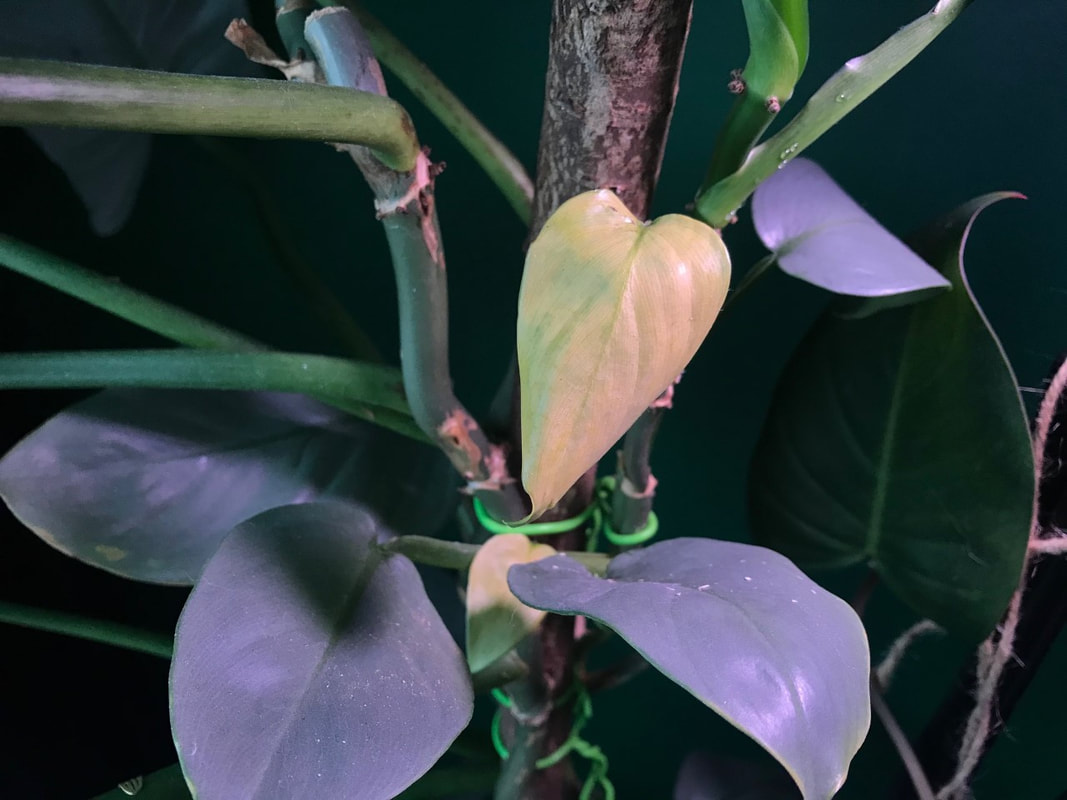
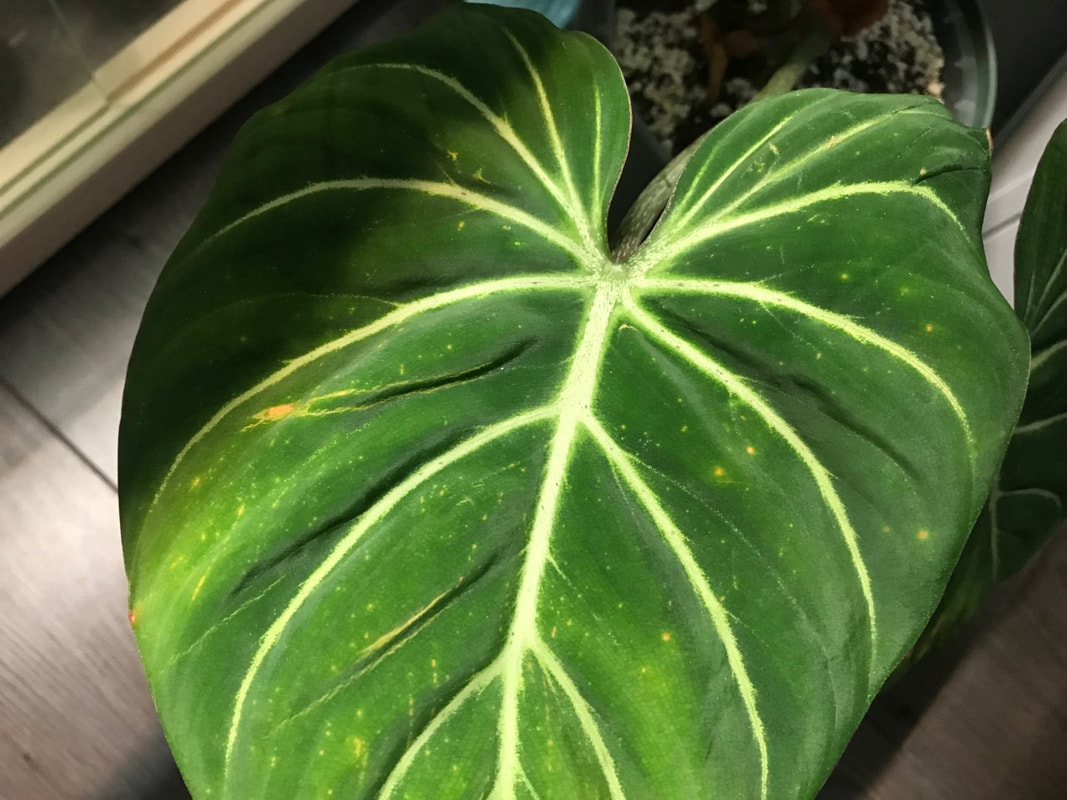
 The occasional leaf that discolors and falls off is the most normal thing in the world, so there is absolutely no need to worry about it. It often happens that a plant lets older (lower) leaves fall off to use the energy to grow new leaves at the top. You can let the leaf hang down and let it dry out, so that the plant can draw some nutrients from it OR you choose to cut the leaf away. You do this with a pruning scissors or knife usually as close to the stem as possible, without damaging the stem. When your plant starts to discolour a lot, there is a chance that something is wrong and it is best to go and investigate. Spots and edges
Fading or discoloration
mosaic virusWhen your leaves show a mosaic pattern & deformation of the leaves, it's quite possible that your plant is really sick. There is little you can do about it except remove the leaves, clean your knife or scissors well after use so you don't pass the virus on to another plant. Is your plant almost taken over by the diseased leaves? Then it's time to say goodbye and you better get rid of it before it infects other plants. Humidity
Bugs
Yellow leaves do not recover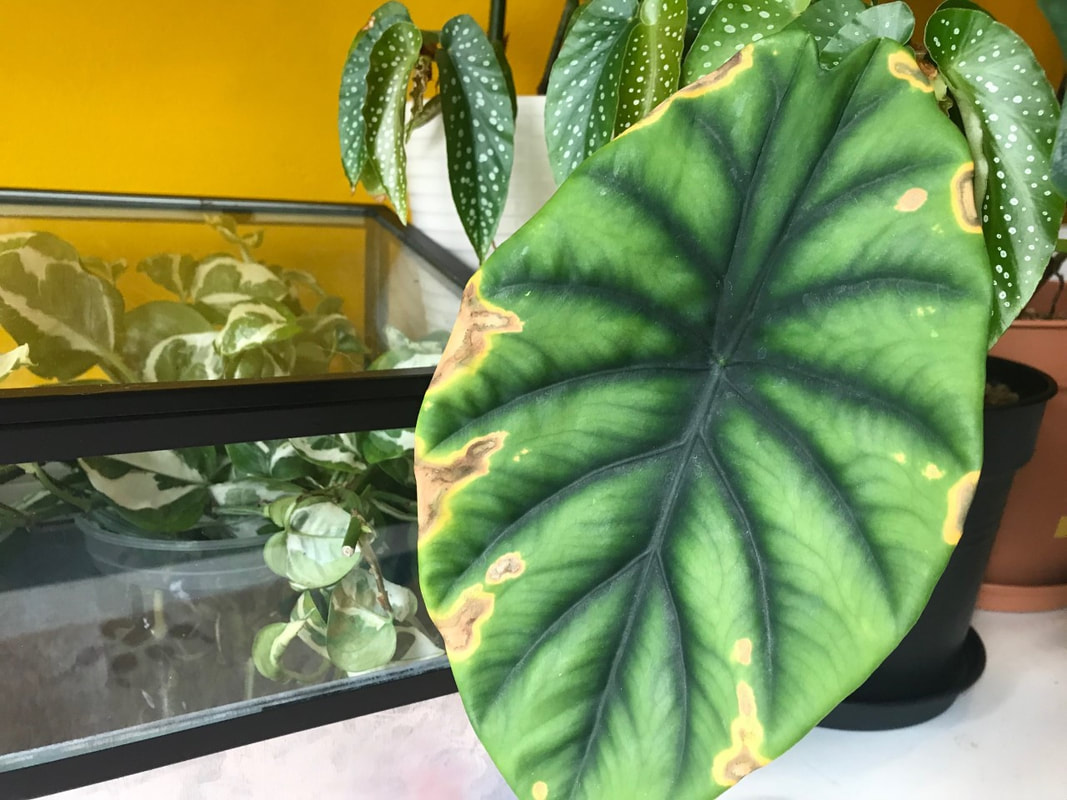 An ugly leaf won't get back beautiful, which is why it's best to remove it, the plant no longer benefits from it & it doesn't look super fresh. A few other causes can be draughts, severe temperature changes, or an overdose of nutrition. Too much nutrition damages the roots which can cause the plant to be unable to maintain its leaves. One leaf can do no harm, but more leaves in a short period of time will set off an alarm bell. Did you like it? Please leave a 👍 below & follow my plant adventures on Instagram!
0 Comments

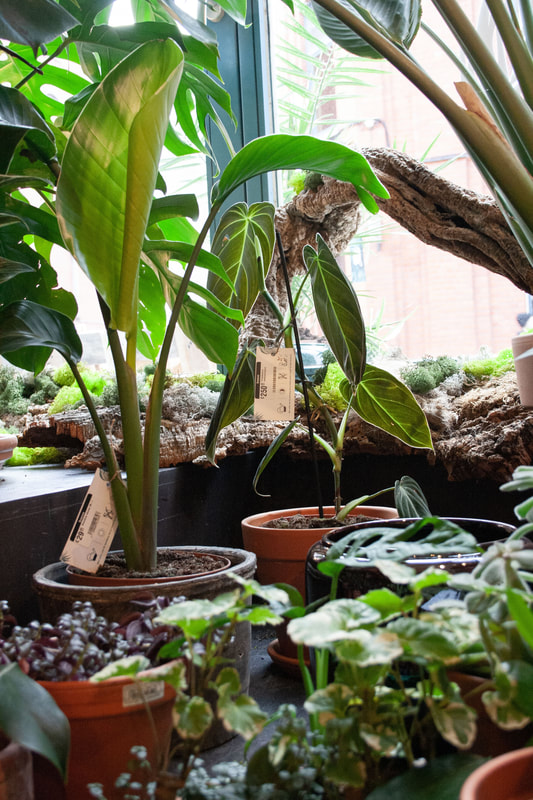
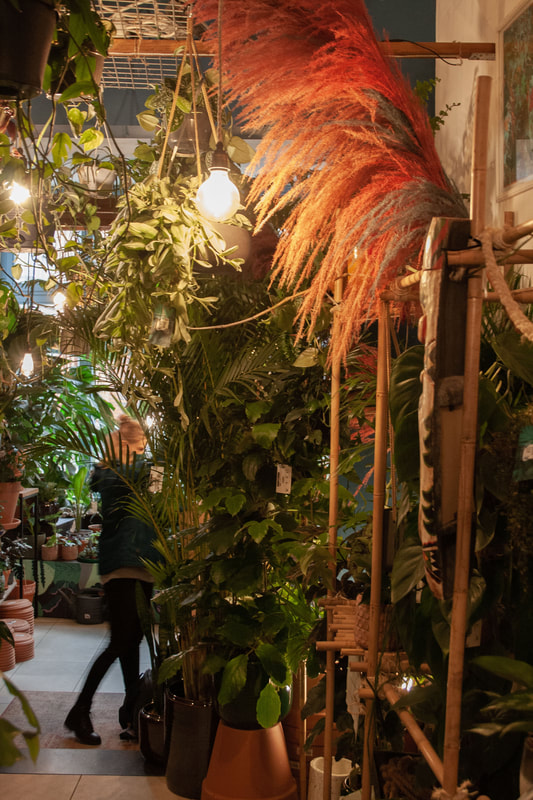
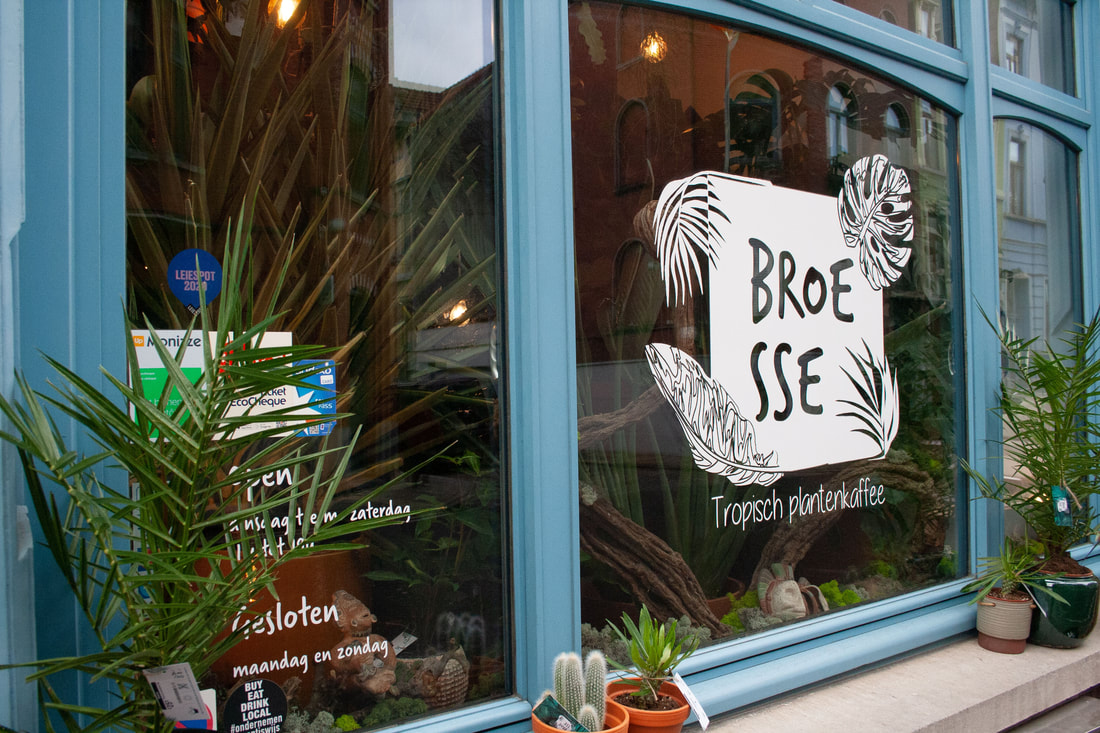
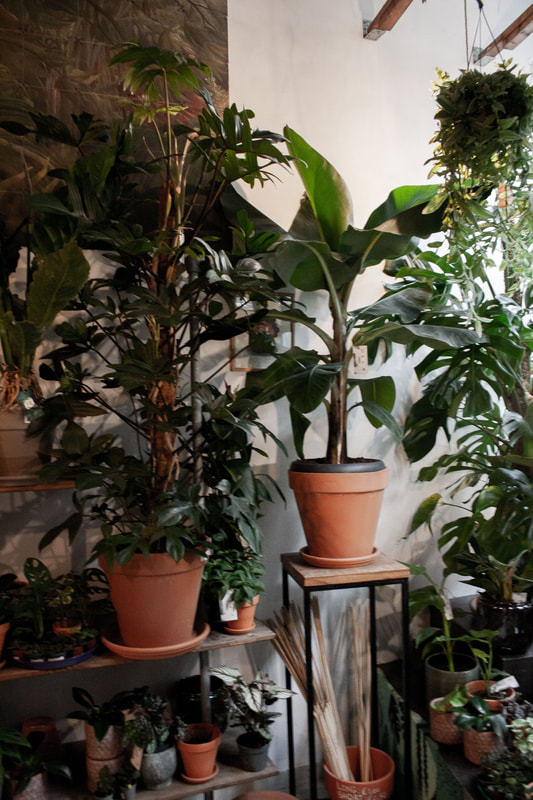
More Broesse? Website: https://broesse.be Instagram: https://www.instagram.com/broesse/ Or visit them: Baudelostraat 13, 9000 Gent I would like to thank Brent for the friendly conversation and for allowing me to take some pictures in the jungle shop! I hope you liked it and stick around for a new shop next month! Did you like it? Please leave a 👍 below & follow my plant adventures on Instagram! Shop visited & photos taken on January 7, 2021.
Published April 13, 2021 I've written about grow lights before on my blog and my houseplant account, but I also use grow lights for growing out seeds or tubers, which are planted out in the (vegetable) garden later in the season. I mainly use grow lights out of lack of windowsill space, they give me the opportunity to grow out plants in places with little to no natural light. Another advantage is that the plants grow up much straighter, although it never hurts to turn them in time. I have a number of types/brands of lamps at home, which I already talked about in one of my very first articles, which you can read here. In this article I want to talk specifically about the lamps I use for the seedlings. 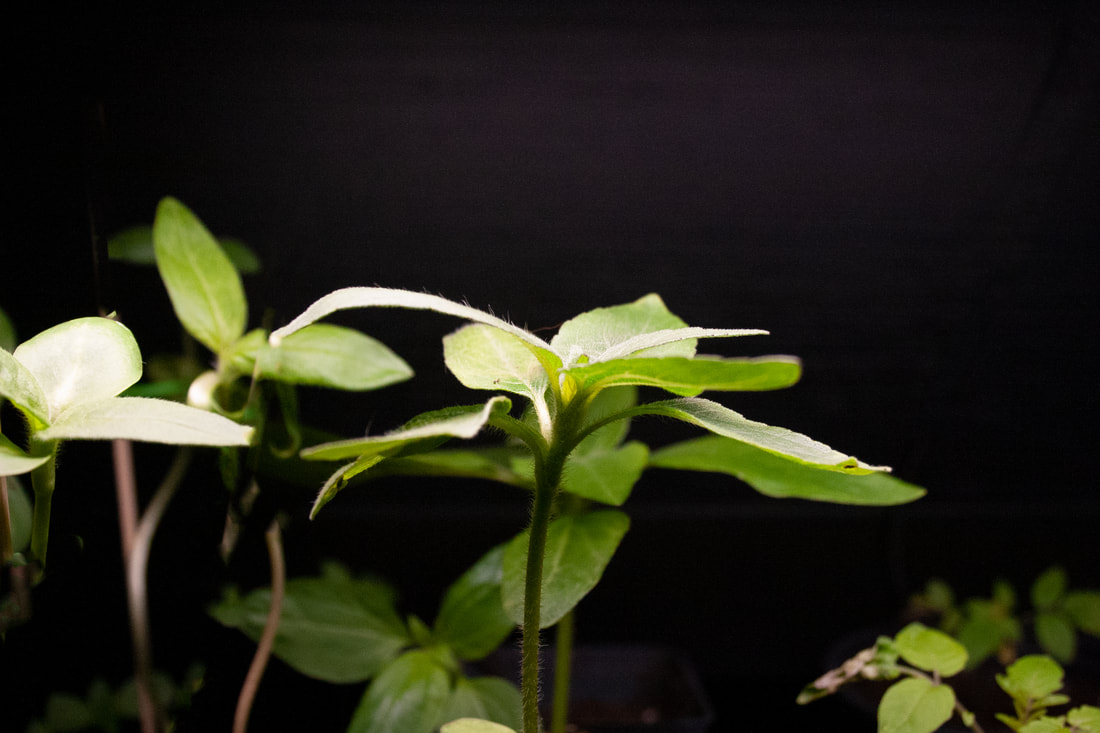 STARTING AT THE BEGINNING - WHY ARE PLANTS GREEN?A light source such as the sun or a lamp emits wavelengths, when such a beam hits an object it is absorbed or reflected. White reflects just about all colors of light while black absorbs them. So when we see an object as green, it means that all light waves are absorbed except the green ones. So for plants the light waves that disappear into the leaf are important. IMPORTANCE OF LIGHT FOR PLANTSSmall piece of repetition from a previous article but useful to know, plants do not use light like us to perceive something like we do as humans. They rather use it as a kind of battery, they get energy from it. You can compare it to a solar panel. Our plants look mostly green, which means that all the light spectrums except the green ones are absorbed. If the plant absorbed all colors in the spectrum it would look black. Why our plants absorb red and blue better is not really known, one explanation is that these light waves are better in the process of turning water and carbon dioxide into glucose and oxygen. You can read more about light here. WHICH GROW LIGHTS DO I HAVE IN USEFor the seedlings last year I mainly used the Light garden from Elho , it is now occupied with cuttings so this year the grow lights from Hema and the plantspectrum from Mother will do the job. 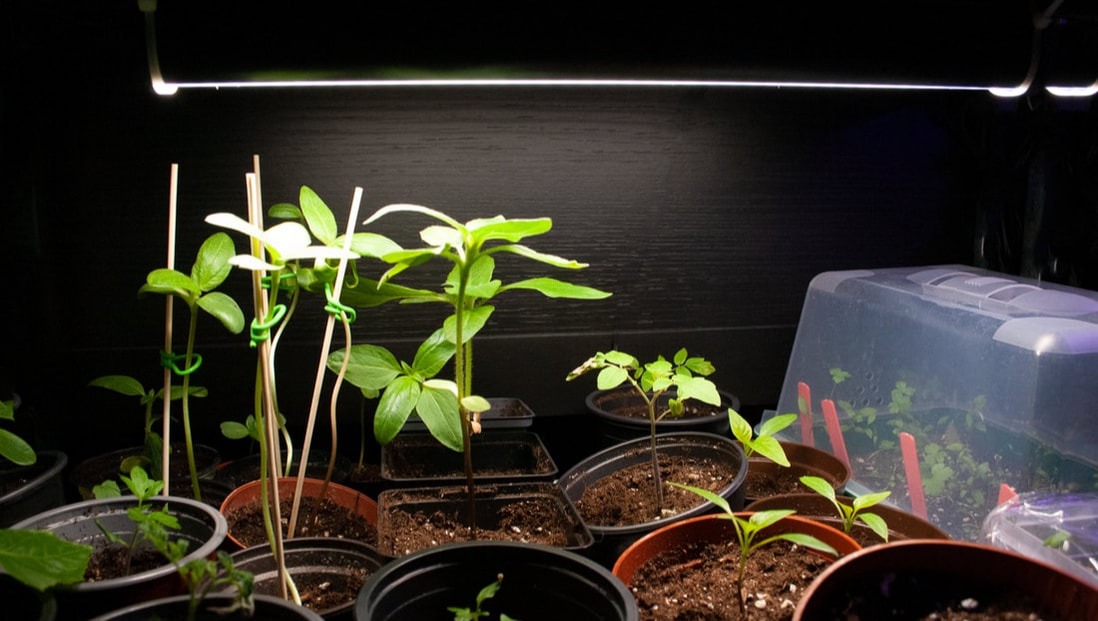 1) PLANTSPECTRUM The plantspectrum comes from Mother and comes in 2 sizes, the plantspectrum.32 and the plantspectrum.16. I'm not going to lie, currently these are truly my most favorite lamps in the house and I'll tell you why right away. The lamps are multi-functional in that they can be mounted and used both vertically and horizontally. For example, I use the plantspectrum.32 horizontally above my greenhouse with more special houseplants. The smaller model, the plantspectrum.16, I use in the winter months to light the houseplants and now that the sun is quietly doing that again, the lamps have been promoted to growing my seedlings for the (vegetable) garden. Also the color of the light makes me happy, it is a very bright white light. The light is too bright for cozy in your living room next to the TV, but it is ideal for working or even for taking pictures. Hahah as I said before, it is multifunctional ;) Now I have them horizontally in a rack with all the seedlings under it, the lamp has no timer but I easily solved that myself by putting a separate timer in the socket. Not unimportantly, it is more expensive to buy compared to the other models I mention here, but I personally think it is worth the money. The lamp is made of recycled aluminum and is designed to last a lifetime. The led strip has an expected life of 8 years and can easily be replaced yourself after that, allowing you to continue using the lamp itself. Apart from all this, I also find them handsome in design and therefore enjoy intigrating them into our interior. In addition to lamps, Mother also offers a rich assortment of microgreens, a must-try. It is even easier than vegetables for the garden, in less than 2 weeks you can already harvest and the vegetables are packed with vitamins. I definitely recommend you check out the site.  2) HEMA LAMP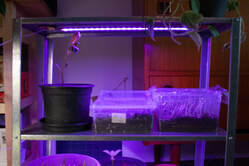 The second lamp I have in use is one from Hema, I just saw that they are currently unavailable on the website so I'm not sure if they are temporarily sold out or if they are just not coming back. They were originally made to fit one of their greenhouses, super handy but I just enjoyed using them in my own way. What I liked most about the lamps when I bought them last year was their purchase price (€10/st.) I did not have a large budget so this was ideal, they have served a few months and then I decided to put them away. Now I have them back in use but more because I have too many seedlings than what the current lamps could handle. The only reason I prefer not to have them (visibly) in use is their color, it's a bright purple light. If this doesn't bother you it's ideal of course, however that is not the case with mine. I regularly take the plants out to check them in daylight, the purple light sometimes gives the impression that my plant does not look good but it is (or vice versa). Although for this price you really can't complain! They are oblong lamps that I have attached to an iron rack by means of a magnet, they have a long cord and just like the previous lamp I put them in a timer so I don't have to worry about when they go on or off. 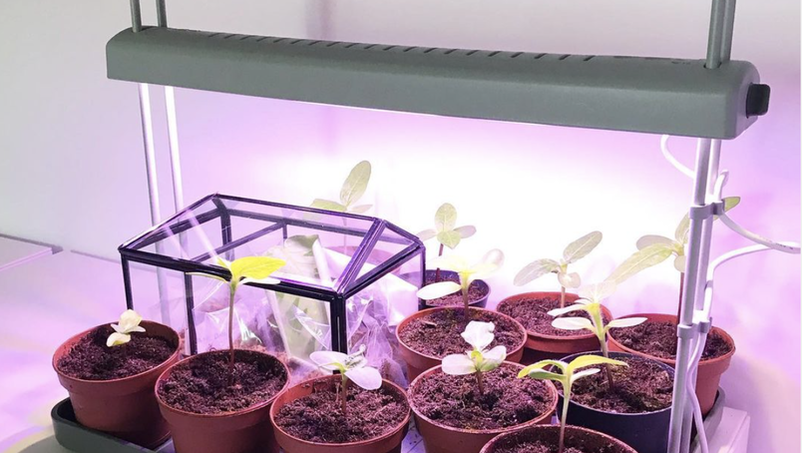 3) LIGHT GARDEN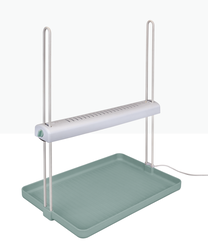 The light garden is a product of Elho, for most of us I think a known brand. Elho stands for sustainability and recycling, their pots and many other products are made from recycled plastic. They use their own energy through a windmill in the company's garden and their products are made to last a lifetime. This lamp is horizontal and has a saucer at the bottom, you can put a lot of smaller plants under it. Ideal for cuttings, or germinating seeds, but also for keeping your herbs in the kitchen. The lamp is attached to two sides that you can slide it on, so you can move the lamp higher and lower as your plants grow. What I find really fascinating about this lamp is that it goes on and off in phases. So it gets stronger and stronger in light just like a sunrise, and when it goes out in the opposite direction. The light that it gives off is not completely white, there is a slight purple glow to it but not strong enough to be experienced as disturbing. This lamp has an on/off switch on top of the lamp, there are 2 touch buttons to turn the lamp on/off & one to set the duration of the lamp. The lamp burns for 15h here at my place and then 9h rest. Tip: Elho sells grow houses that fit perfectly under this lamp. Not unimportant, what if the lamp is at the end of its life? I inquired with Elho themselves to ask what happens when the lamp reaches the end of its life, do you replace the circuit board or does the whole lamp have to go in the trash? They told me that the inside consists of a circuit board because the frequency is not obtainable with a regular lamp, the board is set to give the right frequency and duration of light. So unfortunately, when the bulb stops working it cannot be fixed by replacing a bulb. The lamp has been thoroughly tested and has an extremely long life that lasts much longer than the light hours of a bulb. MORE LAMPS?In a previous article I cited all the lamps I have in my house https://greenplantmom.weebly.com/bloggreenplantmom/welke-groei-lamp-kies-ik In this article by Floor Korte there is a handy list of lamps that you can use https://www.floorsmoestuin.nl/post/planten-kweken-onder-een-groeilamp Did you like it? Please leave a 👍 below & follow my plant adventures on Instagram!
Did you already discover my newest account? Especially for the (vegetable) garden adventures.
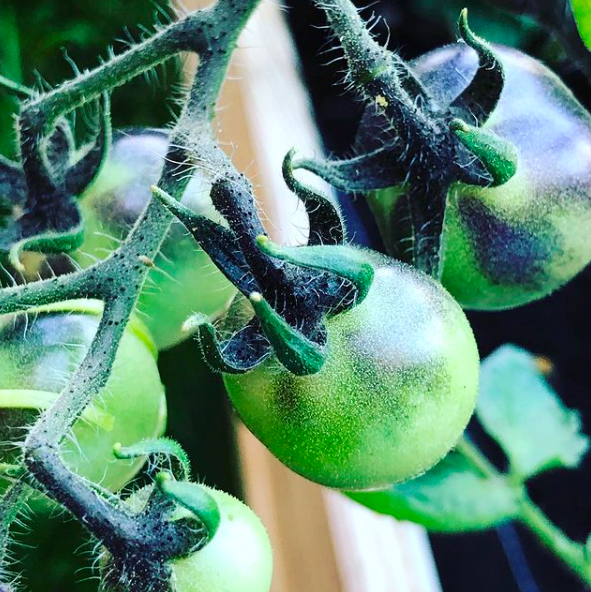
THERE'S A TOMATO FOR EVERYONE!The fifth and already last article in this blog series. It was very nice to show you how you too can get started, regardless of the space you have. Thank you in advance, Kelly, and I follow with great interest your own vegetable garden steps. We end in beauty, with a bit of a diva: the tomato. The first bite into a sun-ripened tomato, straight from the vine, is a revelation for many people and the beginning of a lifelong passion for growing your own vegetables. Whether you have a conservatory and want metre-high plants full of fruit, or you want to go for a balcony garden with hanging cherry tomatoes: there is a tomato for everyone! 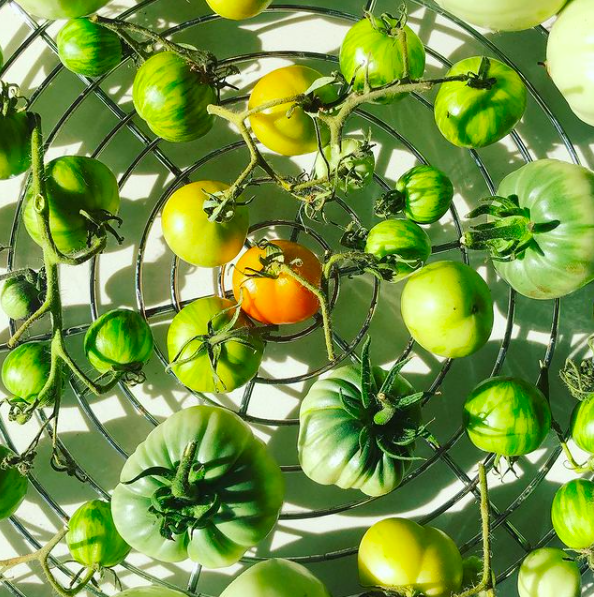 As always, you can get started with small plants, but with tomatoes I still recommend you try growing from seed. This way you can choose from infinitely more varieties, shapes, flavors and colors and you can already start sowing now, so you'll have a head start in the garden! You can already start sowing at the end of January, but it is certainly not too late. Now that the spring sun is really making itself felt, seedlings grow like cabbages...or in this case, tomatoes. Water your potting soil before sowing to prevent all the seeds from being washed away. Sowing is done in a regular potting soil. You can sow in pots, trays or do it yourself with toilet paper rolls or pots made from newspaper.
When your seeds have germinated and the first plants are sticking out above the potting soil, you can remove the cling film. Give your seedlings a place with plenty of light, warmth and sun. Tomatoes are real sun worshippers! Now it is especially important that each plant gets enough space: from the time your seedlings are 2 to 3 cm tall, give them their own, larger pot and if necessary, you can give the plant some support with a skewer. Now just keep repotting until they can go outside. When repotting, it is also useful to know that you can always stick the plant a little with the stem under the ground. This will give you a strong root structure that will give strong plants later on. Transplanting tomatoes is done at the end of May, in any case after the infamous Ice Saints. Choose a sunny, sheltered spot. Against a wall is ideal, because the plant will benefit from the residual heat when it cools down in the evening. About two weeks before planting out, you will have to 'harden off' the seedlings, i.e. get them used to outdoor life. You do this by placing them outside during the day, on nice days, but by taking them inside again during rain, cold and night. Growing tomatoes involves some important rules. This is no longer a vegetable that you can plant and just let do its thing (and therefore an ideal conclusion to this series). 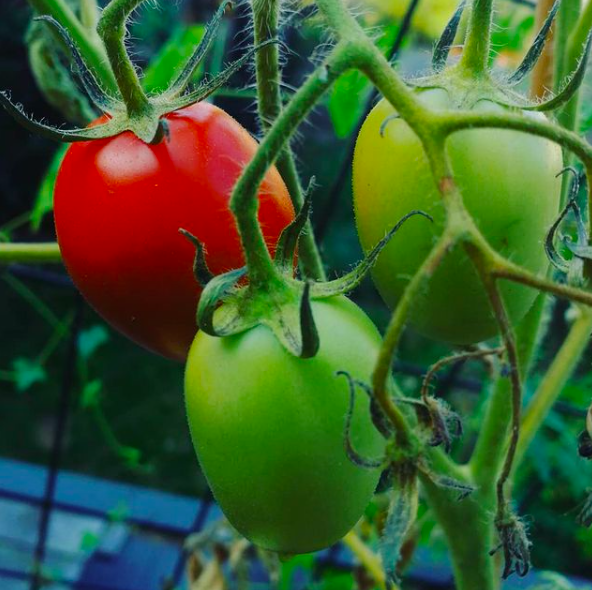 First and foremost, a tomato needs regular watering. Irregular watering can cause your fruit to crack and rip at the bottom. This is caused by a lack of calcium, which a tomato plant is going to get mostly from its water. This is one plant I would rather water with tap water than rain water. In any case, always water from below. A tomato does not like wet leaves. Tomatoes are very susceptible to fungal diseases (including the tomato plague, the nightmare of every hobby gardener) and wet leaves that cannot dry quickly enough are a shortcut to a dead plant. If you are going to grow the larger varieties outside, it is even advisable to provide them with a canopy and not plant the plants too close together. Make sure air can get between the leaves to help dry and ventilate.
Tomatoes are very hungry plants, so a weekly liquid tomato food is certainly not a luxury. You can certainly find some at your garden center, but as a general rule: high in nitrogen (the N on your package) and high in potassium (the K on your package). If all goes well, your tomato plant will now begin to form flowers. Now it's up to the wind and the pollinators in the garden to do their work and fertilize them, but you can also (literally) give them a hand by gently shaking the plant every now and then. This is called 'shaking' and professional growers use the craziest materials for this purpose: from electric toothbrushes to...other vibrating objects. So it's perfectly possible to do it by hand: gently tap/vibrate the plant for a few seconds; this way the pollen from the stamens ends up on the pistil.
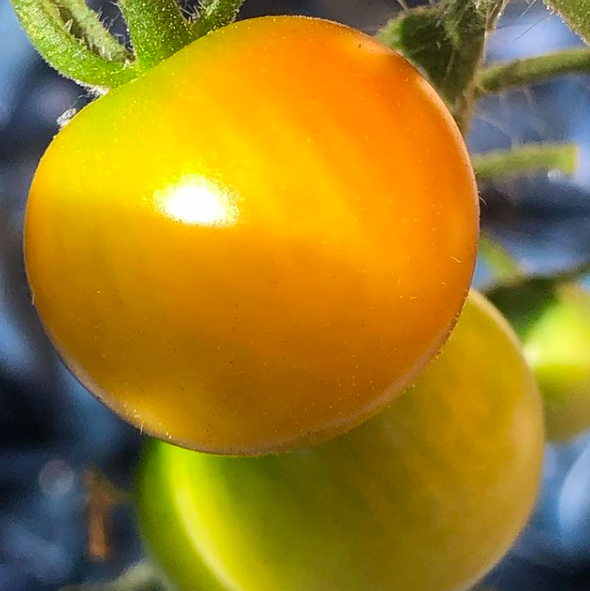
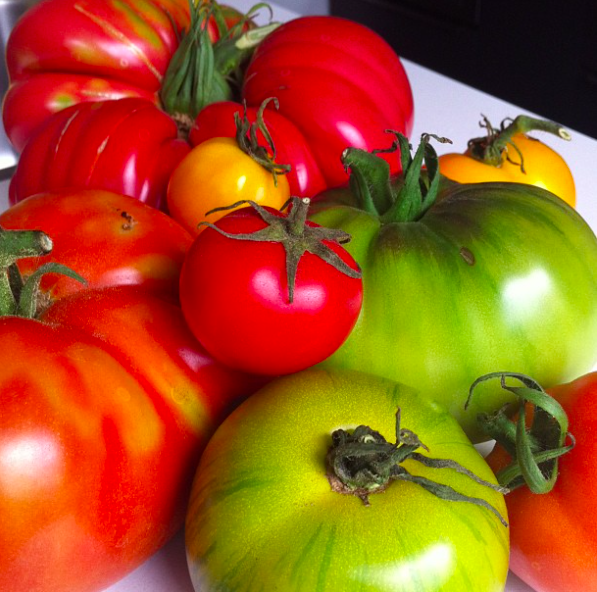
Now the moment has come: the fruits are finally forming on the plant. If they are a bit hidden under the foliage, feel free to remove some leaves so that the tomatoes can take full advantage of the sun. Leave them on the plant to ripen as long as possible, but if you have to, you can always leave them to ripen on a rack. Or you can make a green tomato ketchup of course. Sometimes it may be necessary to start supporting the branches and fruit. Especially with larger beef tomatoes, you run the risk that the weight will damage the branches. You can do this in many different ways, with material that you have available. Google around, I would say, and discover how multi-purpose a nylon stocking can be. Harvesting is done simply with scissors by cutting off the tomato, or the vine, from the plant. Pure summer in your mouth! Be sure to try... ...a large, heavy beef tomato, such as the coeur de boeuf ...or just delicious vine tomatoes, just in pots on the balcony, like Tiny Tim, Gardener's Delight or Black Cherry ...Sow basil around your tomato plants. Research has shown that both plants boost each other's health ...The yellow or red pear, with its unique shape. Ideal for brightening up salads and dishes. ...millefleur, a cherry tomato variety with a huge yield of up to a hundred tomatoes on a single vine. Did you like it? Please leave a 👍 below & follow my plant adventures on Instagram!
|
AuthorCrazy plant lady who likes to inspire others! Everything I write here comes from my own experience, knowledge that I gained by reading books and on the internet. If I would literally copy someone's info, I would do my best to link it of course! Do you spot typos or do you have other concerns, let me know! Have fun reading! I've only just started writing English blogs since January 2021, that's why there are many Dutch blogs and not so many English ones.
I use DeepL to help me translate. ARCHIVES
Maart 2022
|

 RSS-feed
