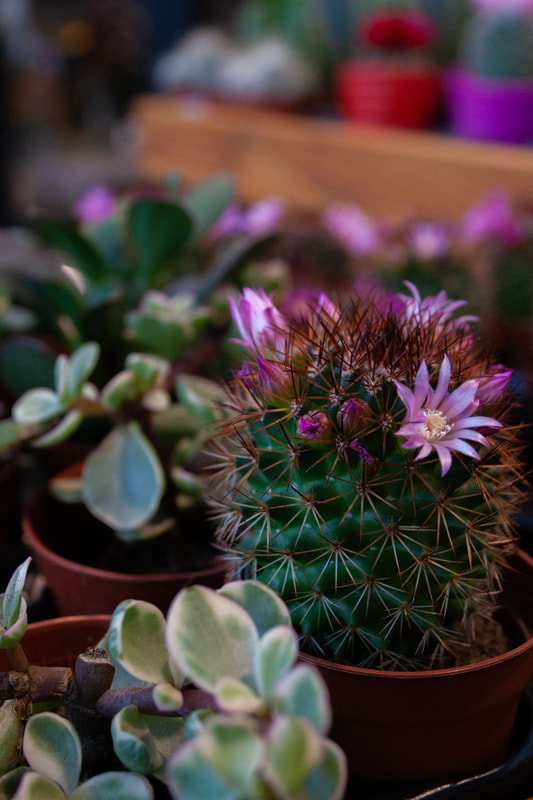
Hey Hey, Plan(t)B here! This week Greenplantmom gave me the chance to write a piece here, for which I’m grateful! I chose to discuss some similar looking plants in short, so a noob can also find out what the differences are more easily. I’m not a botanist either, so you won’t find advanced info here. But I thought it would be handy to make a little overview! Philodendron pedatum & co P. pedatum has very smooth petioles, which are usually green. However, there may be reddish or brownish colours present. P. ‘Florida’ usually has dark red petioles with a rougher structure, but then again there also may be some green present. So the most important recognisable difference is in de relief of the petioles. If these are a little bumpy or if there appears to be some noise, then it’s most likely a p.’Florida’. P.’Florida Green’ is a commercial name, invented to make the difference between a Ghost or a Beauty (see further) and a ‘regular’ Florida more clear. But this is essentially the same as a Florida. Phildodendron ‘Glad Hands’ is a cultivar from p. pedatum, so this one also has smooth petioles. This ones leaf shape is quite slender and it’s possible for it to have some kind of yellow variegation on it. 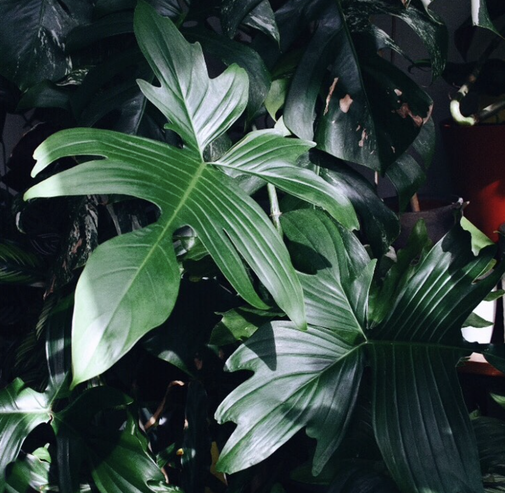 P. Pedatum @Greenplantmom  Philodendron ‘Glad Hands’ @plants_loves_kids Where does this difference come from?Philodendron ‘Florida’ is a cross between p. pedatum (smooth petioles) and p. squamiferum; a very different plant. Philodendron squamiferum is easy to recognise by the combination of very hairy and red petioles, with a unique leaf shape. Because it’s a cross between these two species, it’s possible that a specific plant looks more like either pedatum or squamiferum. So a completely green petiole with small bumps on it, still is a good indication for p. ‘Florida’. 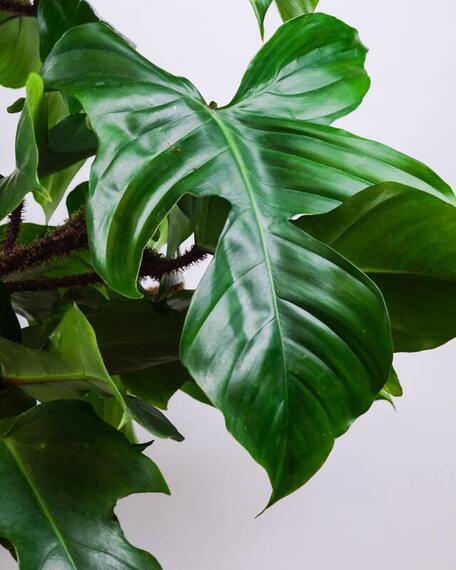 SQUAMIFERUM 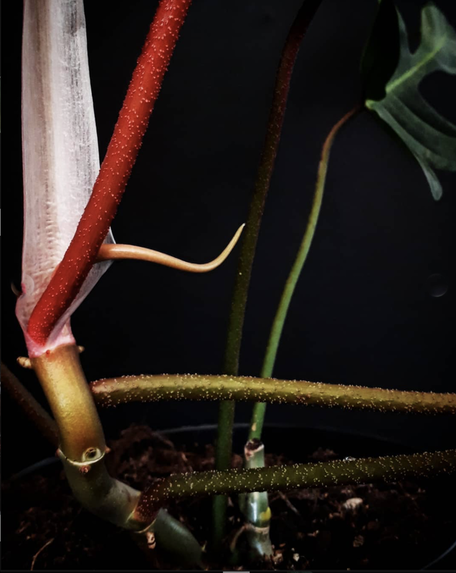 Petioles from a philodendron ‘Florida’ cultivar Variegated varietiesEvery variegated variety where the name ‘Florida’ appears, is a mutated hybrid (all with the rougher petiole). These are also called cultivars, meaning that they’re selectively bred to look like this. In p. ‘Florida Ghost’ the leaves emerge white and change to green over time. If the plant receives less light, then the leaves could also emerge rather light green after which they change to dark green. The leaves from this plant can also have a ‘mint’ like colour and remain like this for a longer period of time. That’s how one ‘Florida Ghost’ can look completely different from another, but ‘Mint’ hasn’t been made an official name of variety. 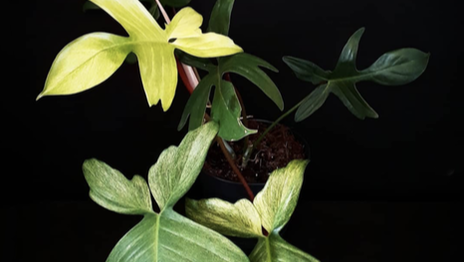 philodendron ‘Florida Ghost’ @plan_t_b Recently there’s been introduced a new cultivar to the market called p. ‘Florida New Ghost (Hybrid)’. This variety would develop some kind of yellow variegation in the shape of vague stripes, which kinda looks like nutrient deficiency or too much light. A difference that I was able to observe, is that this so called hybrid has petiolar sheaths instead of cataphyls. Cataphyls are loose floppy pieces at the base of the petiole with the purpose of protecting the new leaf. With petiolar sheaths it kinda looks like the petiole has divided into two, there’s nothing hanging loose. Whether it’s an actual hybrid or not, is not known. The plant is a hybrid anyways since ‘Florida’ is a hybrid already. If they’d cross this one with something else, it would be a hybrid of a hybrid. 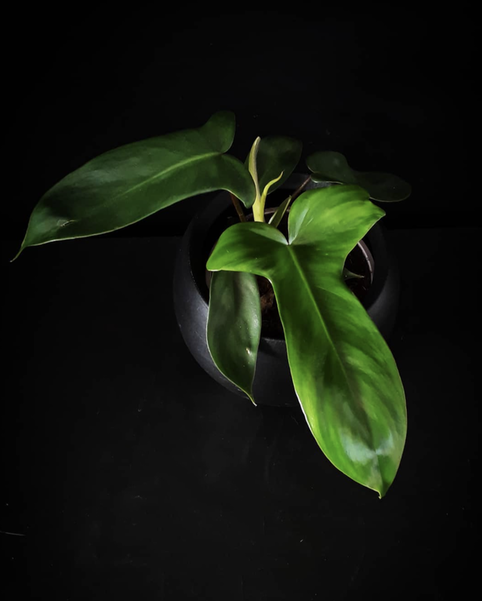 philodendron ‘New Ghost Hybrid’ @plan_t_b A very popular cultivar is the p. ‘Florida Beauty’ aka p. ‘Magic Mask’. This is a Florida with a different type of variegation. It comes with yellow and white patches which are rather sectoral and which won’t disappear. In contrast to what some people might think, you don’t have to call this plant “p. ‘Florida Beauty’ variegata/variegated”. The word “beauty” in itself points to the variegation aspect. 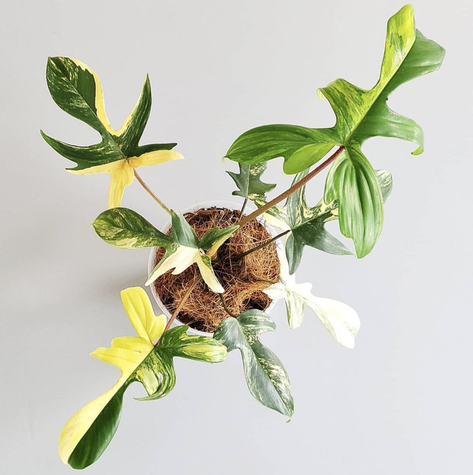 Philodendron ‘Florida Beauty’ @plants_loves_kids A similar species which is slightly more difficult to find than a Beauty, is the philodendron pedatum variegatum. The difference with a Beauty is again, mostly in the petiole. This is very smooth in a pedatum and somewhat rougher in a Beauty. A p. squamiferum variegatum also exists, but can currently only be found in very small numbers within the hobby. 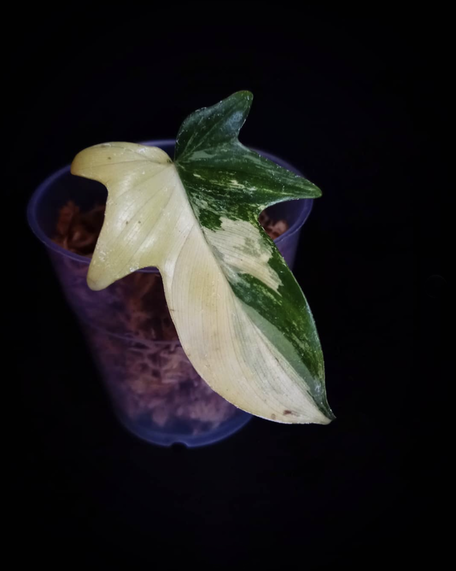 philodendron pedatum variegatum @plan_t_b Philodendron bipennifolium varietiesI also wanted to talk about this series of plants because they look alike. P. bipennifolium is also called a “horsehead philodendron” sometimes. This species forms somewhat less lobes in their leaf shape and has green petioles just like philodendron pedatum.  Bipennifolium @Denise Huizeling Similar to p. ‘Florida Ghost’ is the p. bipennifolium aurea aka p. bipennifolium ‘Golden Violin’. This one grows leaves which come out yellow and fade to green afterwards. One which is comparable with a variegated p. pedatum is the p. bipennifolium variegatum. A variegated bipennifolium can come in white variegation or yellow. Yellow variegation however, usually fades to a creme white colour, so it’s possible to see both colours in one plant that way. Besides that there’s another cultivar called p. bipennifolium ‘Splash Gordon’. The name itself says it already, the variegation appears like splashes but it also kinda looks like the kind of variegation you can see in mosaic virus infected plants. For clarity, I don’t think these plants are infected. There are other species in which their variegation looks alike. Finally, if you like the leaf colour from philodendron hastatum ‘Silversword’ then the p. bipennifolium ‘Glaucous’ or ‘Silver’ might be something for you. This one has a blueish grey sheen on them instead of green. 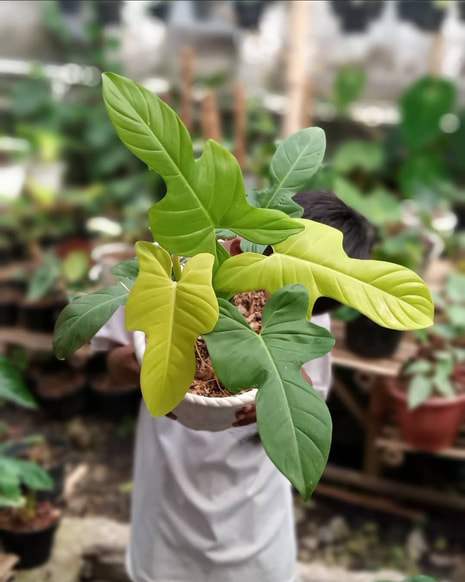 philodendron bippenifolium aurea @julifloree.id 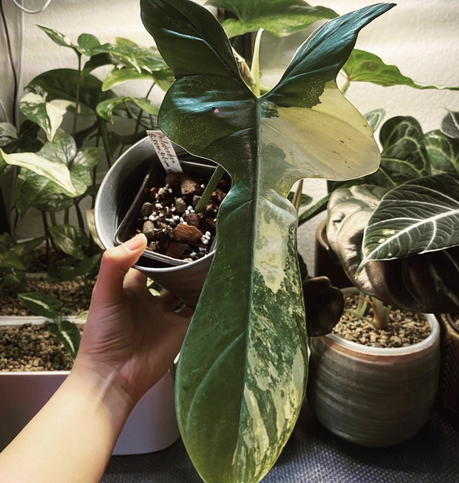 philodendron bipennifolium variegatum @julsis.jungle. 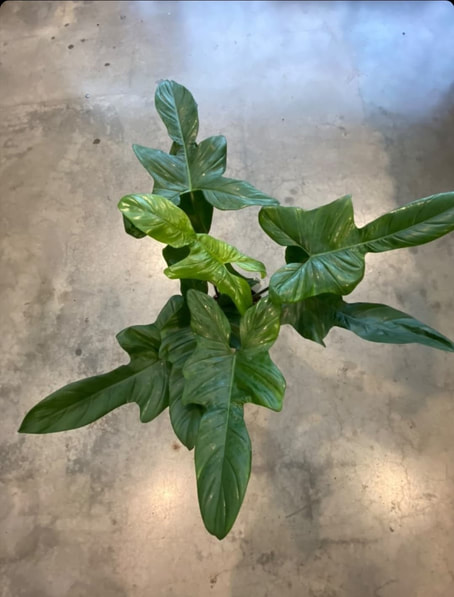 Bipenifolium silver @BloemenRobberechts  philodendron bippenifolium ‘Splash Gordon’ @die_paar_pflanzen Of course there are a bunch of other species which also look similar (E.G. p. ‘Golden Dragon’ varieties, p. ‘Jerry Horne’ etc.) but there are just too many to discuss in one go. Hopefully this article helped develop some insights or maybe even helped some of you discover new species!  thankyouThank you Emily for taking the time to teach us a bit about the differences between pedtum and its friends. Would you like to know about Emily and her collection? Then you can follow her at: https://www.instagram.com/plan_t_b/ Did you like it? Please leave a 👍 below & follow my plant adventures on Instagram!
2 Comments
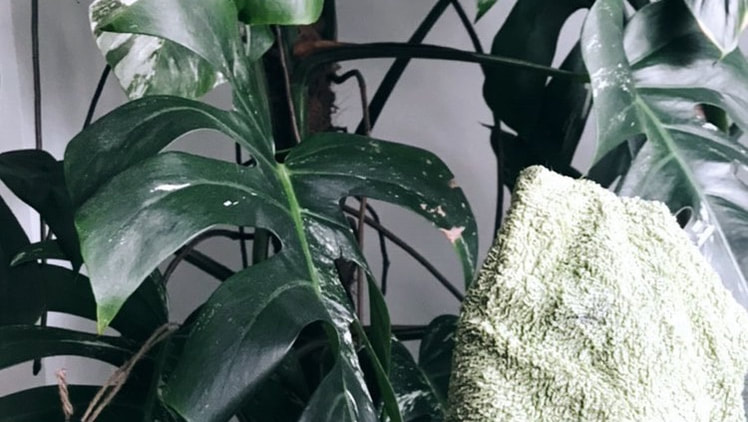
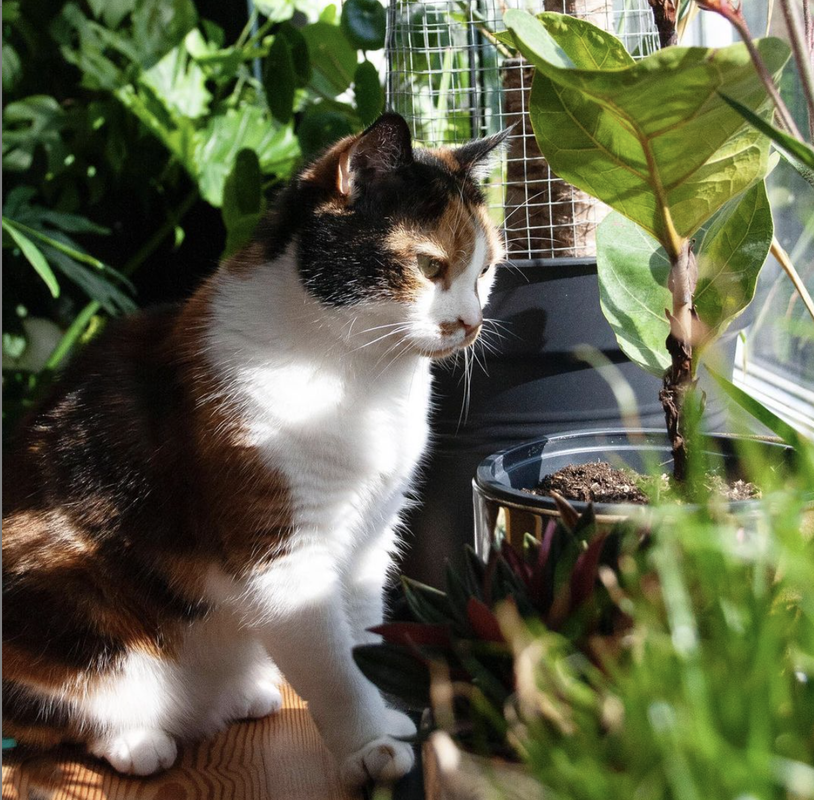
Just like your furniture, plants sometimes suffer from a layer of dust, to promote the growth of your plant it is important to clean them in time. HOW TO CLEAN YOUR PLANTS?The 3 easiest and most efficient ways are;
 WHY SHOWER YOUR PLANTS?

Where does your passion for green come from? Our dad started selling bouquets and flower arrangements out of his room as a young boy, after. He came from a family of chicory growers, so it was a bit of a 'career switch'. Shortly afterwards, he met my mum, and that is how a cute little flower shop came into being. Don’t forget to ask for a picture next time you visit: it’s really too cute. Two children, two cats and an ostrich later, we moved into the greenhouse that most people know now. Even though it was a lot smaller back then. We want to make people happy and help them to bring greenery and life into their homes
Do you offer anything else besides flowers and/or plants? That brings me seamlessly to the rest of the story: from a small flower shop with some houseplants and deco, we grew into a real garden centre. With a large outdoor department, a giant amount of indoor plants (especially in recent years), fresh flowers, dried flowers, lots of pots and decoration that suit our customers. Why should people really visit you? Kelly's followers will know us as a houseplant specialist or even as a detective of 'special plants'. Apart from that, we are primarily a family business that likes to play a warm role in the (local) community. We want to make people happy and help them bring greenery and life into their homes. And I think we are pretty progressive too and you will see many trends for the first time in our store. And we are proud of that!
The offer varies regularly, so I recommend you to take a look at the instagram
or Facebook to get informed of their offer. More Robberechts? Website: https://www.bloemenrobberechts.be Instagram: https://www.instagram.com/bloemenrobberechts/ Or just visit: Driesstraat 34, 1861 Wolvertem (Meise) I want to thank Lien for the friendly conversation and for letting me take some pictures in the shop! This was already the second "shop of the month". I hope you liked it and stay tuned for a new shop next month! Did you like it? Leave a 👍 below & follow my plant adventures on Instagram! 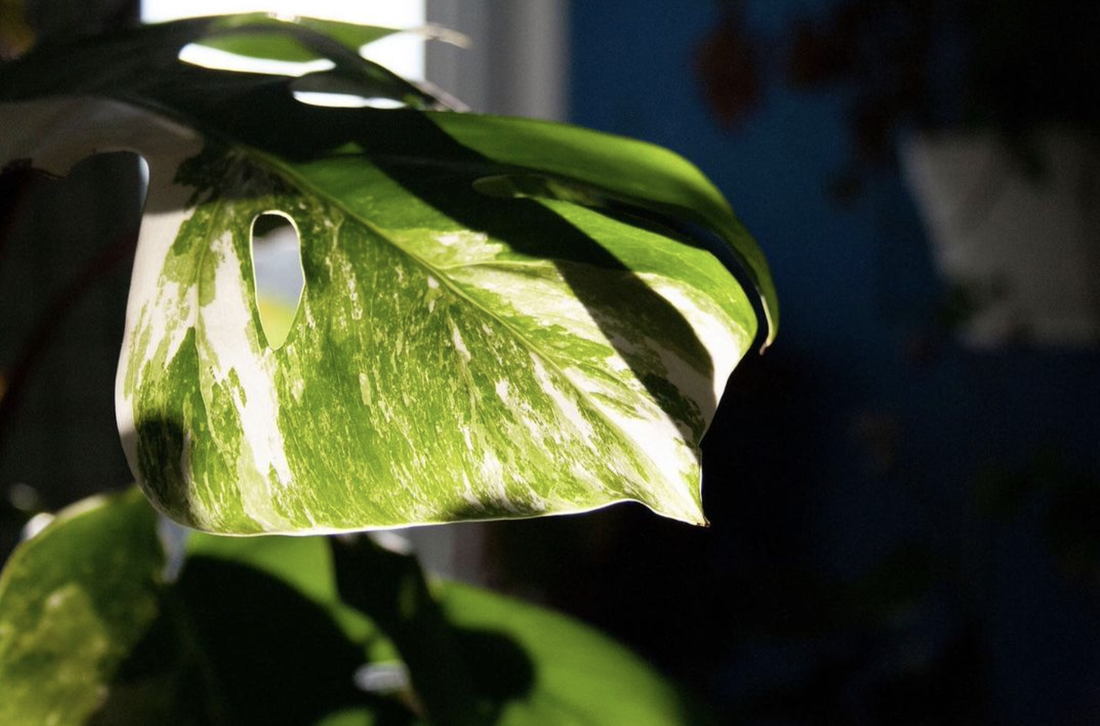 Our eyes are not very good at determining how much light is present, we as humans use light as a tool to perceive things. Plants on the other hand use light as a source of survival, they get their energy from it. To test your eyes, you can make the room dark and let your eyes get used to it. You will immediately notice that the longer you are in the dark, the more you see. The room does not get lighter but your eyes adjust. Nature has arranged this for us so that we can still see enough at night and throughout the winter when everything is a lot darker. DIFFERENCE BETWEEN PLANT AND HUMANOur eyes and the cells of plants that absorb light are not only different in the adaptability but also in sensitivity to the light spectrum. Special grow lights can seem quite dark in light intensity to us, while the plant can just absorb a lot of light from them. The visible light spectrum consists of light with a wavelength between 400 and 700 nanometers. This is the light spectrum that both humans and plants are sensitive to. The light waves are made up of light particles (fotones) & these move in the motion of a wave. The speed of this movement determines the radiation, the higher the number the slower the movement. So 700nm is slower than 400nm. A light source like a lamp or the sun emits these wavelengths. When this beam hits an object it is reflected or absorbed. White bounces back just about all light colors while black absorbs them. So when we see an object as green it means that all light waves are absorbed except the green ones. So for plants the light waves that disappear in the leaf are important while for us the reflection in the world around us is important. (ONLY IN DUTCH) You can read more about how our eyes capture light here: https://www.foodplanting.com/2018/10/24/licht-en-planten-waarom-onze-ogen-niet-kunnen-zien-hoe-donker-het-is-voor-een-plant/ |

 | The article "Everything You Need To Know About Lighting " by The Sill, is really highly recommended if you want to learn about types of light. |
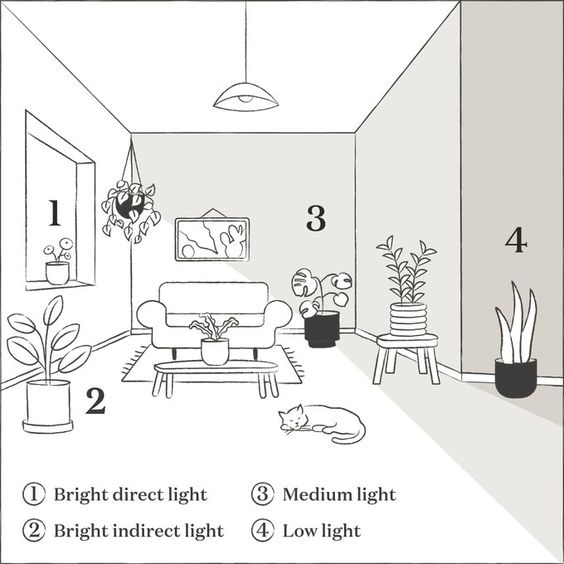
Points of Attention
You may have just determined what light you have where, but there are still a few stumbling blocks to consider.
- How big is your window & in what direction is your window facing. There is a huge difference in how far your plant is from your window but also the size of your window, the bigger, the more light it can let in. And very importantly in what direction is your window facing? North, east, south or west? You can determine this by looking at where your sun rises and sets or if you want to be sure use a compass. Light on the east is a lot less intense than south or west & is therefore an important factor to keep an eye on.
- Blocking elements, is there a tree or building in front of your door blocking the light? Or do you have curtains or UV-blocking glass? A few points to think about and respond to.
- The color of your walls, light walls reflect the light while darker colors absorb it. Of course you should not repaint your house for the well-being of your plant, but it is something you can think about.
DETERMINE & SIGNALS
How can you determine where your plant stands best, because say it yourself; a yellow sun on the plant stick from the garden center doesn't say much. You can look it up online or in a book or you can just see if your plant can be found in the plant database of Mother. Since Mother specializes in lamps and light I find this a very useful source to know what light intensity your plant can handle, apart from all the information sources I think your Intuition is also an important role.
It is not always the case that a plant is in the right place according to 'the theory' that it is therefore happy, look at your plant. I give you a few signals you can pay attention to:
When there is too much light:
Too little light:
TIP: regularly turn your plant a quarter turn to prevent it from growing crooked.
It is not always the case that a plant is in the right place according to 'the theory' that it is therefore happy, look at your plant. I give you a few signals you can pay attention to:
When there is too much light:
- The leaves become lighter in color.
- The leaves look glum.
- The leaves turn yellow and dry out.
- Holes appear in the leaves.
Too little light:
- The leaves turn yellow, not enough light causes photosynthesis to fail and the leaf gives up. This can also occur on 1 side of your plant, for example, the side facing the wall.
- The leaf patterns become even green, this can't hurt the plant but if you like the patterns it's best to turn it a little lighter.
- Long stems between the leaves, the plant will literally stretch to get closer to the light.
- The leaves fall off, there can be several causes for falling leaves, a lack of light is one of them.
TIP: regularly turn your plant a quarter turn to prevent it from growing crooked.
INTERVENE / MOVE
All right, time for action. You now know where your plant is best placed & you want to move it. Don't do this all at once. From full sun to no sun or vice versa can give your plant a shock, with all the consequences that come with it. Move it piece by piece, every day or two days a meter backwards or closer so it can adjust to the new light situation.
I often think of this as the in-between seasons, spring builds to the bright summer sun & fall softens to the dark winter months. When a spot is too dark or gets too dark as can be the case in winter, turning on a (grow) lamp can be the solution.
The main difference between a spectrum lamp and our ordinary home lighting is mainly the color waves it radiates. The spectrum lamp provides your plant with the right light waves it needs for photosynthesis. When using it it is important to inform yourself about the distance and the number of light hours your plant needs, for the majority of plants this is between 12-16 hours a day. The distance of the lamp, on the other hand, is different. Putting your plant too close to the lamp is the same as putting your plant in full sun and can therefore cause damage.
I'm happy to explain more about the light waves plants need and the difference between what the plant needs and what we see, in this article.
NO LIGHT = NO PLANT
I sometimes get the question; 'what plant can be in the bathroom/on the toilet? There is no window'. A bathroom with a window is ideal, a higher humidity, a pleasant temperature, ... But no window or light source is no plant.
There are probably people who will contradict me and say that there are plants that do fine in their dark bathroom. Or people who buy two of the same plants and then switch them every week (dark - not dark). I absolutely cannot support this, the relocation and change of environment and light causes stress to the plant. I also have plants in our bathroom without a window, but they are equipped with a grow light that is on 12h a day.
There are probably people who will contradict me and say that there are plants that do fine in their dark bathroom. Or people who buy two of the same plants and then switch them every week (dark - not dark). I absolutely cannot support this, the relocation and change of environment and light causes stress to the plant. I also have plants in our bathroom without a window, but they are equipped with a grow light that is on 12h a day.
Did you like it? Please leave a 👍 below & follow my plant adventures on Instagram!
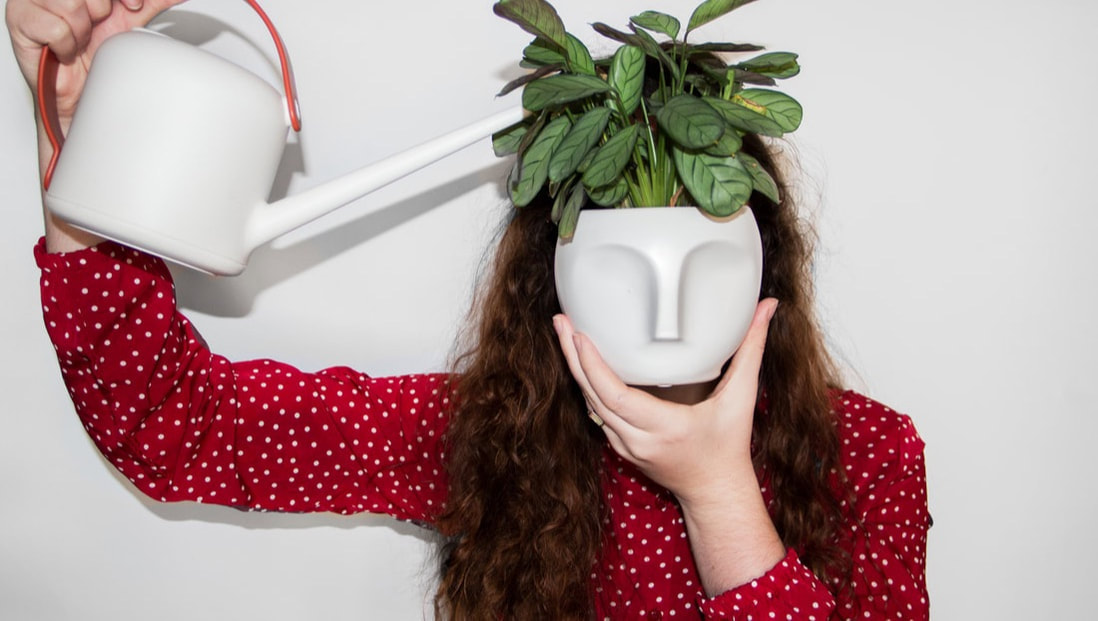
Watering your plants, it sounds obvious right? But how much water do they need and what is the best way to water them? I'd like to give you a little more explanation about that. The number one cause of death for plants is too much water.
Once you start to know your plants better you can quickly see when they are thirsty -by their leaves curling up for example- or when you have been too generous -you can see this in the yellow leaves- for example. I'll be happy to explain.
Once you start to know your plants better you can quickly see when they are thirsty -by their leaves curling up for example- or when you have been too generous -you can see this in the yellow leaves- for example. I'll be happy to explain.
WHEN TO WATER
Preferably in the morning, by evening your plant has enjoyed a full day of sun and they have a nice temperature. Then suddenly a cool splash of water can startle it, so spend your Saturday morning watering and checking your plants rather than in the evening after work.
But before you water, it's best to check whether it needs it. How to do it?
There are several possibilities:
But before you water, it's best to check whether it needs it. How to do it?
There are several possibilities:
- The potting soil feels dry, but this does not mean that it actually is. To be sure, stick your finger (or a stick if you prefer) about 5 cm into the pot. Does it feel moist? Or is there still soil hanging on your stick? Then the soil is still moist enough and you can wait a little longer with watering.
- Look at the color of the soil or lift up your pot, dry soil is lighter in color and weighs less than wet soil. The longer you have your plant the easier you will recognize when it needs water.
- When your plant indicates it; many plant species fold their leaves together or let their stems hang down when they are thirsty. They then don't have enough water to steam through the leaves & they show this by curling up the leaves. - Similarly, yellow leaves are often the sign of too much water, damaged or discolored leaves will not come back so these are best removed.
- If you are still in doubt, you can use a water meter, which you can find in most garden centers.
| | |
 difference between wet and dry soil |  folded/hanging leaves |
WHAT DO YOU HAVE TO CONSIDER?
PREFERENCES
Inform yourself about what conditions your plant likes, does it like to be moist? Or does it prefer a drier environment? You do not have to know the Latin name of your plant right away, its family is more than sufficient. Tropical plants for example (often recognized by larger green leaves, such as monsteras or calatheas,...) come from areas where there is always moisture present and where the humidity is often on the higher side. While cacti and succulents are structured in such a way that they are made to store moisture and thus overcome longer dry periods.
PLACE OF STANDING
Where does your plant stand? Plants that stand in heated places or places with lower humidity use up their water supply faster than plants in more humid places. For example, I think of my plants in the greenhouse, I often don't need to water them for 2 weeks or more because the humidity is high. The leaves evaporate less and the plant can therefore use more water. Plants in full sunlight, especially in the hot summer months, evaporate much faster and will therefore need watering more quickly.
Which brings me to the next point; seasons. In the spring and summer, plants use more water than in the fall and winter. In the spring they start the growth period again and in the fall they go dormant.
POT / PLANT SIZE
How much water you just give depends of course on your plant and pot size. The larger your plant is the more water it will use, but the larger your pot is the longer your soil can stay wet. This is also one of the reasons why I find it so important that you don't plant your plant too big, the remaining soil will hold the water (too) long.
Of course there is a big difference between plants in pots and in the ground, but that is a whole other subject.
Read more below the photo
HOW TO WATER?
What do you need? A decent watering can, of course. Don't go for the cheapest or just the most beautiful designer watering can, but for one that YOU find practical and with which you can water your plants easily without spilling.
There are a few ways to water your plant;
It is also better to water your plant once a day instead of a sip every day, this to prevent the soil from being wet for too long.
There are a few ways to water your plant;
- Watering the roots. You pour the water on the soil of the plant, not over the leaves (you can certainly clean your leaves, but not with your watering can).
- Watering true a dish at the bottom, you pour the water in the dish under the pot and let the soil absorb the water. This of course only works if you use pots with holes, after an hour you throw away the remaining water. Never leave your plant in a layer of water, this will cause root rot & is therefore deadly for your green friend!
- Give your plant a bath, I remember my mom used to take care of our orchids this way. She would fill a tub with water, put the plants in it for an hour & then take them out. What is very important with this technique is to let the plant drain well, again to prevent root rot.
It is also better to water your plant once a day instead of a sip every day, this to prevent the soil from being wet for too long.
| | |
| |
MY POT HAS NO HOLES, NOW WHAT?
I'm a fan of pots with holes, usually growing pots in a nice decorative pot or with just a bowl underneath. I find these really ideal because it allows the excess water to go right back out.
Is this the only way? Of course not, you can easily go for a closed pot. You can then add a layer of hydro grains at the bottom, which can serve as a catch basin for the water. Be extra sparing with the watering because the excess water has nowhere to go.
Is this the only way? Of course not, you can easily go for a closed pot. You can then add a layer of hydro grains at the bottom, which can serve as a catch basin for the water. Be extra sparing with the watering because the excess water has nowhere to go.
 | The very first but not the last guest speaker on the blog! I really like this so much, today I would like to introduce you to Mirthe. Belgian student, 21 years young & I met her on instagram, where you can find her under the name: @Greenhappiness_place. There you can take a look into her super cozy room with a big plant collection and 2 super handsome cats, Aiko & Kamill. But now to get to work; Mirthe tells in this blog a bit more about the use of Pon. You hear it passing by more and more lately and I'm using it more and more as well. I myself am satisfied with pon, but beware it is not always risk-free. |
WHAT EXACTLY IS PON?
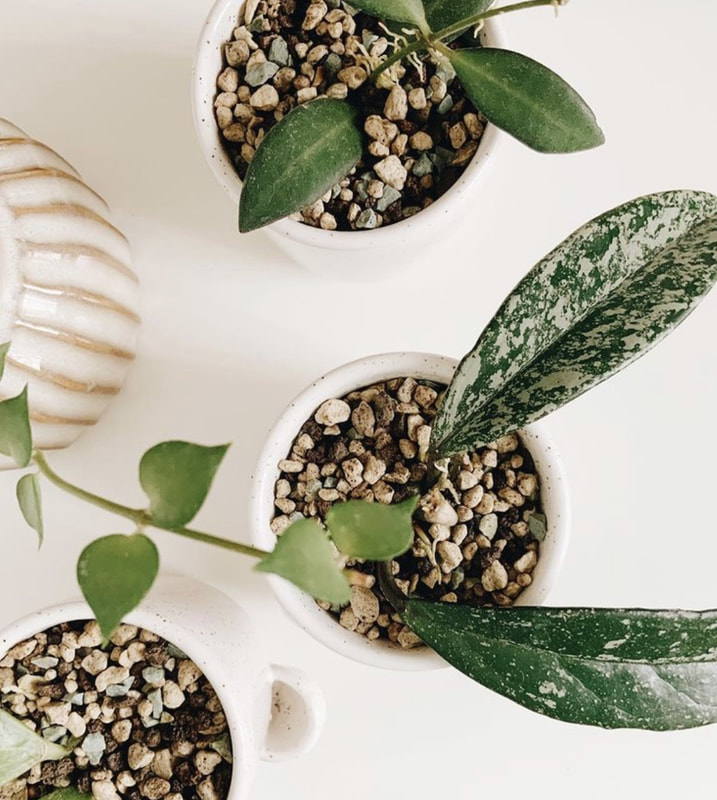
Pon is an alternative to potting soil, and look like all small stones. Pon contains high-quality mineral rocks that are free of contaminants and pollutants.
It contains the ideal water and air ratio (45% water and 55% air). This reduces the susceptibility to disease. Pon can even be reused several times, it does not even need to be replaced after years. Note the nutrition will disappear though. (See below)
It contains the ideal water and air ratio (45% water and 55% air). This reduces the susceptibility to disease. Pon can even be reused several times, it does not even need to be replaced after years. Note the nutrition will disappear though. (See below)
WHAT ABOUT NUTRITION?
Pon already contains nutrition when purchased, this is in effect for about 6 months. Afterwards you will have to add nutrition yourself. This can be done in many different ways: the nutritional spheres of the brand itself, or by feeding through the leaves of the plant (with liquid plant food that is suitable for this) or if you work with water reservoirs you can add nutrition to the water.
WHAT ABOUT THE PH VALUE?
Many of you may have never heard of this. The PH value is actually your acidity of your water. This is important, for example, if you want to work with water reservoirs. Think of leca, this is a semi-hydro medium. So you always work with water reservoirs. The disadvantage is that with leca (at least if you want to do it in the correct intensive way) you have to measure the PH-value yourself and you will have to add PH etc.. (I don't know the details, but leca is in any case a very intensive and time-consuming medium).
With pon you don't have to worry about this at all, because pon contains Zeolite. This ensures a permanent and optimal PH-value. This would ensure healthier plant growth.
So, less worries!
With pon you don't have to worry about this at all, because pon contains Zeolite. This ensures a permanent and optimal PH-value. This would ensure healthier plant growth.
So, less worries!
THE BENEFITS OF PON
- No worries with the PH value if you want to work with water reservoirs, for example.
- Ensures even distribution of nutrients.
- Behaves like a buffer, i.e. absorbs the excess fertilizers and releases them again when needed (i.e. when your plant demands nutrition) This prevents burning of roots due to over-fertilization.
- Possesses the perfect density (= the density of a substance).
- Pon inhibits the formation of harmful root fungi.
- Easy to spread, so less hassle (no more potting soil that you have to mix yourself)
- Contains the ideal water - air ratio, so there is less susceptibility to diseases.
HOW TO REPOT YOUR PLANT? (IN 5 STEPS)
- STEP 1: Remove your plant from the potting soil and remove as much soil from the roots as possible.
- STEP 2: Rinse the rest of the soil with water, so you get the cleanest roots possible. (A tip: use a strainer and place it in your sink, this will prevent your sink from getting clogged with soil).
- STEP 3: When your roots are as clean as possible, you can start.
But first I want to show you the different possibilities:
| The first possibility: Water reservoirs So there is the possibility of working with water reservoirs. This is very useful for people who do not have much time to water their plants or find it difficult to water them regularly. But of course everyone can use this, it goes as follows: often 1/3 of the pot will be filled with water, so your plant can drink itself when it needs water. And such a water reservoir remains full for a while. You can opt for a self-watering pot of lechuza (they are quite pricey) or elho (I prefer this one). You have several choices. They come in different brands and even 'designer' pots. The inner self watering pots from elho possess a water meter, with this you can easily see when you need to refill your water reservoir. As you can see, they also have feet. This is to prevent the roots from directly touching the water (as this can lead to root rot). The pots from lechuza are similar. Or similarly, you also have ones with a string, so your plant drinks from the water reservoir via the string. | 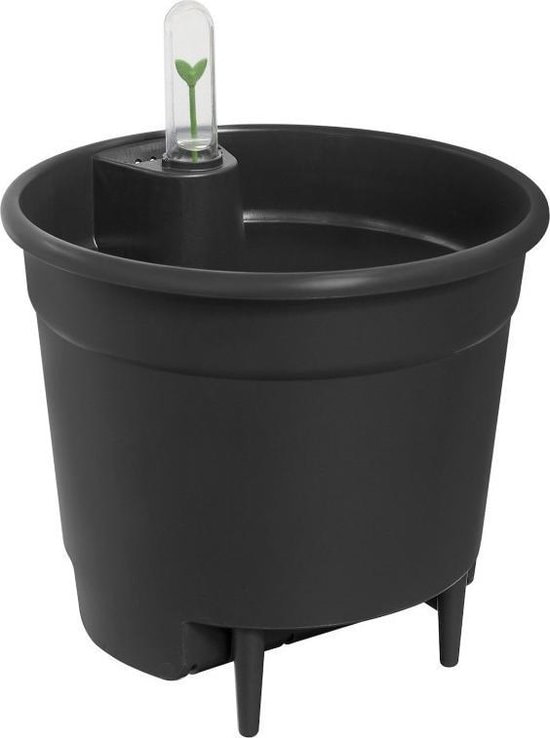 |
| You can also work with a water reservoir without these self-watering pots. And make some yourself, but always make sure that your roots are not directly completely submerged in water. (By that I mean that the inner pot should not directly touch the floor of your pot.) Tip: I use a small net, I put it on the bottom of the innerpot, so the pebbles don't all fall through the holes. |  |
| The second option: without water reservoirs and thus watering as you would with soil. So you water your plant when your pon looks dry. With plants that need less water, you can leave the pon dry a little longer. It is best to water them under the shower or tap that you can flush the pon again. Do this for a minute so that your plant definitely gets a chance to drink. Now I am sometimes lazy, and want to save me a trip to the bathroom that is located one floor below. I then often water my plants with the watering can, and I leave the excess water in for about an hour, and then I tip the excess water away. | 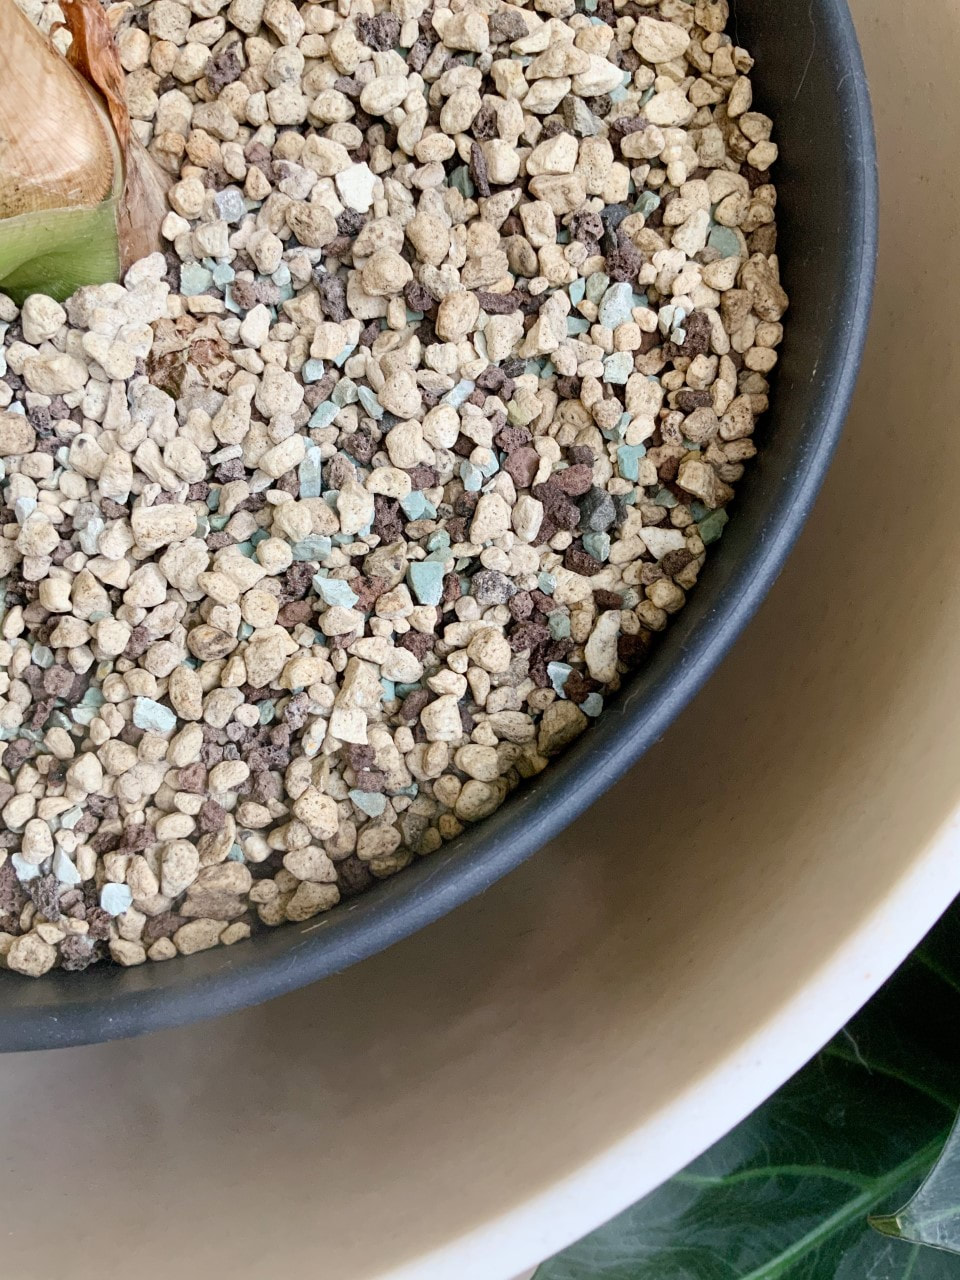 |
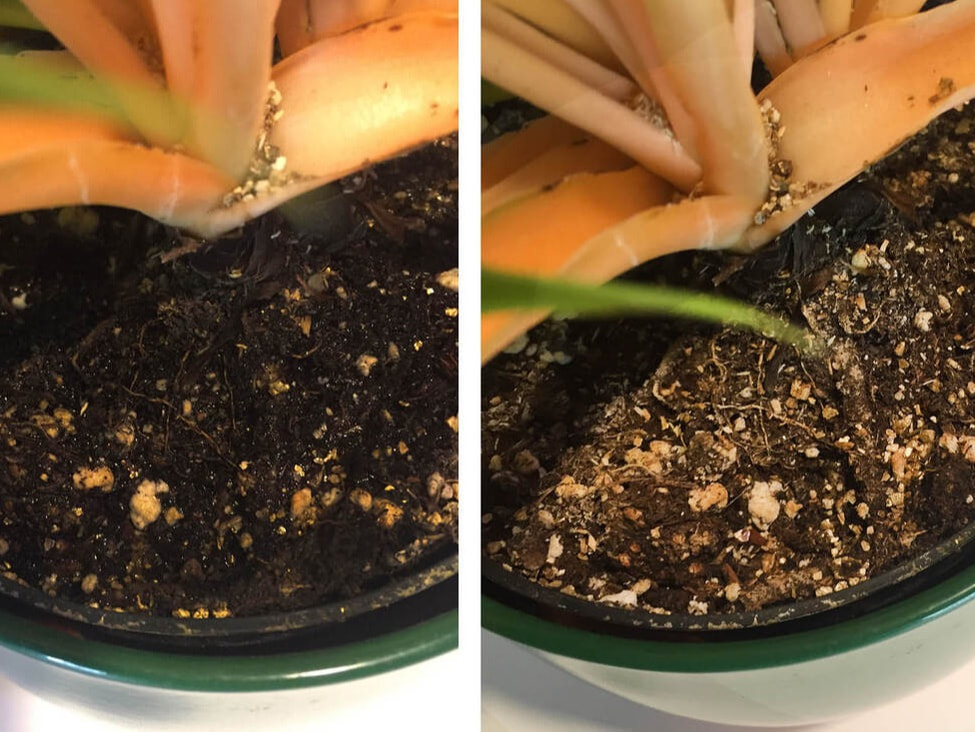
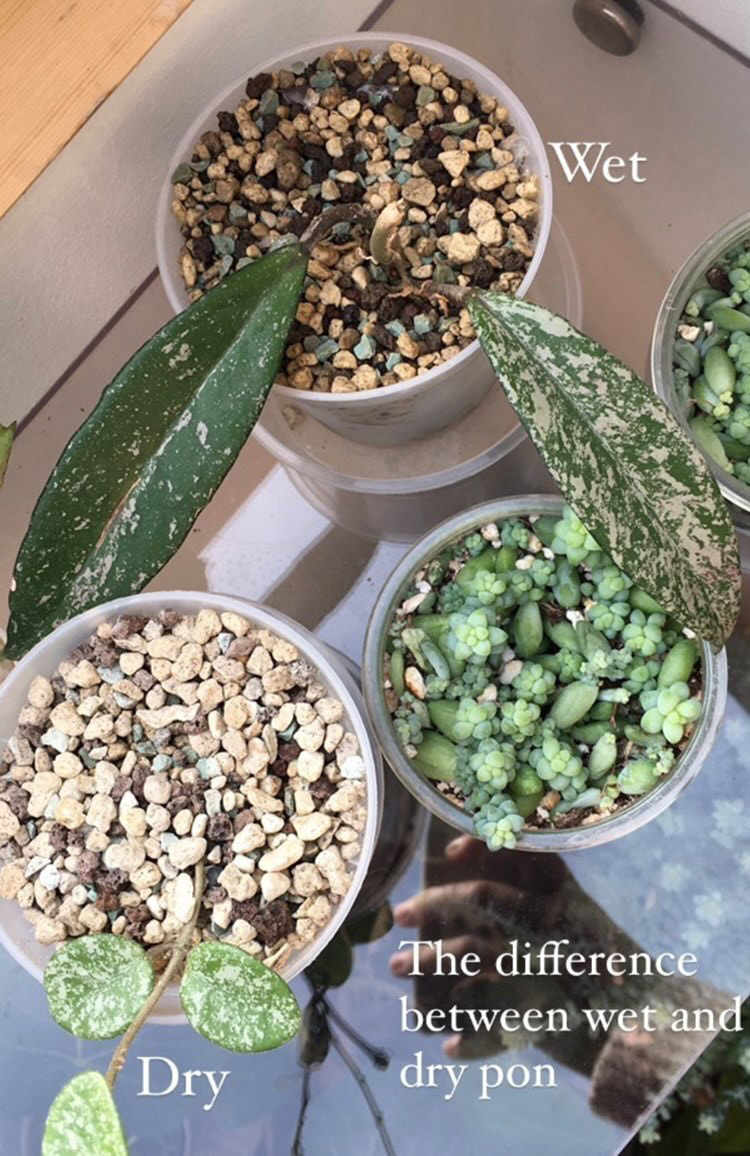 difference between dry and wet pon |
Now back to repotting,
- STEP 4: Fill the inner pot for +- 1/3 with pon. Place your plant inside and fill it up! You're almost there. Another important thing to remember (see 'flushing')
- STEP 5: Proper flushing of pon. The last phase of repotting, is to flush your pon well. This can also be done before repotting, but I prefer to do it after. Wet pot is rather very difficult to work with. Put your plant in a bath/shower or under the faucet and rinse the pon well until all the dirt is out.
- Now you're done!
To make it just a little clearer, here is a short but enlightening video:
https://www.instagram.com/tv/CKjQ9C6gvce/
Continue reading below the photo.
DO I HAVE LESS CHANCE OF fungus gnats WITH PON?
People say not, because pon would not be a good environment for the larvae. But I have my doubts. I also see mourning flies with pon.
If you want to switch to pon because you really want to get rid of the mourning flies, you shouldn't have any plants on soil. Otherwise you're not going to have any effect, unfortunately. I think mourning flies are a bit unavoidable, you always get them. What can help is the use of nematodes, they eat the larvae of the mourning flies. This works very well! In pon this is less useful, because pon is not the best environment for nematodes.
If you want to switch to pon because you really want to get rid of the mourning flies, you shouldn't have any plants on soil. Otherwise you're not going to have any effect, unfortunately. I think mourning flies are a bit unavoidable, you always get them. What can help is the use of nematodes, they eat the larvae of the mourning flies. This works very well! In pon this is less useful, because pon is not the best environment for nematodes.
 | Tip: use yellow adhesive strips, the flies are attracted to yellow. As a result, they quickly stick to it and therefore have no further opportunity to reproduce. |
NOT INSIGNIFICANT:
Always think carefully before switching to pon. Pon may seem easy but in practice it is not always so. Write down the advantages and disadvantages for you, why you would want to switch to pon. The idea, of course, is that you get more advantages out of it than disadvantages. Don't choose pon because you only like the look of the stones. Then you can just buy decorative pebbles to put on top of your soil.
Be aware that pon is not the cheapest alternative. And especially that not everything is always right. There is always a chance that a plant can go into shock because of the transfer from soil to pon. That is just part of the process. I am always mentally prepared for this.
Tip: If you want to make the switch, start with easier or no costly plants. It is possible that you will not succeed in keeping them happy in pon the first time. Then you can first learn how pon works, without the risk of losing your favorite plant.
Second Tip: To make the transfer a little easier for your plant, you can make sure that your humidity level is right. For example by placing them in a greenhouse or near the humidifier. This way your plant will make new roots in pon faster, and the transfer will be easier.
THANK YOU
Thank you Mirthe for taking the time to teach us a bit about pon. Want to know more about Mirthe and her collection? Her tips & tricks? Or just look at the sweet faces of Aiko & Kamill? Then you can find her at: https://www.instagram.com/greenhappiness_place/
Author
Crazy plant lady who likes to inspire others! Everything I write here comes from my own experience, knowledge that I gained by reading books and on the internet. If I would literally copy someone's info, I would do my best to link it of course! Do you spot typos or do you have other concerns, let me know! Have fun reading!
 RSS-feed
I've only just started writing English blogs since January 2021, that's why there are many Dutch blogs and not so many English ones.
I use DeepL to help me translate.
I use DeepL to help me translate.
ARCHIVES
Maart 2022
Februari 2022
November 2021
Juli 2021
Juni 2021
Mei 2021
April 2021
Maart 2021
Februari 2021
Januari 2021
Maart 2019
